There are times when you want to add canvas to a certain image. In this tutorial you will learn as to how do you Photoshop to insert additional canvas in a picture. If you are increasing the canvas size then Photoshop will add space to the existing image while if you decrease an image’s canvas size Photoshop crops into the image.
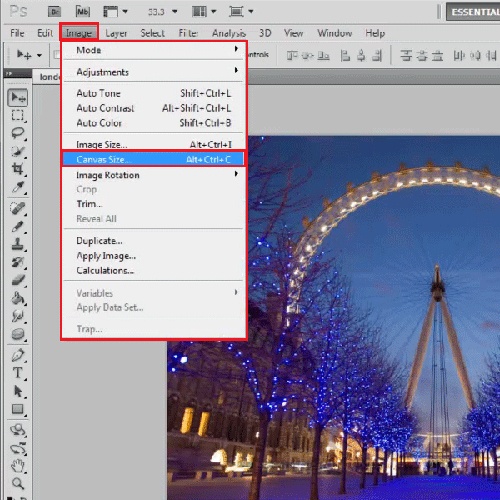
Step # 1 – Select the ‘Canvas Size’ option
To add canvas to an image what you have to do is go on the ‘Image’ menu and click on the ‘Canvas Size’ option.

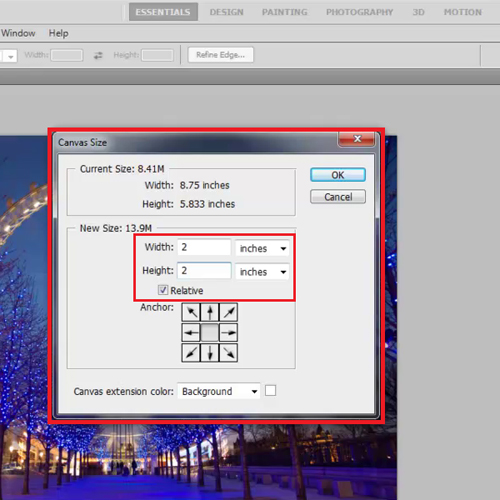
Step # 2 – Select the ‘Relative’ option
When the dialogue box appears, click on the ‘relative’ option. This adds an equal measure of space to all the corners of the image together. Otherwise you would have to choose the measurement for every corner yourself which is a hassle and a bit confusing at times.
If you want ‘1’ inch of canvas all around the image you have to enter ‘2’ inches because whatever number you enter, it is divided equally to the left and right hand side of the image. The same goes for the top and bottom of the image. If you had entered ‘1’ inch then it would have added ‘0.5’ inch to all sides of the image.

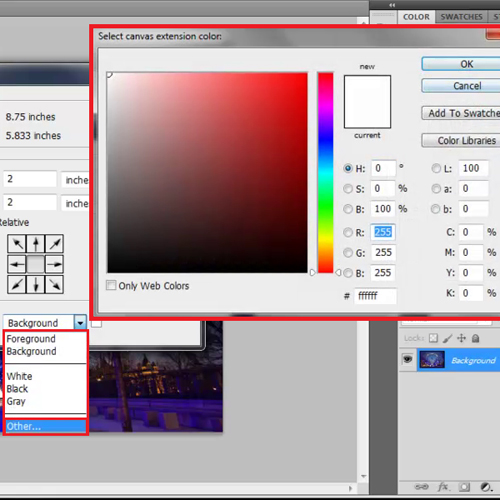
Step # 3 – Add color to the canvas
Now decide the color of the canvas. The preset colors are black white and gray. You can also choose the background or foreground color and can do this through the color picker.
Choose the color black since that would look nice with the image we currently have. Press ‘OK’ and the black canvas will be added.
How do you Photoshop and perform different actions in this software depends on your basic understanding of it. This can be improved and new features of it can be understood with the help of its tutorials.

 Home
Home