One of the reasons that make Photoshop prominent from all other designing applications is its realistic manipulation techniques. In this tutorial, we are using an image of a girl in which the focus is set to her hair. We are using a very easy color technique and few manipulations to change the color of her hair. This technique allows you to maneuver images by giving them a realistic feel.
Follow this step by step guide to learn how to change the hair color in Photoshop.
Step # 1 – Open an Image
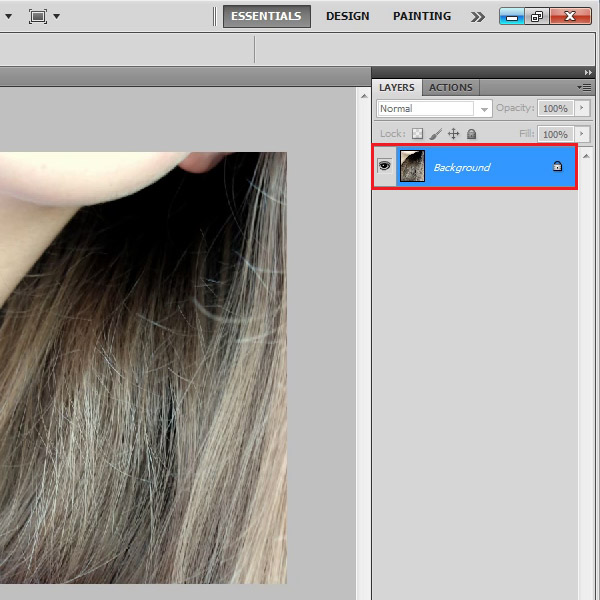
In the first step, open Adobe Photoshop and load an image in which you want to change the color of hair. In this tutorial, we are using an image in which a girl’s hair is in focus. You can use any image of your choice however some settings may vary on different images.

Step # 2 – Enter into a Quick Mask
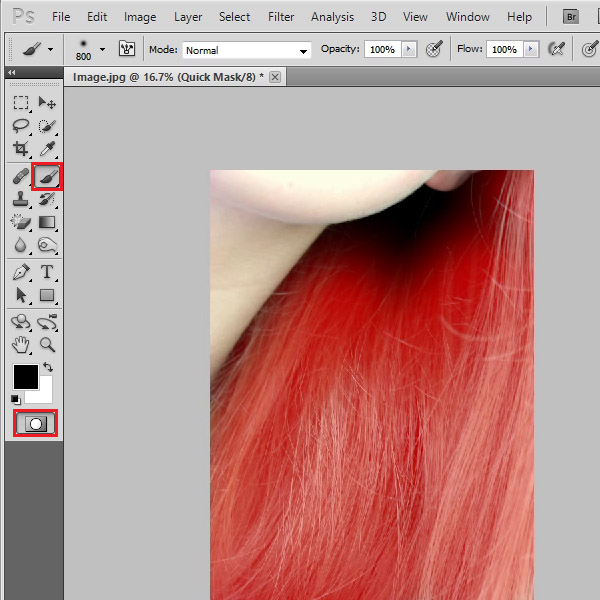
In the second step, click on the “Quick Mask” icon to enter into the quick mask mode. You can alternatively do that by pressing the “Q” key on the keyboard. Once done, click on the “Brush” tool, select “Black” color and start painting over the hair. It is recommended to use a soft brush for this purpose.

Step # 3 – Adjust the Hue/Saturation
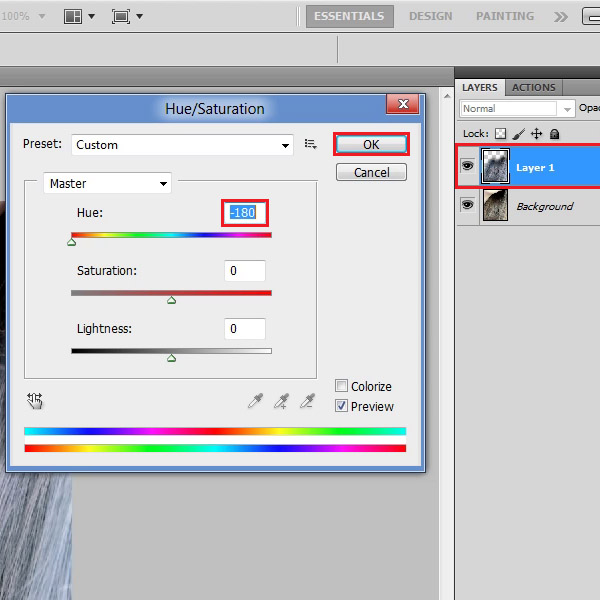
In the next step, click again on the “Quick Mask” icon to exit from the masking mode. Now go to the “Select” menu and click on the “Inverse” option. This will inverse the selection in the image. Now, press the “Ctrl+J” on the keyboard to create a duplicate layer. Now go to the “Image” menu, select “Adjustments” and click on the “Hue/Saturation” option from the list. In the “Hue/Saturation” settings panel, change the “Hue” level to adjust colors according to your choice. Finally, click on the “OK” button to apply it on the hair.

Step # 4 – Apply the Gaussian Blur
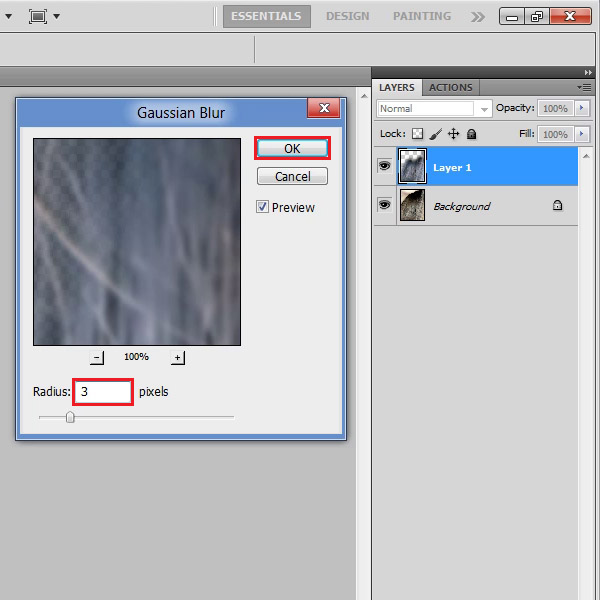
In the final step, go to the “Filter” menu, select “Blur” and click on the “Gaussian Blur” filter from the list. In the filter settings panel, set the “Radius” to “3 pixels”. Click on the “OK” button to apply it on the image. After applying the Gaussian blur filter, the hair color will be changed successfully.

 Home
Home