Adding color to black and white photographs is becoming more and more popular. This tutorial is going to provide an introduction to how to color a black and white image in Photoshop.
Step # 1 – Making Some Initial Preparations
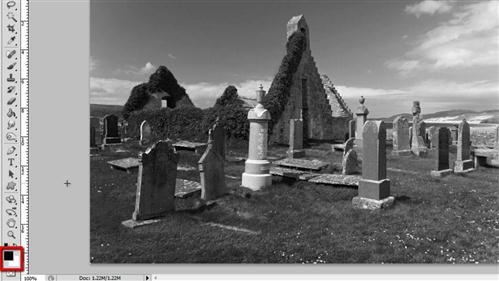
Open Photoshop and load the image that you want to add color to. Here we have a simple shot of a church. We are going to need to select different parts of the image and color them individually. Make sure that your color swatch is set to foreground color black and background color white, then click the “Quick Mask” option. Select the brush tool. Right click on the “Background” layer and click “Layer From Background”.

Step # 2 – Creating a Selection Using the Brush
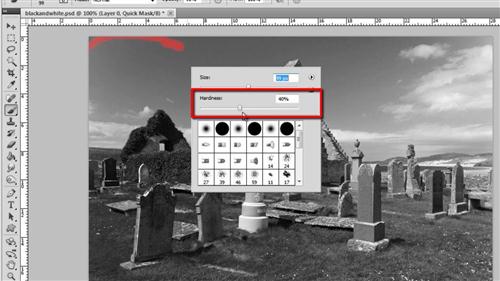
Use the brush tool to paint onto the image. You should only paint over the part of the image that you want to change to the first color – here we are painting the sky as we want to turn it blue. Right click on the image to select a good brush size, you should also drop the hardness a touch, here we have it set at around 40%. Paint over the sky being careful not to paint over anything else, adjust the brush size as you go to get clean lines.

Step # 3 – Adding Color to the Selection
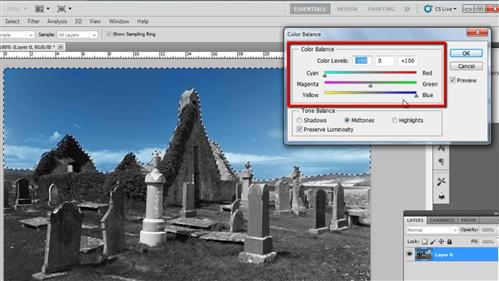
When you have your selection as you wish, press “Q” on the keyboard to change the painted area into a selection. Click “Select” then “Inverse”. Now click “Image” navigate to “Adjustments” and click “Color Balance”. This will open a window which will allow you to alter the color of the selection – this is where you will need to experiment a little. Drag the sliders until you achieve a good color for the sky, here that mostly means moving the sliders towards blue and cyan. When you achieve a good result click “OK”.

Step # 4 – Adding Colors to the Rest of the Image
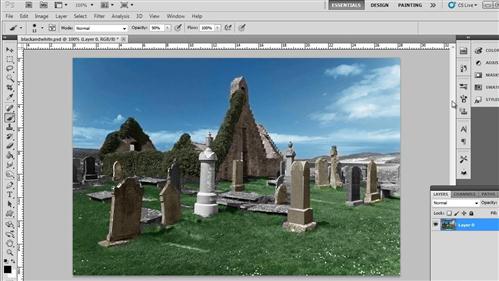
This is essentially how to color a black and white image and you will need to repeat this for other parts of the image, in this image that would be the grass, gravestones, ivy and the building. This process will be very different on your image, here we will speed up the video to show you the result we would achieve with this image.

 Home
Home