In this tutorial, we will guide you on how to convert an image into vector artwork in Illustrator.
Step 1 – Drawing over the image with the pen tool
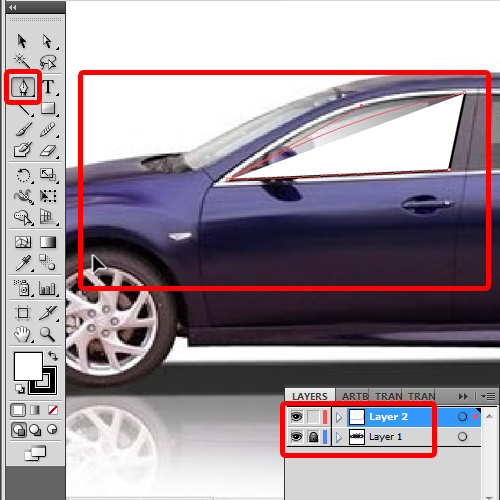
Over here, we have an image of a car opened up in illustrator. What we will do is trace parts of the image using the pen tool.
We will first lock this layer and create a new layer in the document. This is so that we can easily trace over the image. With that done, let’s select the pen tool and start tracing the side windows over here. What you would want to do is simply add anchor points and trace over the image.
When dealing with curves, you have to keep the mouse click pressed while moving the cursor. It will automatically form a curve according to the movement of the cursor.
Step 2 – Creating 2D artwork
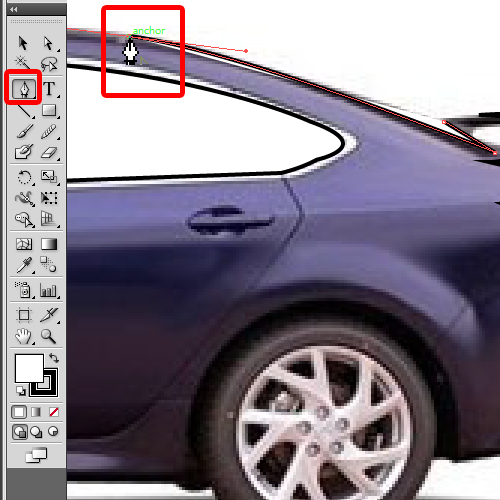
In the same way you can trace over the other parts of the image. In this case, it’s the tail light and the spoiler as well.
Notice that in the image, we cannot see the rear windshield. But since the illustration would be a two dimensional artwork, it’s better to recreate it by simply tracing over the background image. This will basically add detail to your artwork.
If you are tracing over a car, make sure you cover every aspect including the front windshield, headlights and the number plate at the front.
Step 3 – Drawing over the tires
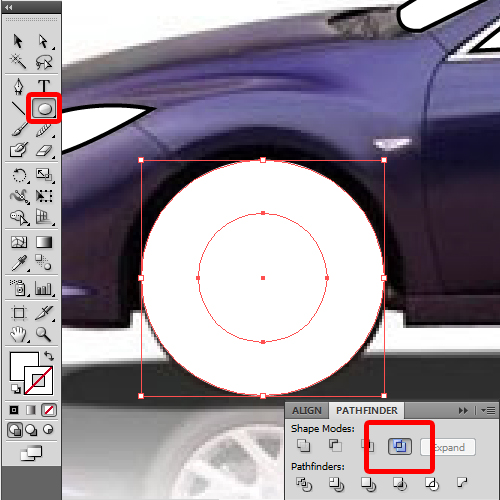
Lastly, we will pick up the ellipse tool and draw over the tire. With that done, let’s create another circle and position it in the middle of the bigger circle. With that done, let’s move to the pathfinder window and exclude the two circles.
With that done, let’s copy this and place it over the other tire.
Step 4 – Changing the color of the illustration
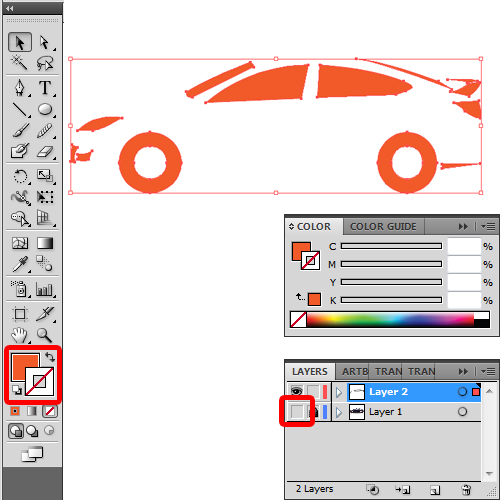
Once the tracing is done, you can hide the image layer from the layer panel. Select all the shapes and let’s change its color to “F15A29”. You can now see the outline of the car that we have traced.
Step 5 – Adding the text
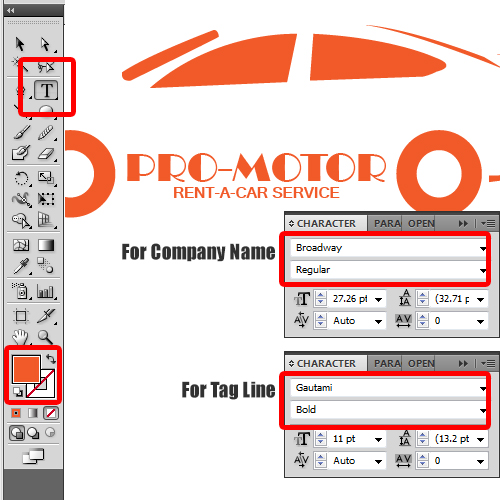
Let’s use the type tool to write the name of the company in caps using the “Broadway” font.
For the tag line over here, we will use the “Guatami“ font. We will position both the texts between the two tires .
Make sure to change their color to orange as well.
Step 6 – Making a background
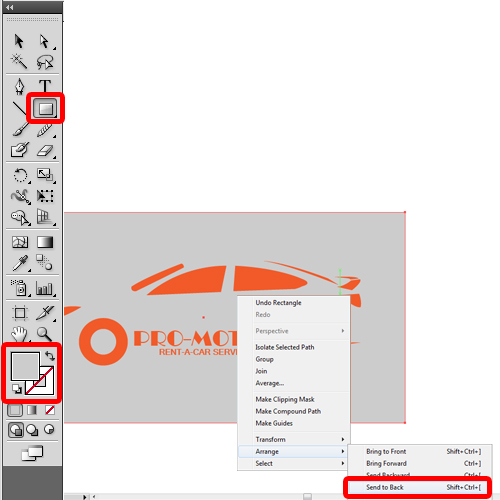
Now, let’s pick up the rectangle tool from the tool bar and draw a rectangle larger than the shape of the car. Right click on the rectangle, move to “Arrange” and click on the “send to back” option. With that done, let’s change its color to grey.
And there you have it. An image of a car has been turned into a vector artwork in illustrator.
 Home
Home