In this tutorial you are going to learn how to convert negatives to digital this process does require a bit of preparation before.
Step # 1 – Scanning your Negative
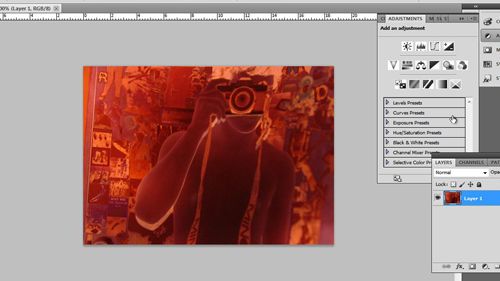
First you are going to need to get the negative and hold it up to a bright white light and then take a photograph of it with a digital camera and transfer it to the computer. Alternatively you can use a special negative scanner – a regular scanner will not work. Once you have this, the cropped image will look something like this in Photoshop. Credit to Flickr user Cesar Gutierrez for the image we are using here.

Step # 2 – Inverting the Image
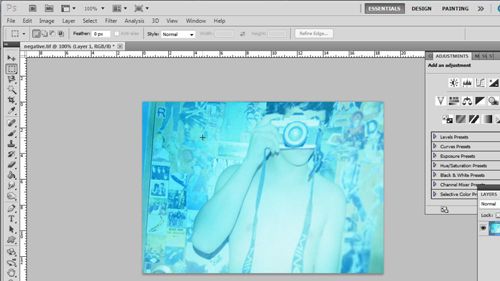
Now you are going to need to invert the image so click “Image” in the main menu, navigate to “Adjustments” and then click “Invert”. Although the image is a ‘negative’, simply inverting the image is not enough. As you can see it is rather blue and we are going to need to reduce this.

Step # 3 – Adjusting the Blue Setting
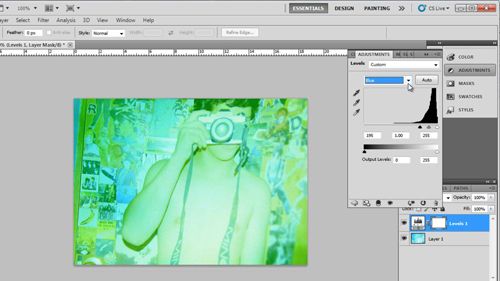
Click “Layer” then navigate to “New adjustment layer” and click “Levels”. In the dialog box that appears click “OK”. The layer adjustments options will appear and we are going to need to tweak these to get the colors right. From the drop down box that currently reads “RGB” select “Blue”. As you can see the graph is skewed way to the right, drag the left pivot across so that the three pivots better fit around the peak on the graph.

Step # 4 – Adjusting the Other Colors
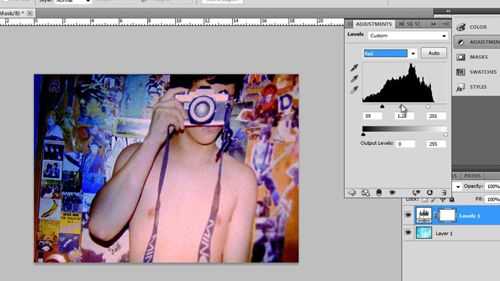
Now that you have done the blue setting, you can select the other colors from the drop down menu and adjust them as well. How you change these will largely depend on your image and you just need to experiment with them until it looks just right. Here we are going to speed up the video while we adjust the colors and as you can see after a few minutes we get a satisfactory result. You now know how to convert negatives to digital using Photoshop.

 Home
Home