With Photoshop you can design and make a picture exactly the way you imagine it in your head. There are various techniques through which you can simply convert your photos and images into a beautiful piece of art. You can even play around with the perspective of an image and give it a three dimensional look. Using the transformation tool as the basis of this effect, we would be creating a three dimensional object, adding depth and colors to the overall image.
Follow this step by step guide to learn how to create a 3D film strip in Photoshop.
Step # 1 – Create Black and White Layers
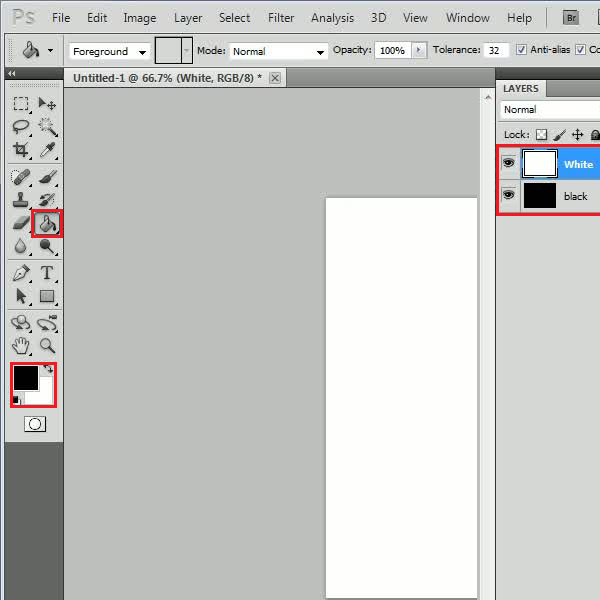
First of all open up Adobe Photoshop, double click on the “Background” layer and change its name to “Black”. After changing its name, select the “Paint Bucket” tool from the menu and fill this layer with “Black” color. Now duplicate this layer and change its name to “White”. After that, press “Ctrl+I” on the keyboard to invert the colors of this layer.
Step # 2 – Merge Layers
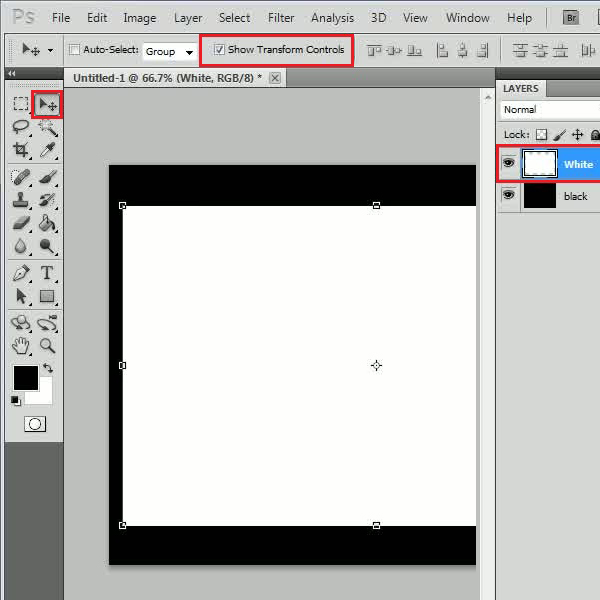
Now select the “White” layer and decrease its “Height” to “80 percent” and “Width” to “95 percent”. Select both “Black” and “White’ layers and press “Ctrl+E” on the keyboard to merge them into a single layer. Now go to the “Select” menu and click on the “All” option to select this image. After selecting it, press “Ctrl+C” on the keyboard to copy the selection.
Step # 3 – Open a New Image
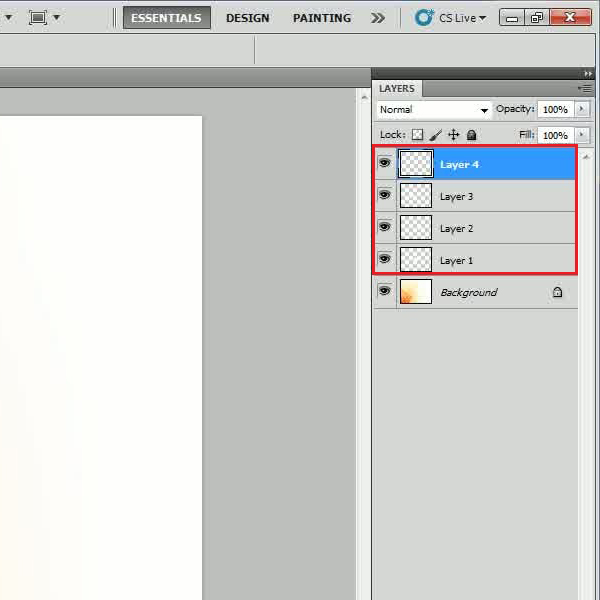
In this step, go to the “File” menu, click on the “Open” option and select a “Background” image to open it. Once done, press “Ctrl+V” on the keyboard to paste the image which we created in the previous step. Now duplicate the layer four times and position them horizontally to form a film strip.
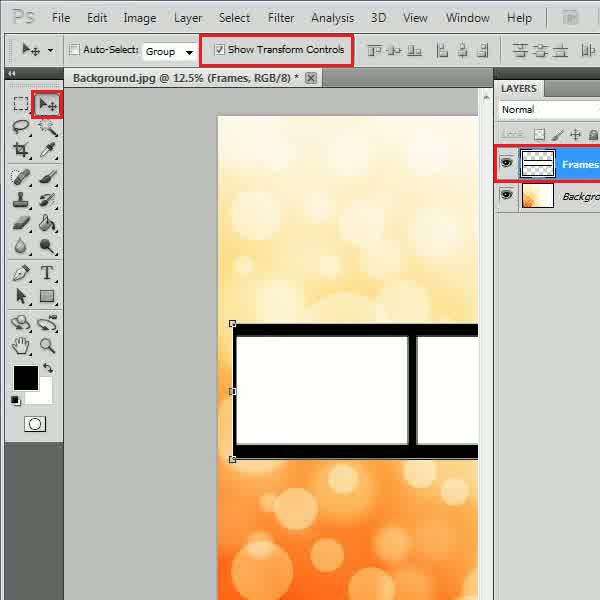
Step # 4 – Adjusting the size
Once done, select all these layers except the “Background” layer and press “Ctrl+E” on the keyboard to merge them into a single layer. Now change the name of this layer to “Frames”. Once done, select the “Move” tool, enable the “Show Transform Controls” option and adjust its size according to the image.
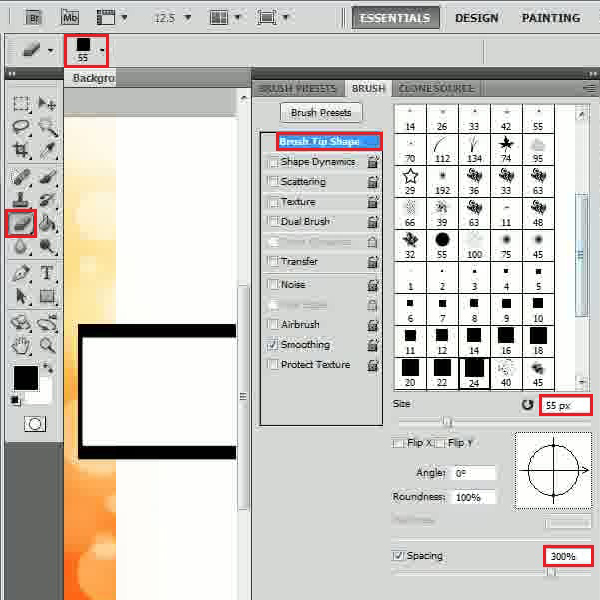
Step # 5 – Select the Eraser Tool
Now select the “Eraser” tool from the menu and choose a “Square” brush. After selecting it, go to the “Windows” menu and select the “Brush” option. In the “Brush” settings panel, set the brush “Size” to “55 px” and “Spacing” to “300 percent”. After changing these settings, close this panel.
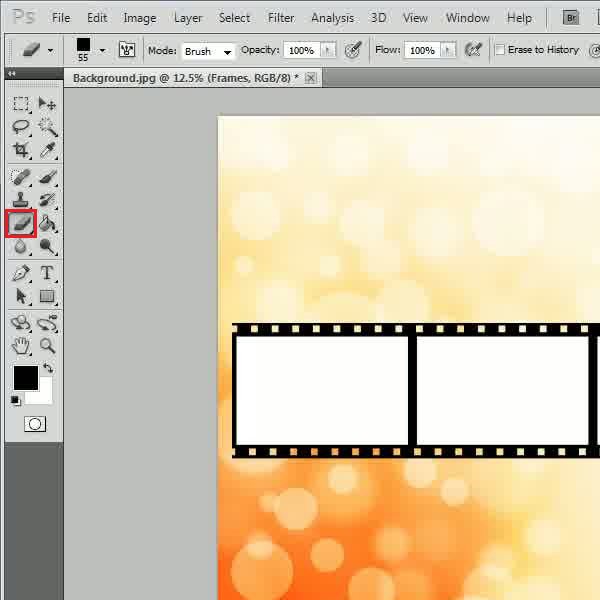
Step # 6 – Apply the Eraser Tool
Now place the “Eraser” at the corner of the film strip, press and hold the “Shift” key from the keyboard and drag the cursor towards the other end. This will create holes in the borders of the filmstrip.
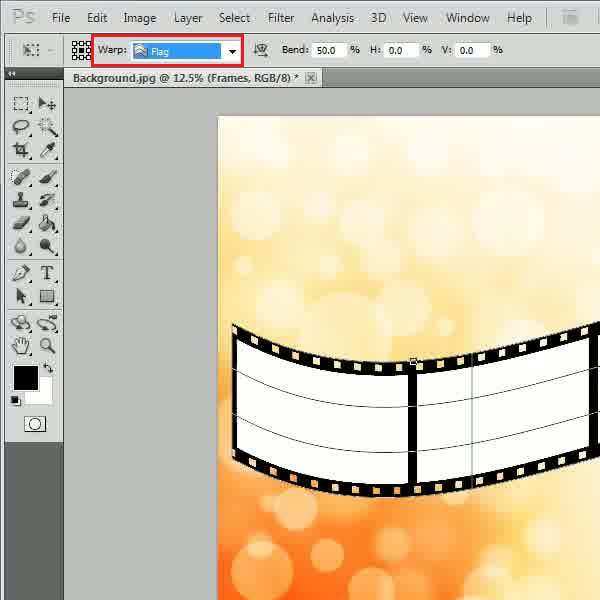
Step # 7 – Use the “Warp” Tool
After creating a basic film strip image, go to the “Edit” menu, select “Transform” and click on the “Warp” option from the list. Choose the “Flag” shape for your basic design and hit enter.
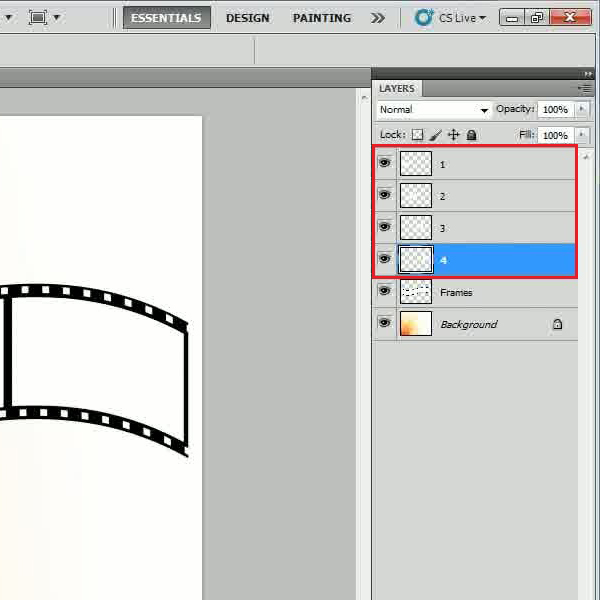
Step # 8 – Create Separate Frames
Select the inner white area of the first frame by using the “Magic Wand” tool from the menu and press “Ctrl+C” on the keyboard to copy it. Insert a new layer and change the name of this layer to “1”. Now press “Ctrl+V” to paste the inner white area of the frame in this layer. In a same way, select all the rest of the inner white areas of the frames and paste them on separate layers.
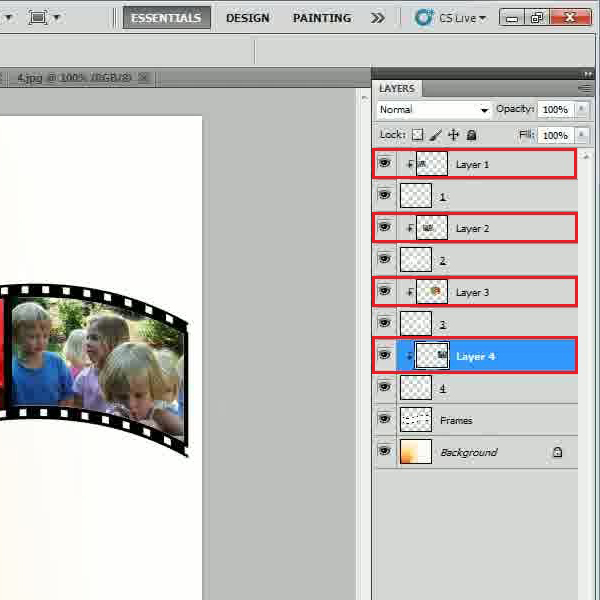
Step # 9 – Create Clipping Masks
In this step, open the images you want to fill the frames with and bring them on the canvas. Now move it on top of the “1st” frame. Right click on this layer and select the “Create Clipping Mask” option from the menu. This will clip the image inside the first frame of the film strip. After clipping the image, adjust its size according to the frame and in a same way, complete the rest of the film strip.
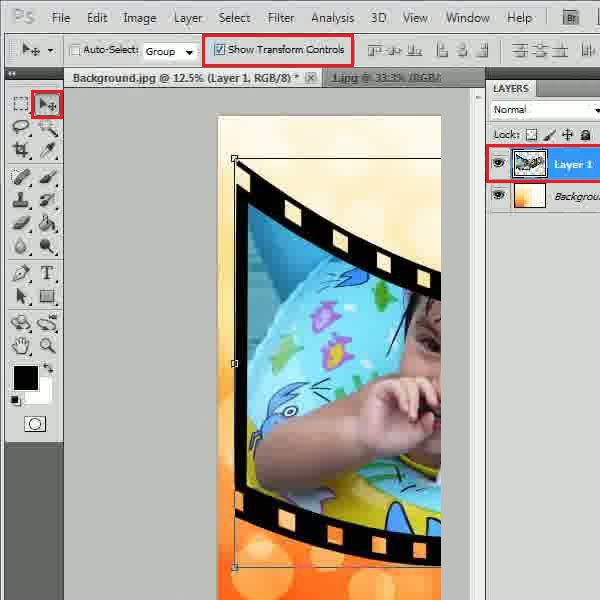
Step # 10 – Transform the Film Strip Image
Now select all layers except the “Background” layer and press “Ctrl+E” on the keyboard to merge them into a single layer. Select the “Move” tool from the menu and click on the “Show Transform Controls” option to enable free transformation of the image. Now click at the corner of the image, press and hold down the “Ctrl” key on the keyboard and give your image a perspective. Play around with the transformation tool a bit and add creativity to the image.