Image manipulation is certainly an art that helps you to change the look and feel of an image completely. Through the various tools you can lay your ideas on the canvas and come up with something brand new. With the various light effects and filters, you can add to the image and make it the center of attraction for your website, pamphlet or whatever you are designing. For example in this tutorial, we would be using basic editing techniques to create a cast light on objects.
Follow this step by step guide to learn how to create a casting light from a window in Photoshop.
Step # 1 – Load an Image
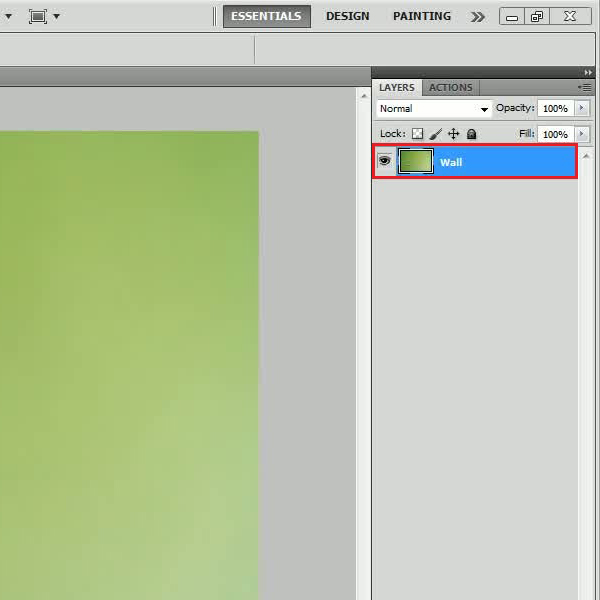
In the first step, launch Adobe Photoshop and load an image on which you want to create a casting light effect.
Step # 2 – Drag a Window’s Image
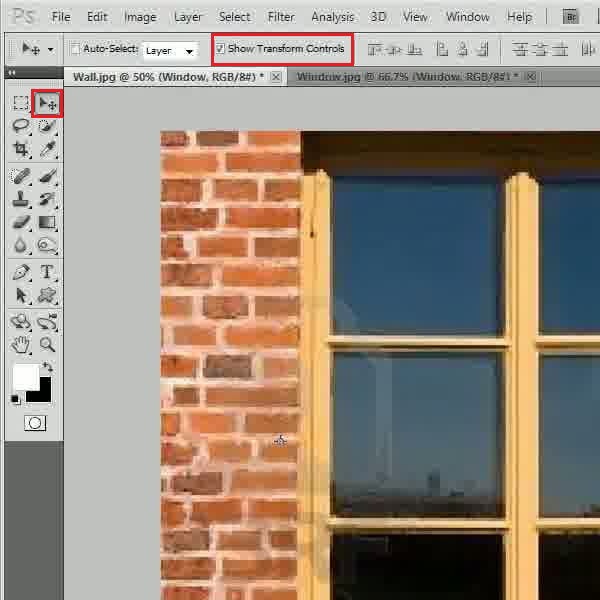
After loading an image, open and drag the image of a window over the canvas. Now select the “Show Transform Controls” option and adjust its size and place it according to the background image.
Step # 3 – Make a Selection
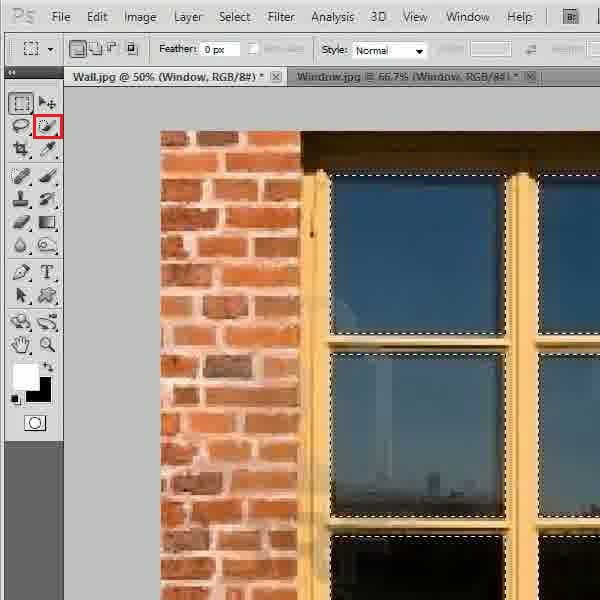
Once you have adjusted the image, select the “Magic Wand” tool from the menu located towards the left side of the screen. Now click on the inner parts of the window by pressing and holding down the “Shift” key on the keyboard to select them.
Step # 4 – Remove Window’s Image
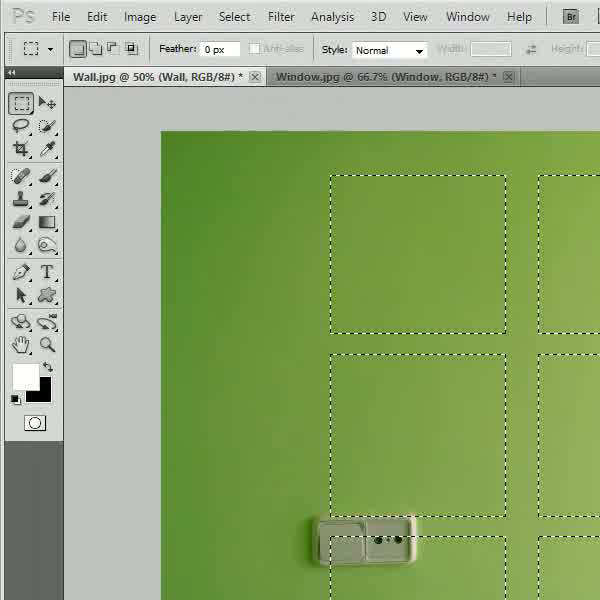
After creating the selection, delete the window’s image. Now only the selection markings would be visible over the background image. Once done, go to the “Select” menu and click on the “Inverse” option. This will select the entire image except the window’s portion.
Step # 6 – Adjust the Image Levels
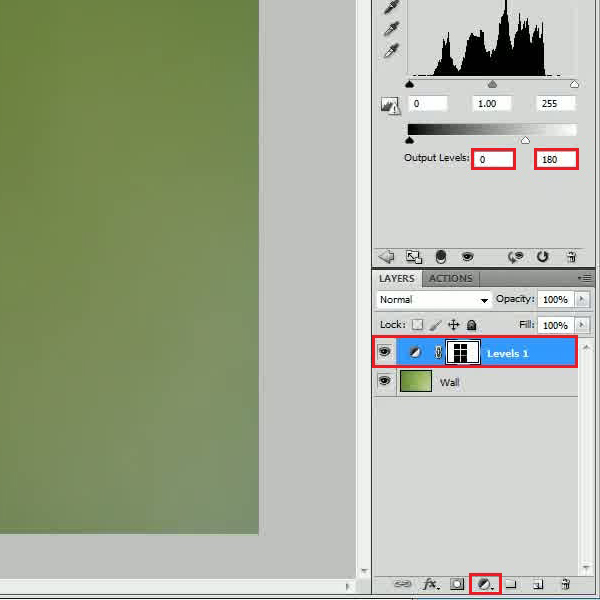
After inversing the selection, click on the “Adjustment layer” icon and select the “Levels” option from the menu. This will open a settings panel which allows you to adjust the color levels in the image.
In this panel, set the “Output Levels” option to “0” and “180” respectively. After entering these values, press the “Enter” key on the keyboard to apply it on the image. You may close this panel once done with this step.
Step # 7 – Make a Selection
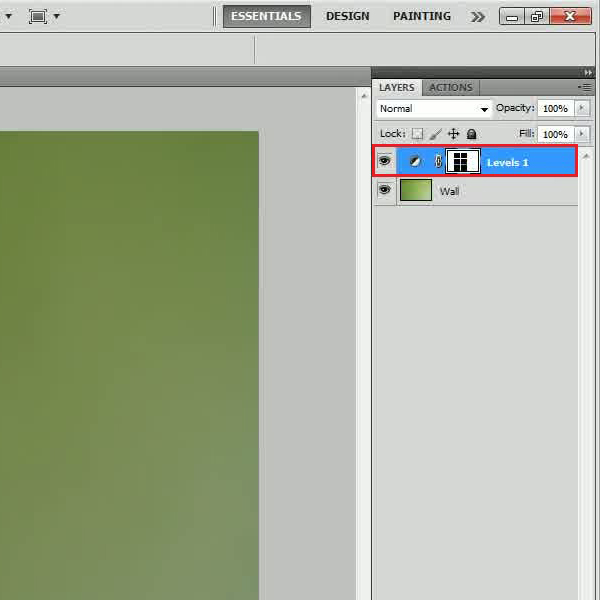
Now click on the layer mask by holding down the “Ctrl” key on the keyboard. This will activate the selection of this layer. Now press “CTRL+SHIFT+I” on the keyboard make the selection inverse.
Step # 8 – Apply a Gaussian Blur
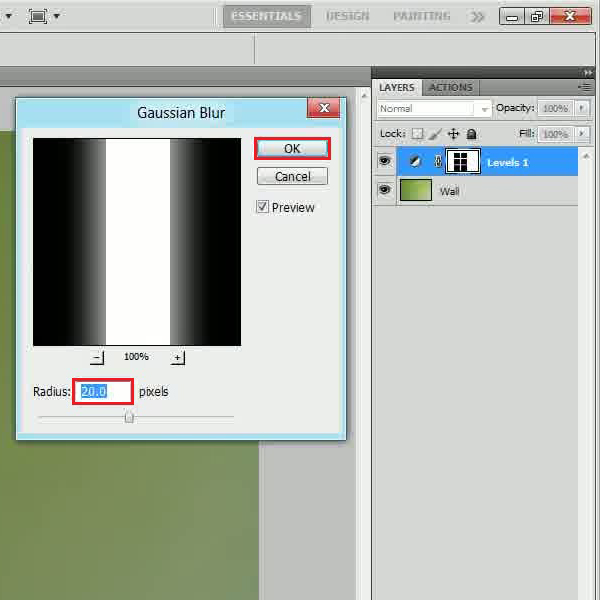
After making the selection, go to the “Filter” menu, select “Blur” and click on the “Gaussian” blur filter from the list. In the filter’s settings panel, set the “Radius” to “20 pixels”. After changing the value, click on the “OK” button to apply the filter on the image and that would be it.
 Home
Home