Adobe Photoshop; is an extremely helpful software when it comes to creating pictures with special images effects, and editing images in a way that makes them stand out amongst others of their kind. The number of options and tools available in Photoshop allow one to keep playing around with the various buttons, and discover new effects that can be applied to make their images look magical. Even though, using Photoshop may appear to be complex at first, once you get a strong grip of how it functions, you will be thrilled by the opportunities it provides you with.
In this tutorial, you will learn how to create a cloud text effect in Photoshop.
Step 1 – Creating a background
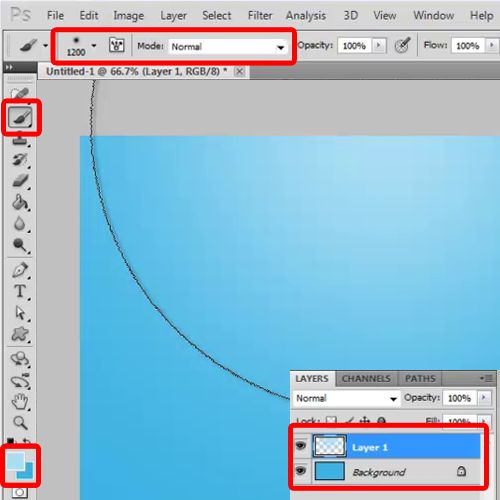
In order to start creating a cloud text effect in Photoshop, you will first need to create a simple background. For that, you will need to pick up the paint bucket tool, choose “3ab2e4” for the color fill and apply it on the background layer.
Now create a new layer. For this, you will have to pick up the brush tool, choose “abdff4” for the color fill, increase the size of the brush and apply it on the upper part of the canvas.
Always remember to rename the layers before moving on with the process.
Step 2 – Typing out text
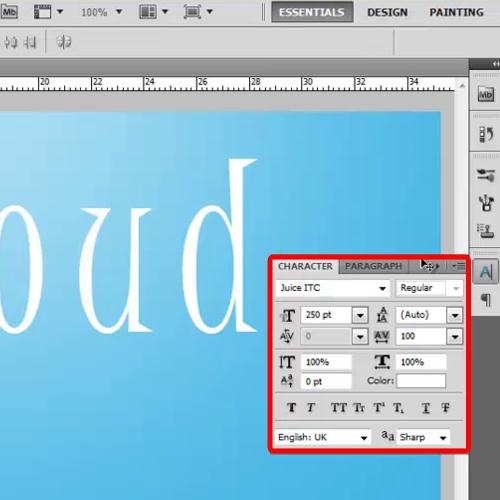
Now pick up the text tool, choose “Juice ITC” for the font and write your text. Choose white for the color and keep the font size at 250 while maintaining font spacing at 100.
Step 3 – Creating a new layer
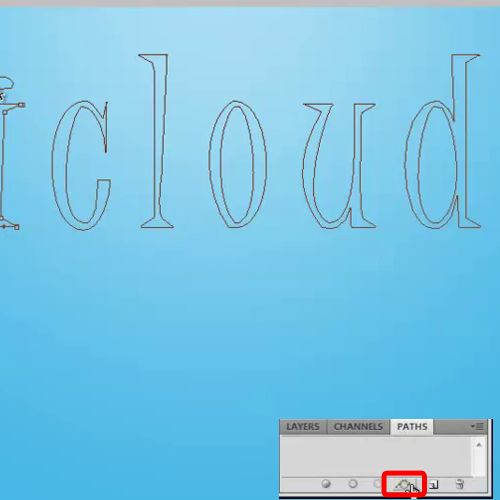
Once this has been done, you will be required to move over to the Paths tab and make a work path after loading the selection. With that done, create a new layer and hide the text layer. Now you can see the complete outline that we have made. Next, it’s time to work with our brush.
Step 4 – Using the brush option
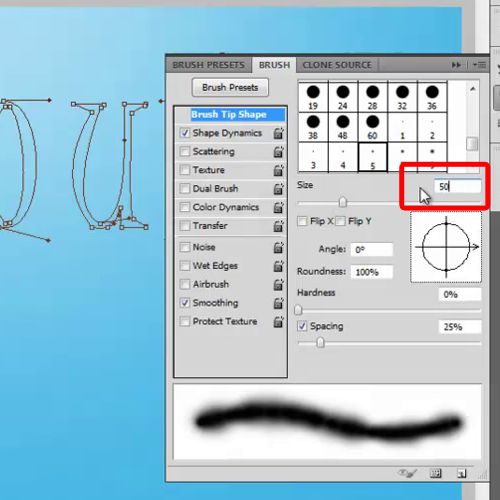
Move over to the Windows menu and select the brush option. Here, different brushes for Photoshop allow you to create different effects. Click on “Brush Tip Shape” and reduce the size of the brush to 50px.
Step 5 – Selecting the angle jitter
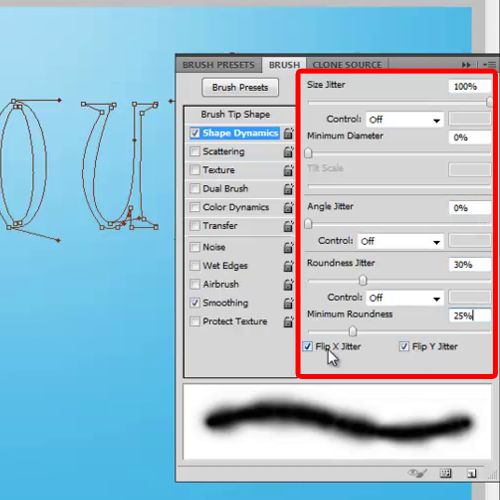
Now move over to the Shape Dynamics tab and set the Size Jitter to 100%, minimum diameter to 0%, angle jitter to 0%, roundness jitter to 30% and minimum roundness to 25%. Do tick on both the “Flip X Jitter” and “Flip Y Jitter” checkboxes.
Step 6 – Using the scattering tab
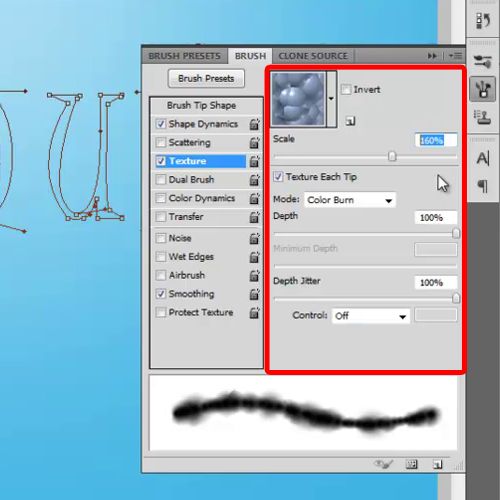
Next, move over to the Scattering tab and here set the scale to 160%, depth to 100% and Depth Jitter to 100%.
Step 7 – Altering the opacity jitter
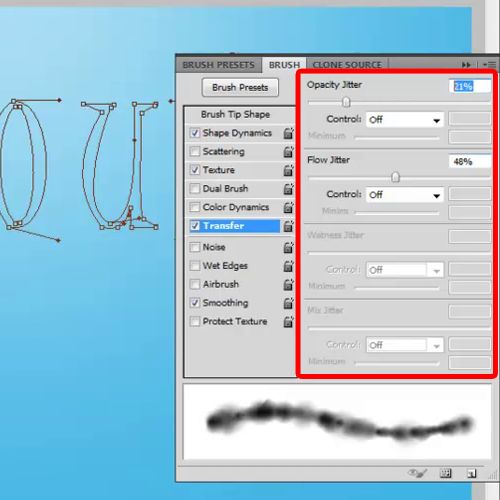
With that done, move over to the transfer tab, or Other Dynamics in the older versions of Photoshop. Here, set the Opacity jitter to 21% and Flow Jitter to 48%.
Step 8 – Using the color fill option
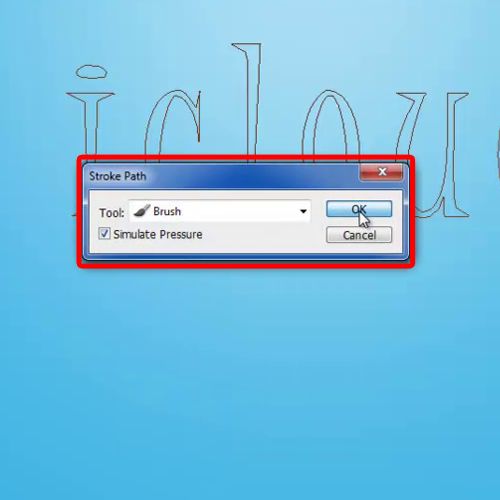
Choose white color for the fill, pick up the quick selection tool, right click on the work path and choose the stroke path option.
Choose the brush option from the drop down menu, tick on the checkbox titled “Stimulate Pressure” and click on “OK”. Now delete the path and rename this layer Cloud Text.
Step 9 – Changing the blend mode
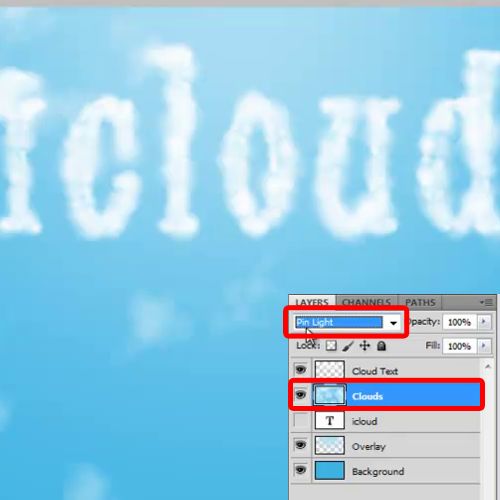
Now, create a new layer and name it clouds. Make sure the foreground color is white and the background color is “3ab2e4”. Once done, click on the Filter menu, move over Render and click on the clouds option. Such effects and more can be created while playing around with different brushes for Photoshop.
With that done, change the Blend Mode of this layer to Pin Light.
Step 10 – Using the Overlay option
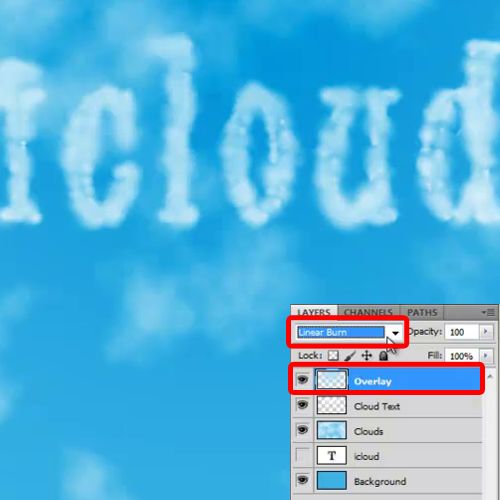
Now select the Overlay to the background layer, move it on top and change the blend mode of this layer to Linear Burn.
This method can be used to add such type of image effects to other illustrations and pictures as well.
 Home
Home