One of the most sought after tutorial, the sketch effect covers the very basics of the many effects your can make using Photoshop. Adding to the effect, in this version we would be adding a color ink effect to the overall sketch effect. With simple image manipulation techniques and adding basic picture effects to the overall image, we would be teaching you how to create a color ink sketch effect in Photoshop.
Step # 1 – Load an Image
In the first step, launch Adobe Photoshop and load an image on which you want to create a color ink sketch effect. It is important to note that the results might vary according to the image. Therefore you must adjust the filter settings in each step according to your image.

Step # 2 – Open the Filter Menu
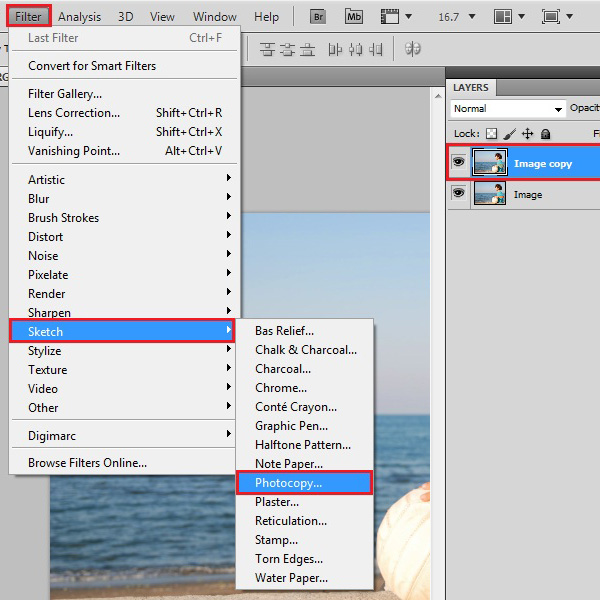
After loading the image, right click on its layer and select the “Duplicate Layer” option from the menu. Now go to the “Filter” menu and select the “Sketch” category. In this category, you will find a filter named “Photocopy”. Click on this filter to load the settings panel.

Step # 3 – Adjust the Filter Settings
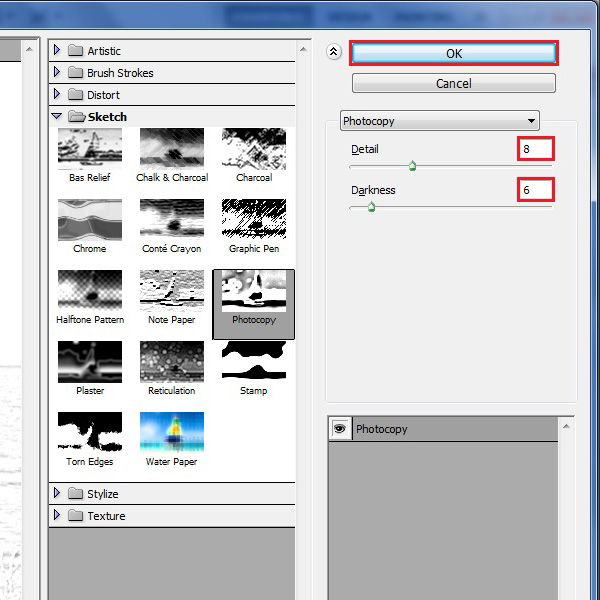
In the filter’s settings panel, you will find various options. Choose “8 points” for the “Detail” option and “6 points” for the “Darkness” option. After changing these settings, click on the “OK” button to apply this filter on the image.

Step # 4 – Open the Filter Menu
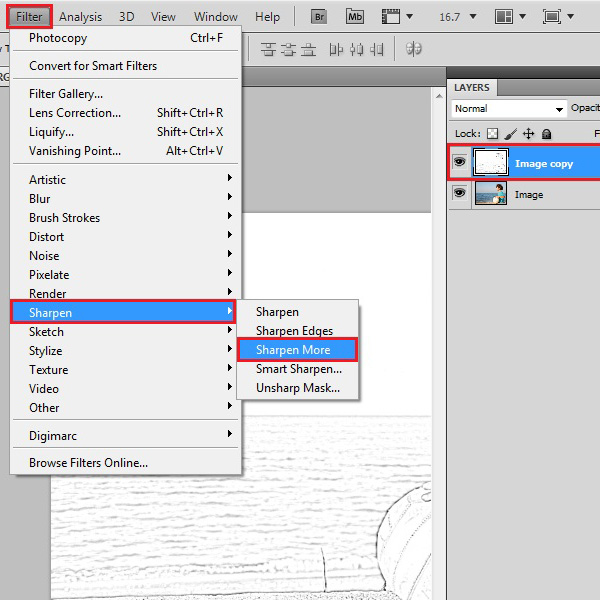
After applying the sketch filter on the image, go to the “Filter” menu again, select “Sharpen” and click on the “Sharpen More” option from the list. This will sharpen the image a little bit. Now apply the “Sharpen More” filter two more times to add depth to your image.

Step # 5 – Change the Blending Mode
Once you applied the sharpness filter on the image, change the “Blending Mode” of this layer to “Overlay”. And that’s it.

 Home
Home