A beautifully designed and an interactive logo can and carefully planned out web content can have a huge impact on your business and add value to your corporate identity Well-designed content on your website reflects your creativity, skills and professional talent. Today we will show you design a simple date flipper for your blog by using Photoshop. In this particular designing tutorial, we will be making a date flipper from scratch using nothing but shapes.
Follow this step by step guide to learn how to create a date flipper in Photoshop.
Step # 1 – Draw the Shape of Date Flipper
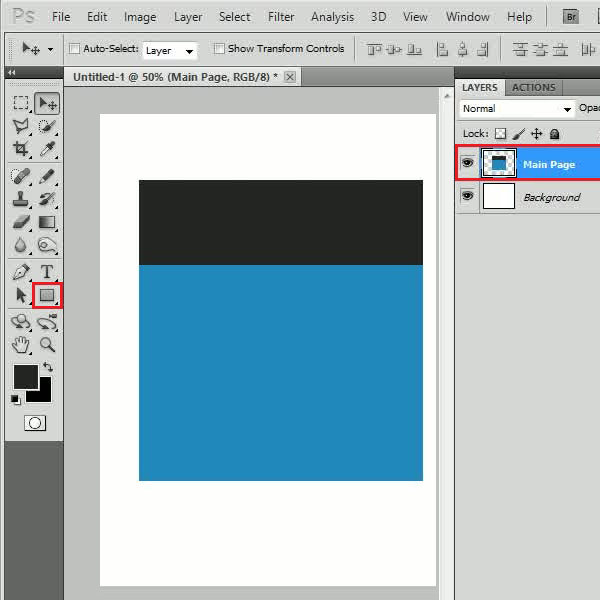
In the first step, select the “Rectangular” tool, choose “2089bd” for the color fill and draw it on the page. Now choose “252525” for the fill and draw another shape on top of the previous shape. Once done, adjust their size and place them at the center of the canvas. Now select both layers and merge them to a single layer. After merging them together, change the layers name to “Main Page”.
Step # 2 – Adjust the Drop Shadow Settings
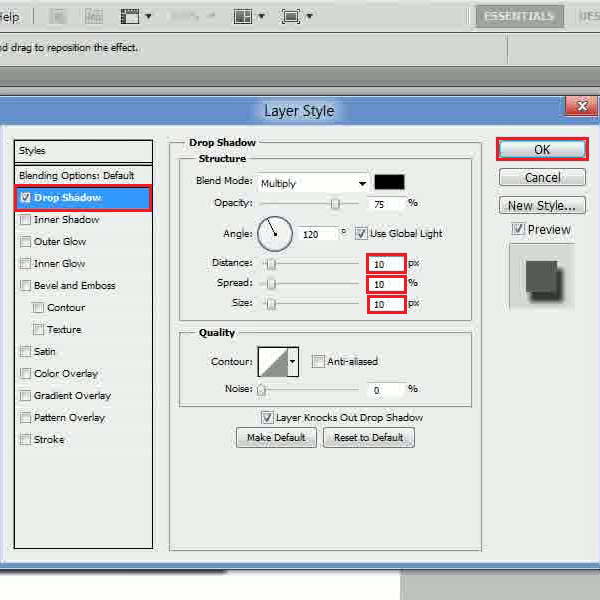
In the next step, open the blending options and move over to the “Drop Shadow” tab. Now set the distance to “10px”, spread to “10 percent” and size to “10px”. After changing these settings, click on the “OK” button to apply it on the layer.
Step # 3 – Draw the Ring
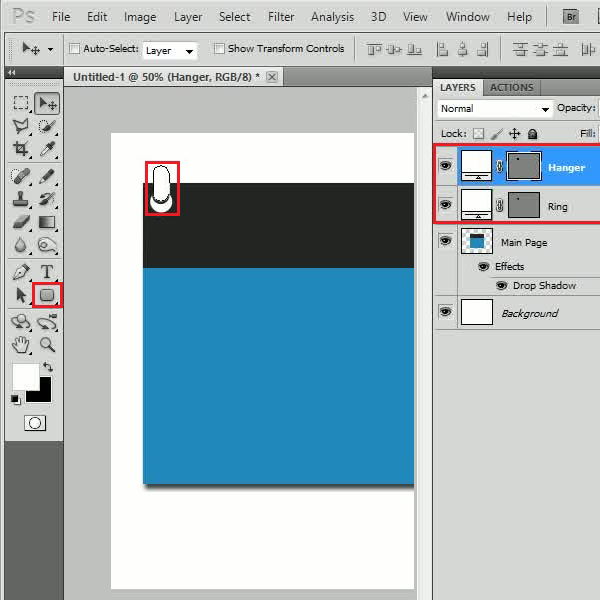
Now select the “Custom Shape” tool from the menu and choose the “Crecent” shape. Draw it at the top of the main image and rotate it a little. Once done, change its name to “Ring”. Now draw a rounded rectangular shape having “30px” radius over the ring shape and rename this layer to “Hanger”.
Step # 4 – Adjust the Gradient Overlay Settings
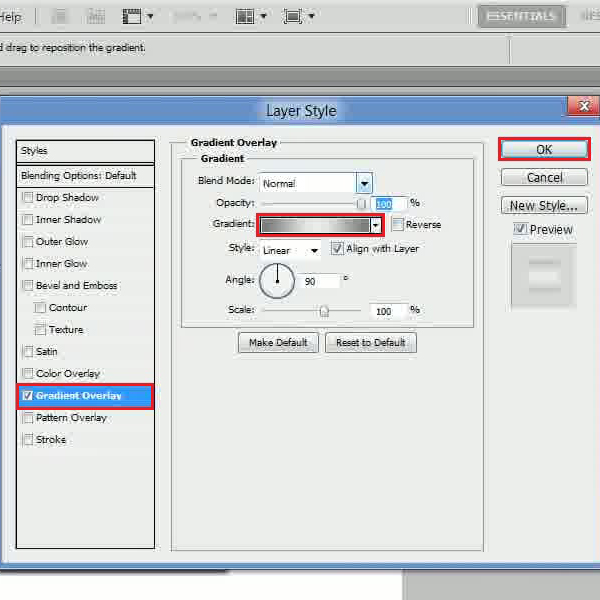
In the next step, double click on the “Hanger” layer to open up its blending options. Move over to the “Gradient Overlay” tab, choose “787878” for botch the left and right side while “ececec” for the middle gradient. Once done, simply duplicate the “Ring” and the “Hanger” layers to create the header.
Step # 5 – Insert the Text
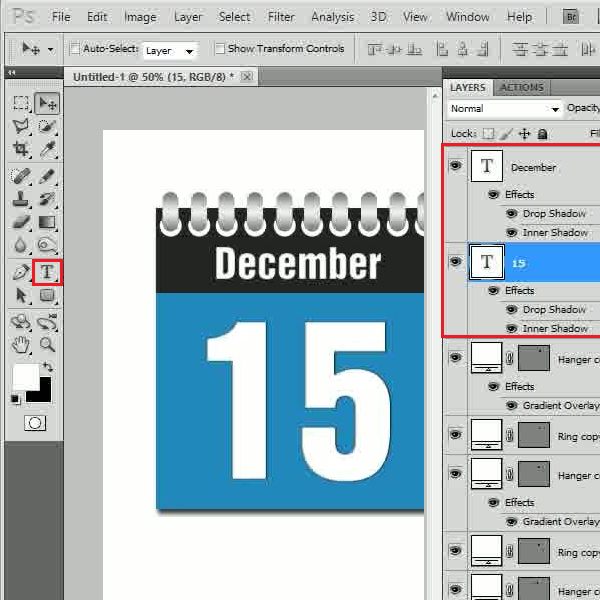
In the last step, select the “Text” tool and insert the month and date. Now add some drop shadow and inner shadow effects on the text layers and you’re done.
 Home
Home