By working on Adobe Illustrator, you can design your own greeting cards. Using Illustrator can be really tricky or fairly simple depending on the design you are working on.
To understand how to create a greeting card illustrator using the scatter brush, follow the steps given below.
Step # 1 – Make background
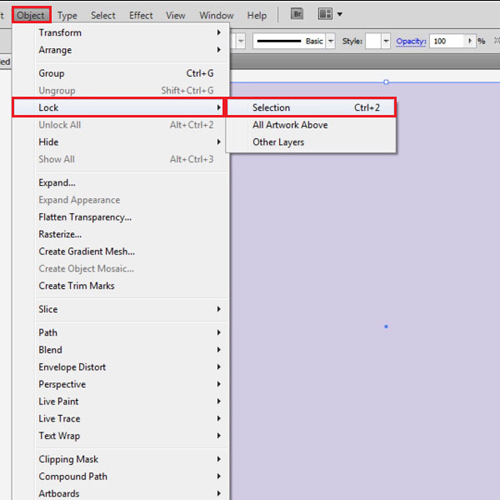
Make a rectangle the same size as the canvas, add any fill to it and lock it by going to the “object” menu, dropping down to “lock” and then pressing the “selection” option. The standard greeting card size used is 5inches by 7inches.
Step # 2 – Create flower
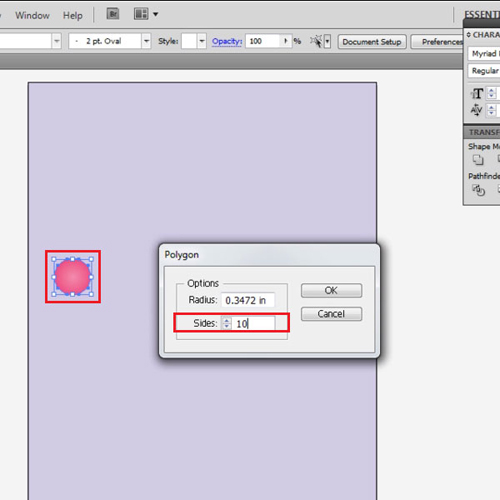
Create a flower for the design. For that, you have to first make a polygon with “10” sides and add a radial gradient to it.
Step # 3 – Apply the “pucker & bloat” effect
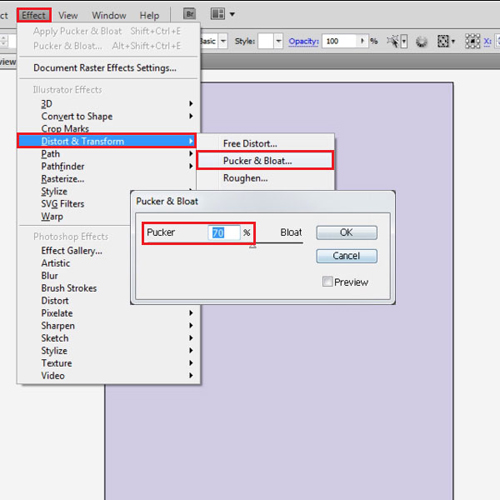
Keep selecting the flower and go to the “effect” menu, move over to “distort & transform” and select the “pucker & bloat” option. In the menu that appears enter the value as “70”.
Step # 4 – Make another flower
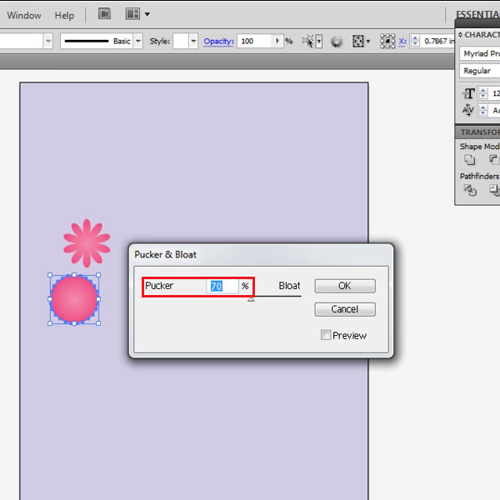
Now create a polygon with “25” sides and repeat these steps. You can alter the sizes and make a several layered flower.
Step # 5 – Create flower arrangements
Create variations and make several flowers. Make a cluster near the center top. Using the same process, create a floral arrangement at the bottom right corner.
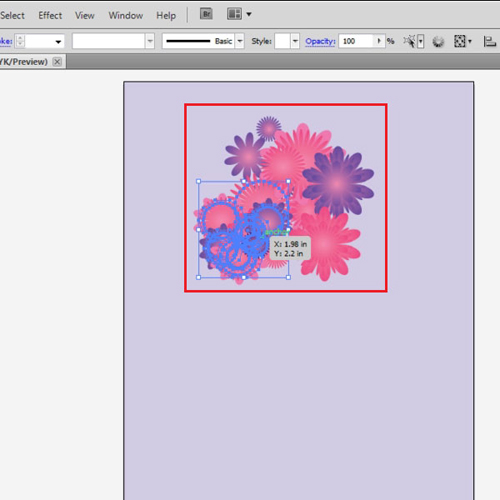
Step # 6 – Reflect the arrangement
Select the flowers at the bottom and go to the “object” menu, drop down to “transform” and then select the “reflect” option. From its menu that pops up select the “horizontal” option, copy the selection and place it on the bottom left corner.
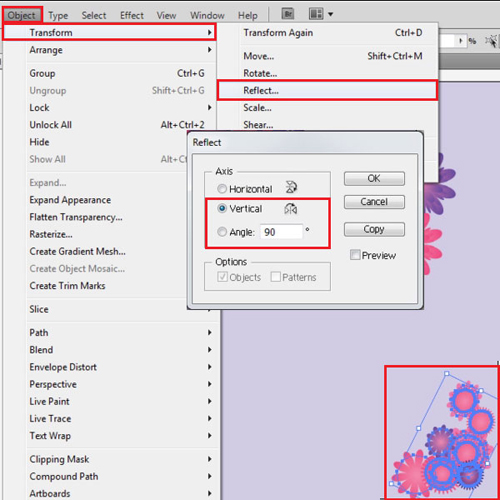
Step # 7 – Make a scatter brush
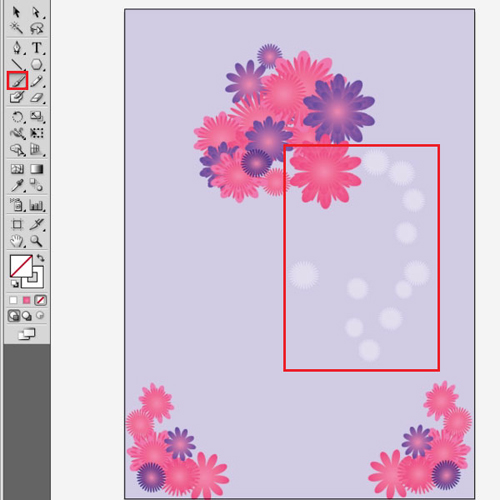
To create a scatter brush, use this floral shape, add a white fill to it and reduce its opacity. Now drag this shape to the “brushes panel” and from the option menu that emerges select the “scatter brush” option. Hence, while using Illustrator you can draw your own customized scatter brushes.
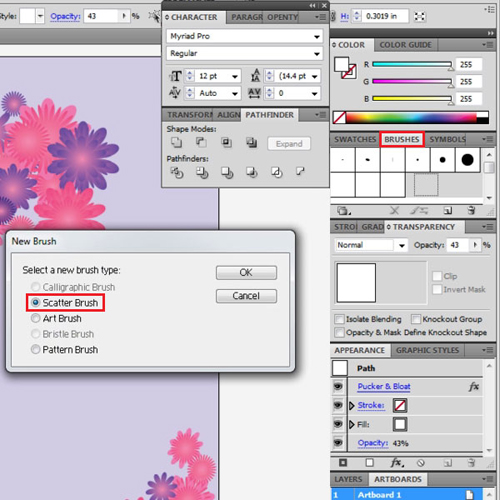
Step # 8 – Customize your settings
Once you drag this shape to the brushes panel a settings panel emerges. From there, customize your settings. This should be according to your card design.
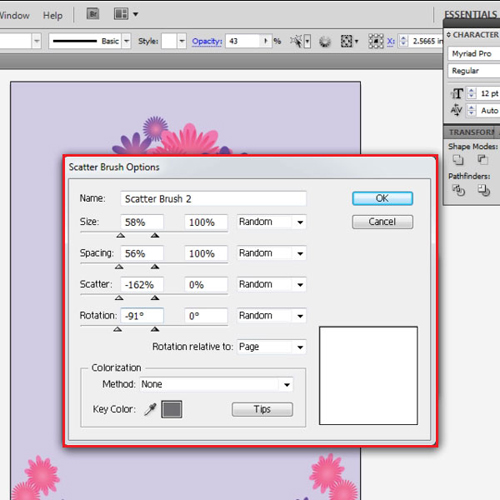
Step # 9 – Use the “paintbrush tool”
Select it from the panel, choose the “paintbrush” tool and create paths where you want to scatter the shape.
In the same way create two more scatter brushes of two ellipses of different sizes and then add them to your drawing.
While using the scatter brush it is important to know that any drawing that contains any sort of effect, even a gradient cannot be made into a scatter brush.
Step # 10 – Enter text
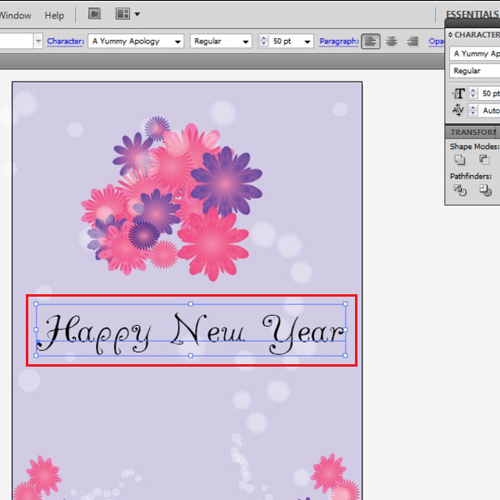
Enter the greeting text by means of the “type tool” in the center to complete your illustration. You can change the placement of the text according to your design.
Your greeting card in Illustrator is now complete.
 Home
Home