Photoshop is considered as an image editing tool, but with that also comes a wide array of options allowing you to create objects from scratch. From buttons to menus and anything else that could be used to add design elements to your web content. In this particular photoshop tutorial, we are going to design a hanging sign starting from sctratch. We will be using nothing but the basic tools and play around with the gradients.
Follow this step by step guide to learn how to create a hanging sign in Photoshop.
Step # 1 – Adjust the Gradient Overlay Setting
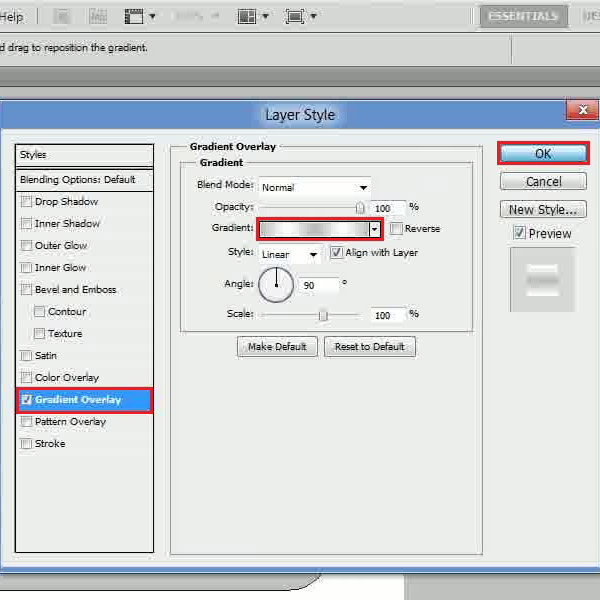
In the firsts step, launch Adobe Photoshop and open up a blank document. After opening a blank page, select the “Rounded Rectangular” tool from the menu and set its radius to “80px”. Now draw a rectangular shape on the page. After drawing it, open the blending options of this layer and move over to the “Gradient Overlay” tab. Now click on the gradient option to choose its colors. Use “bfbfbf” for the left, center and right gradient. Once done, choose the “fefefe” color for the middle gradients.Position the white gradients at 25% and 75% respectively. After choosing the gradient colors, click on the “OK” button to apply it on the layer.

Step # 2 – Adjust the Inner Glow Setting
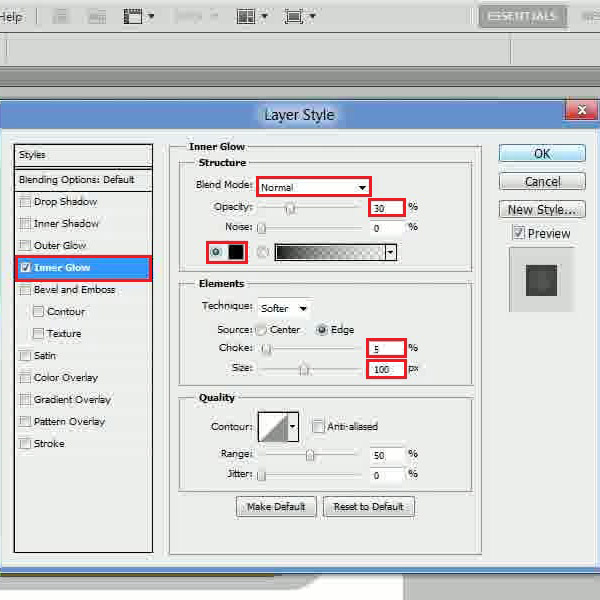
In the next step, create a duplicate copy of this layer and reduce its size. Now change its color to “e9d318”. Once done, open the blending option of this layer and move over to the “Inner Glow” tab. Now set the blending mode to “Normal”, opacity to “30 percent” and select the “Black” color for the fill. Move over to the “Elements” category, set the choke to “5 percent” and its size to “100px”. After changing these settings, click on the “OK” button to apply it on the layer.

Step # 3 – Adjust the Stroke Setting
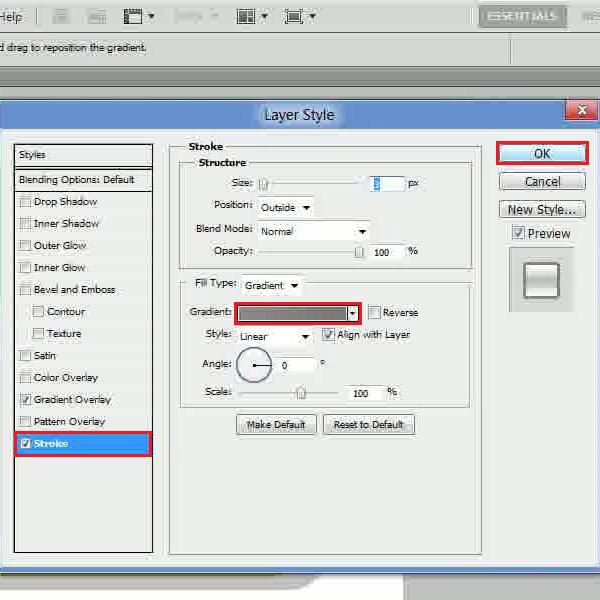
Now select the “Ellipse” tool and draw a small circle over the previous shape. Once done, copy the gradient style of the frame and paste it on the circle’s layer. Now open the blending options of this layer and move over to the “Stroke” tab. In this tab, choose “Gradient” for the fill type, set the left gradient as “8b8989” and “7c7a7a” for the right gradient. After changing these settings, click on the “OK” button to apply it on the layer.

Step # 4 – Insert the Text
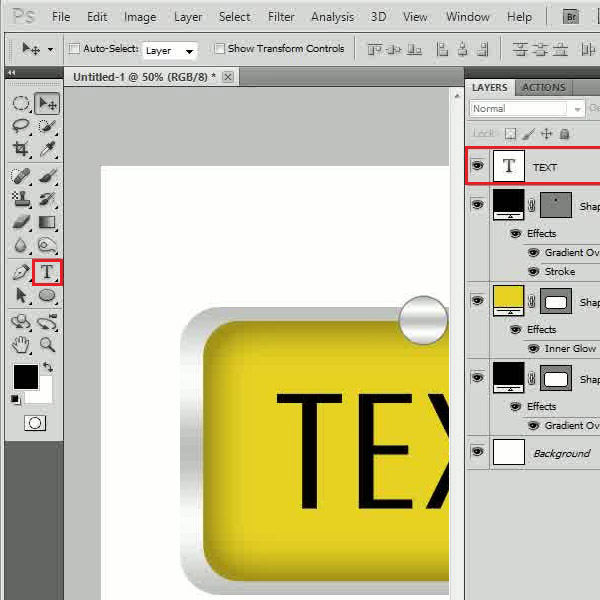
In the last step, select the “Text” tool from the menu and insert your desired text using black color for the fill. Now adjust the size and place the text according to the background. You can use various fonts and play around with the colors and effects for your text.

 Home
Home