Adobe Photoshop is an extremely useful tool when one is working with pictures etc. You can use this software to edit pictures, crop people, and perform a number of tasks along with applying cool effects and different Photoshop styles. At first you might find it difficult to deal with Photoshop but once you learn the various techniques of performing tasks with it, you will be thrilled with the number of options its provides you with.
Various tutorials on Photoshop allow you to learn to use these effects easily. In this tutorial we will teach you how to create a mesh typographic image in Photoshop through a simple step by step process.
Step 1 – Entering the Text
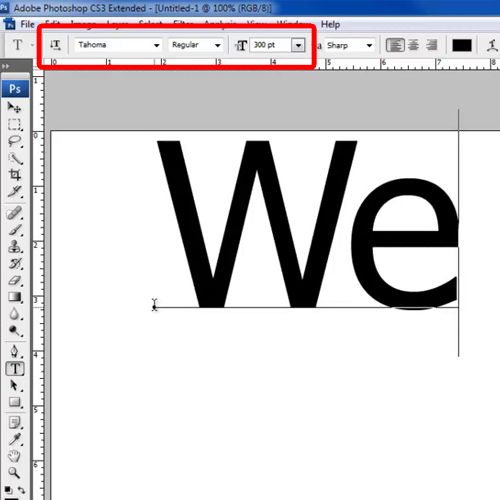
You must start off the procedure of creating a mesh typographic image in Photoshop by firstly entering some text on the Photoshop sheet. In this tutorial, we have used “Tahoma” as the font, keeping the font size at 300pt.
Step 2 – Using the Noise filter
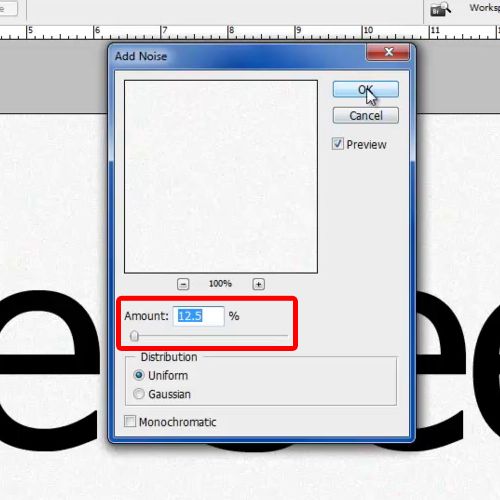
Next, you will need to select the background layer, go to the filter menu and select the “Add Noise” filter. Here, you must change the amount to 12.5%, using a uniform distribution method for the filter. You must follow these steps accordingly in order to apply cool Photoshop effects.
Step 3 – Working with the background
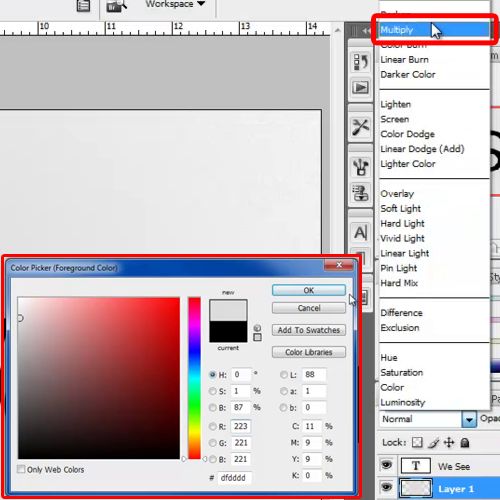
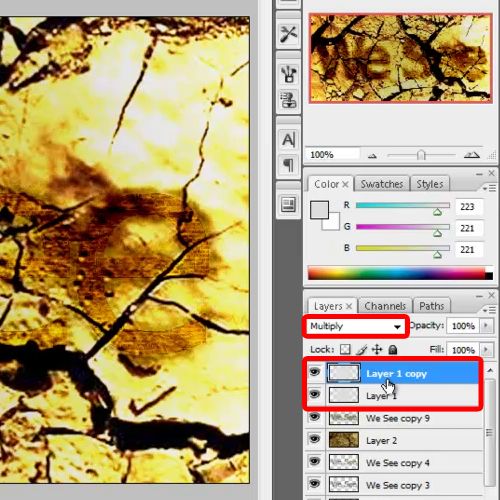
Now add a new layer, choose “dfdddd” for the color fill, pick up the brush tool with 0% hardness, increase the size of the brush to the size of the canvas and apply it right in the middle of the canvas. For this tutorial, let’s name this layer: Layer1. Once this has been done, you will need to change the blending mode of this layer to the option titled “Multiply”.
Step 4 – Making the Outer glow layer style
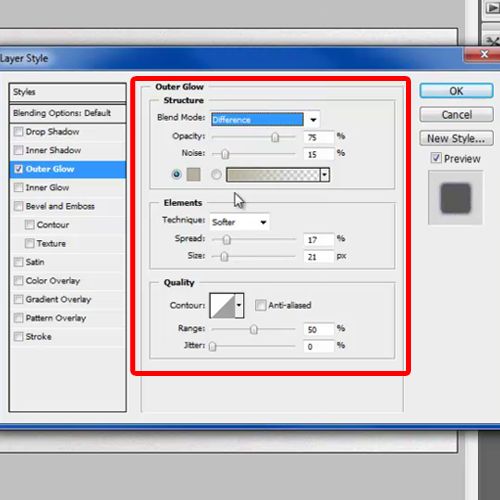
Now select the text layer and open up the layer style options. Here, you will need to move over to the Outer Glow tab, choose “b4b49f” for the color fill, set the spread to 17%, size to 21px, Noise to 15% and change the Blend Mode to the option titled “Difference”.
Step 5 – Using the Texturizer Filter
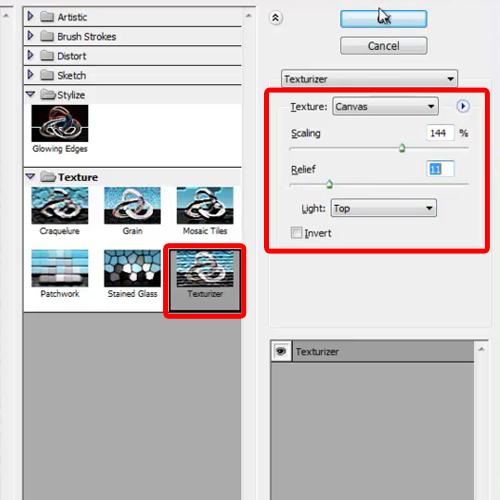
Next, you will need to duplicate the text layer, rasterize it, move over to the filter gallery and choose the “Texturizer” filter. Here, you can set the scaling to 144% and Relief to 11. Apply the filter and duplicate the layer.
Step 6 – Using the Gaussian Blur Filter
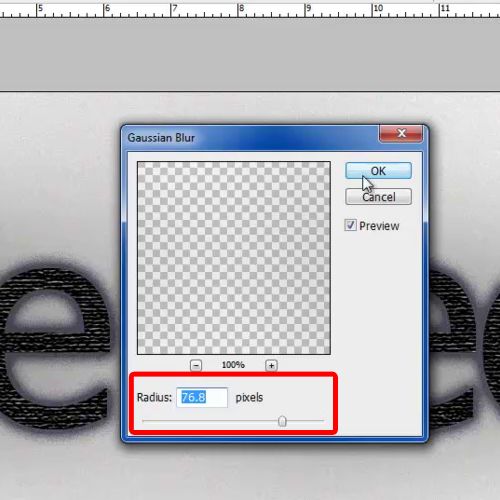
Place the duplicated layer below the original layer. Now, go to the filter menu, move over to blur and click on the Gaussian Blur filter. Set the radius to 76.8 pixels and click on the Ok button.
Step 7 – Using the Chrome Filter
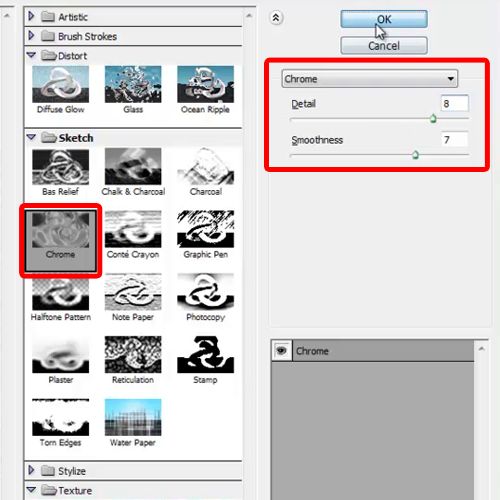
Next, you will need to duplicate the layer on the top and open up the filter gallery. Click on the Chrome filter and set the Detail to 8.
Step 8 – Working with the Hue/Saturation
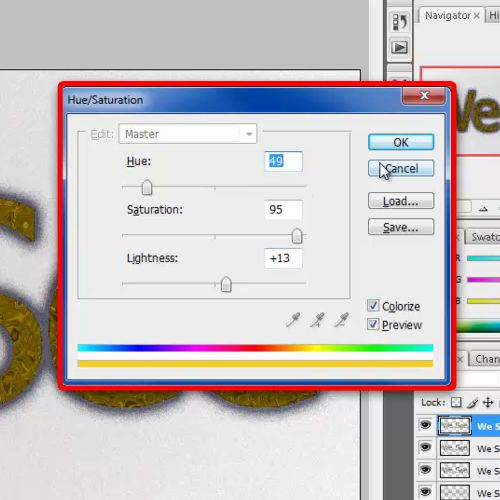
Once the above steps have been completed successfully, open up the Hue/Saturation window. Click on the checkbox titled Colorize. Set the Hue to 49, Saturation to 95 and Lightness to +13. Now change the Blending mode of this layer to Exclusion.
Step 9 – Working with patterns
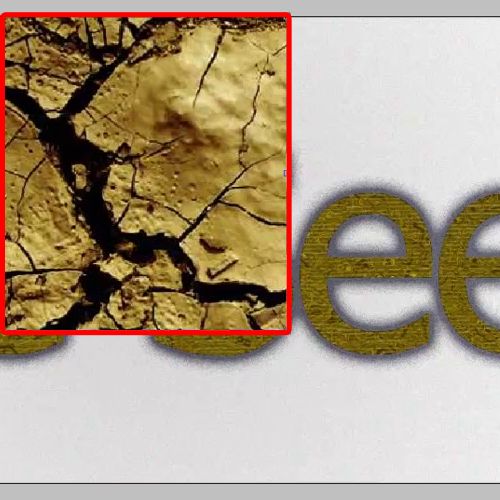
Now that we are done with the text, it’s time to bring in the image for the background. Amongst the different Photoshop styles, in this one, we would be bringing an image of a grunge pattern on the canvas. Place the image layer right at the top and resize it according to the canvas.
Step 10 – Changing the Blend Modes
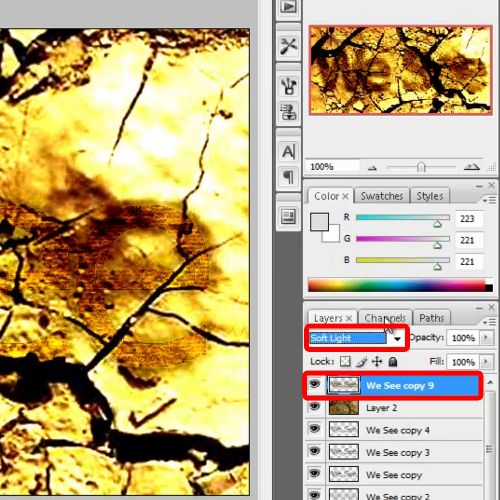
Now change the blending mode of this layer to Linear Light. Now bring the top most rasterized text layer above all other layers and change the blending mode of that layer to Soft Light.
Step 11 – Adding Final touches
Once this is done, position Layer1 on top of all other layers and duplicate the layer once. This would dim down the image a bit, giving it a more dynamic look.
Once you learn how to work with Photoshop and gain knowledge about the various techniques and tools that can be used while working with this software, a number of actions can be performed that you will totally enjoy indulging in. It is yet important to learn about all of the features provided by this software, in order to make the best of it and produce the most effective results, and you can do so by following these different tutorials on Photoshop.
 Home
Home