In this tutorial, we would be teaching you how to create a page curl effect in in Photoshop. Using nothing but the basic Photoshop effects for this tutorial, we would be laying down a step by step guide for you. For this environment changing effect, we would be using the basic warp tool for creating the page curl.
Step # 1 – Load an Image
In the first step, launch Adobe Photoshop and bring an image on to the canvas. It is recommended to use a vibrant and colorful image with a distinctive background. It is important to note that the output might vary from picture to picture. What’s important to understand here is that you must play around with the settings and options mentioned below to adjust the effect according to the image.
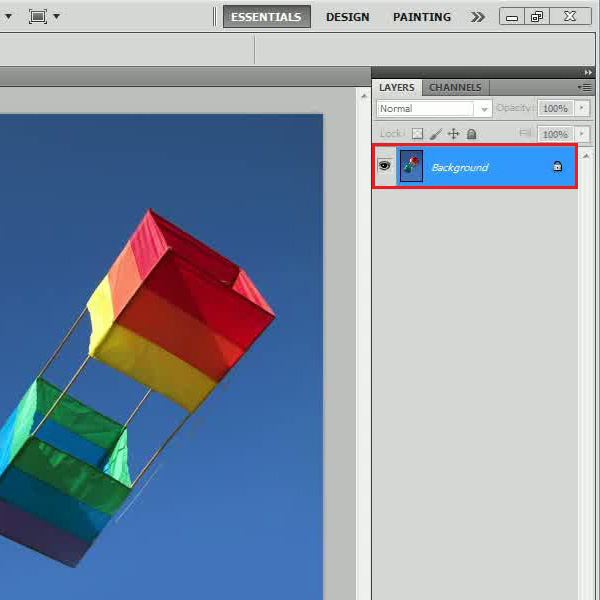
Step # 2 – Add a Black and White Adjustment Layer
After loading the image, click on the “Add an adjustment layer” icon which is available at the bottom of the layer panel. Now select the “Black and White” adjustment layer option from the menu.
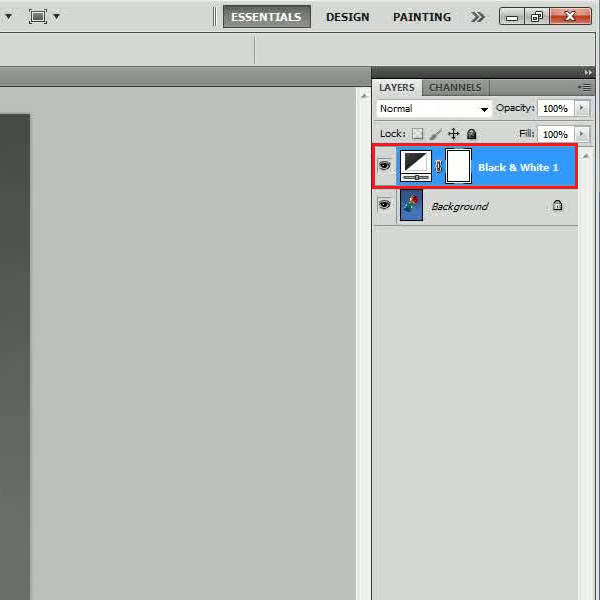
Step # 3 – Apply a Brush Tool
After applying the adjustment layer, click on the layer mask and select the “Brush” tool from the menu. Now start painting over the object using the “Black” color.
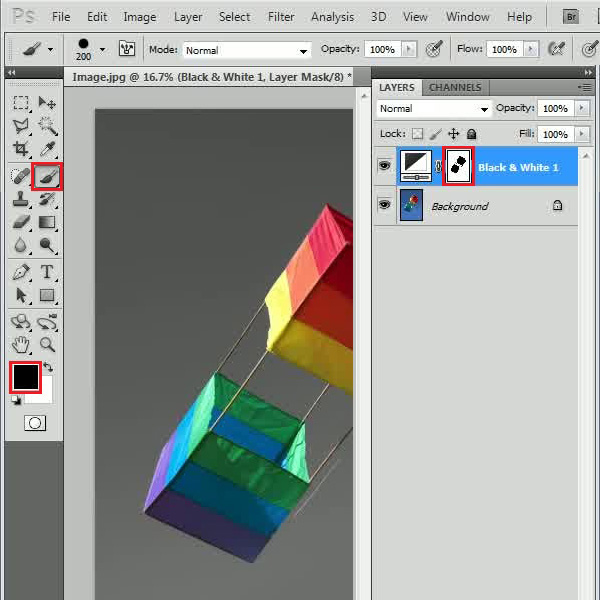
Step # 4 – Create a Duplicate Layer
Once done, right click on the “Background” layer and select the “Duplicate Layer” option from the menu. Now move the newly created layer on the top of all other layers.
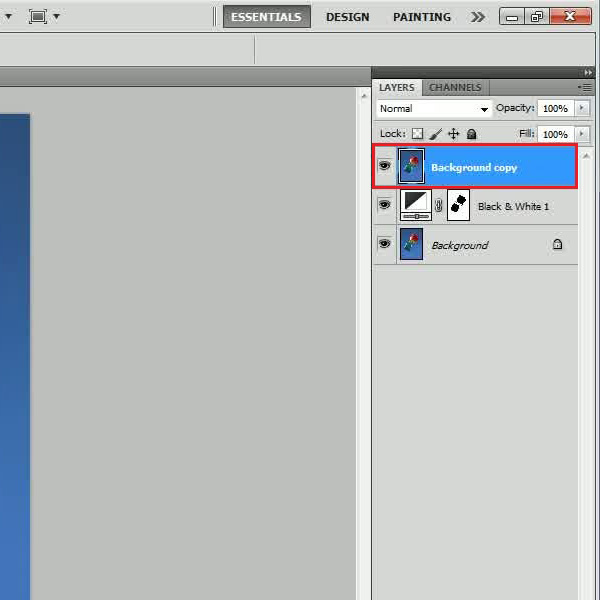
Step # 5 – Create a Frame around the Image
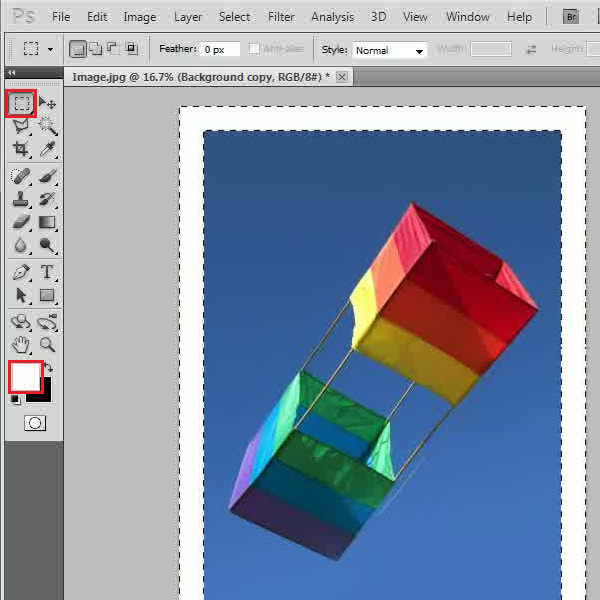
In this step, select the “Rectangular Marquee” tool from the menu and create a selection around the borders of the image. Now set the “Foreground” color to “White” and press the “Alt Backspace” key on the keyboard. This will fill the selected area with the “White” color.
Step # 6 – Apply a Warp Tool
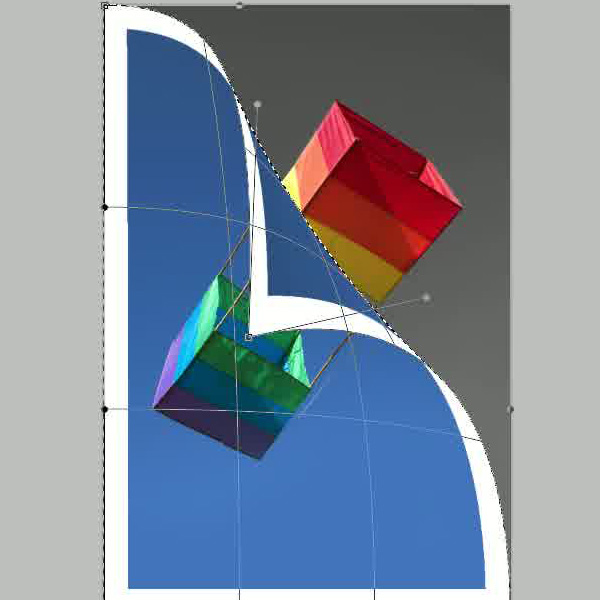
In the final step, go to the “Select” menu and click on the “All” option to select the full image. After selecting the image, go to the “Edit” menu, select “Transform” and click on the “Warp” option from the list. Now drag the corner of the image towards the center of the image and create a page. Play around with this feature until you get it right.
 Home
Home