Adding dramatic effects to your sequence can be very important as it adds to the overall scene. The right effect at the right time can change the whole way how the sequence is viewed and appreciated by the audience. In this tutorial, we will guide you how to create a rain effect in After Effects CS6.
Step # 1 – Create a solid layer
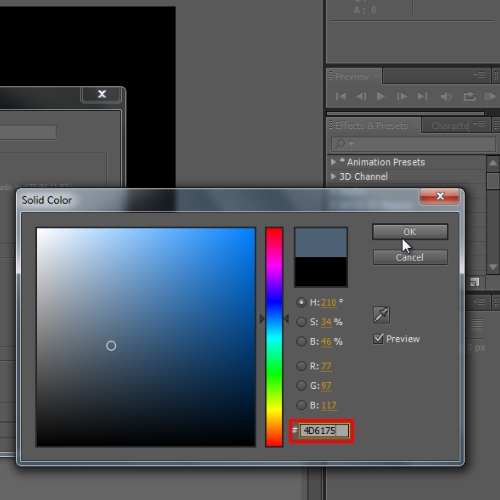
First of all, generate a gray solid layer in Adobe After Effects. Use “4D6175” for the fill.
Step # 2 – Configure CC Drizzle Effect
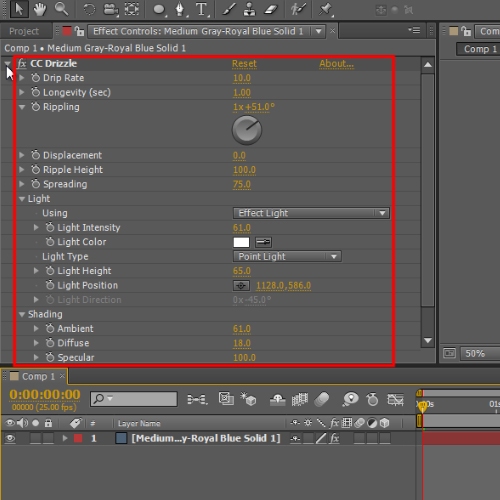
Apply the CC drizzle effect on this layer. Now move to the configuration window and change the drip rate to 10, longevity to 1.00, rippling to “1x+51”, displacement to 0 and spreading to 75.
Next we will expand the light menu, change the light intensity to 65.0 and light position to “1123,586”. Now expand the shading menu and set the ambient to 61, diffuse to 18 and roughness to 0.018.
Step # 3 – Configure Noise Effect
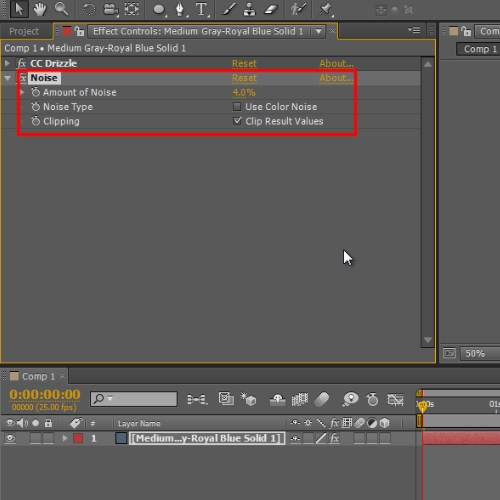
Once done, add the Noise effect on the layer using 4.0 for the amount of noise in Adobe After Effects.
Step # 4 – Apply an ellipse mask
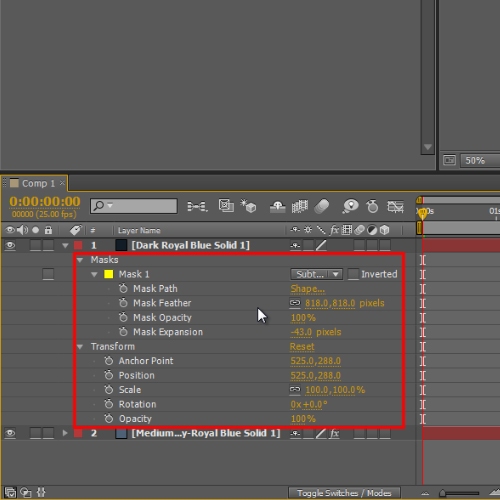
Now generate a new solid layer using”121c26” for the color fill. Once done, apply an ellipse mask over the layer. Move to the configuration window to set the mask feather to 818.0 pixels and mask expansion to -43 pixels.
Step # 5 – Configure CC Particle World Effect
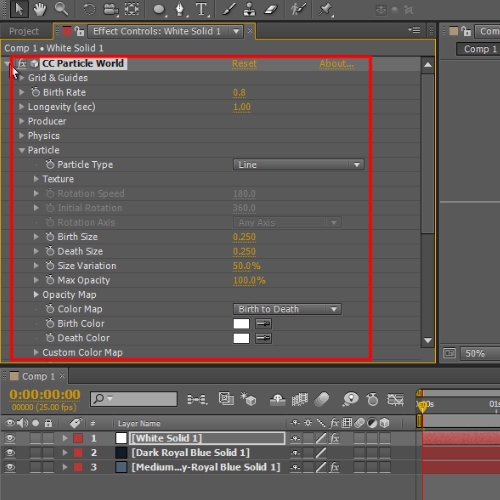
Once done, generate a solid layer and apply the CC particle world effect on it. In the configuration window expand the grid & guide option, uncheck the radius option, set the birth rate to 0.8 and longevity to 1.0. Expand the producer menu and set Radius X, Y and Z to 1.5.
Expand the physics menu, choose direction axis for the animation, set the velocity to 0.50, gravity to 0.0 and extra angle to “0x+280.0degree” Leave the floor menu as it is. Now expand the particle menu and choose Line for the particle type, set the max opacity to 100.0%, and lastly the birth and death color to White. Expand the Extra Menu and change the FOV value to 35.0
Step # 6 – Configure Camera Options
Once done, move to the particle world effect that we previously applied to the clip and generate a two node camera layer. With that done, move to the settings configuration window and expand the transform menu. With that done, change the position to “798.0, 873.0, -1040.0”.
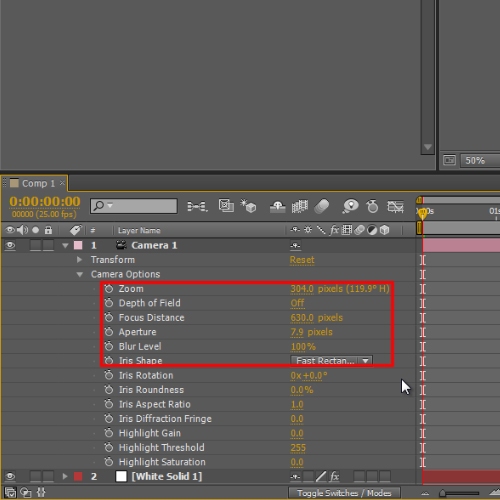
Expand the camera option menu, change the zoom to “304.0 pixels”, focus distance to “630.0” and focus to “7.9 pixels”. Now render the composition and you have successfully created a rain effect in adobe after effects.
 Home
Home