Other then image manipulation and using different tools to blend images, Photoshop can also be used from creating different elements and designs from scratch. By changing the blending mode and applying a few basic effects, you can easily create realistic objects.
Follow this step by step guide and learn how to create a realistic plate from scratch in Photoshop.
Step # 1 – Open a New Document
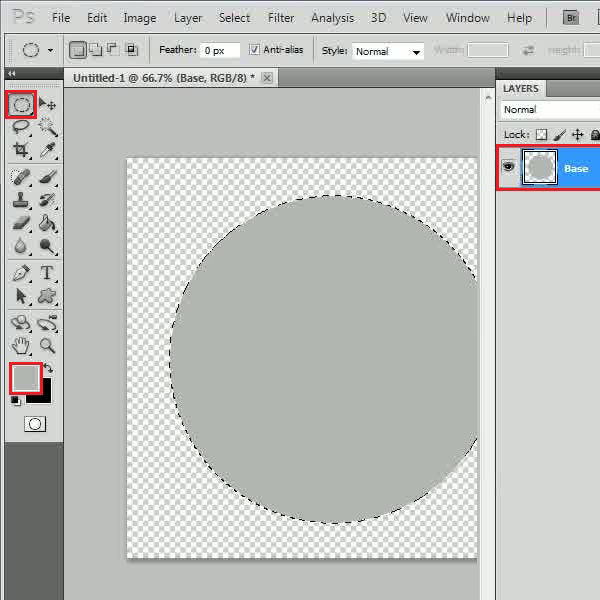
In the first step, launch Adobe Photoshop and open up a new document with a transparent background. Now change the name of this layer to “Base”. After changing the name, select the “Elliptical Marquee” tool from the menu and draw a circle. Choose the “Grey” color for the “Foreground” and press the “ALT + Backspace” key on the keyboard to fill the circle.
Step # 2 – Create a New Layer for Depth
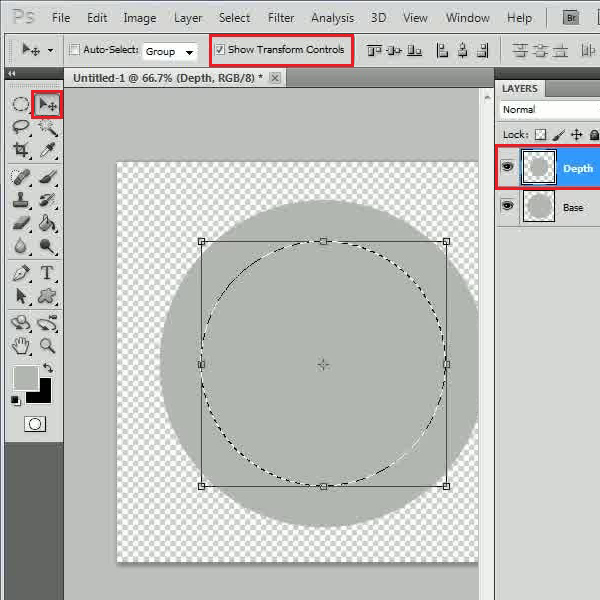
Now duplicate the base layer and rename the layer “Depth”. Select the newly created layer and click on the “Move” tool from the menu. Now select the “Show Transform Controls” option and reduce the size of the circle.
Step # 3 – Change the Bevel and Emboss Settings
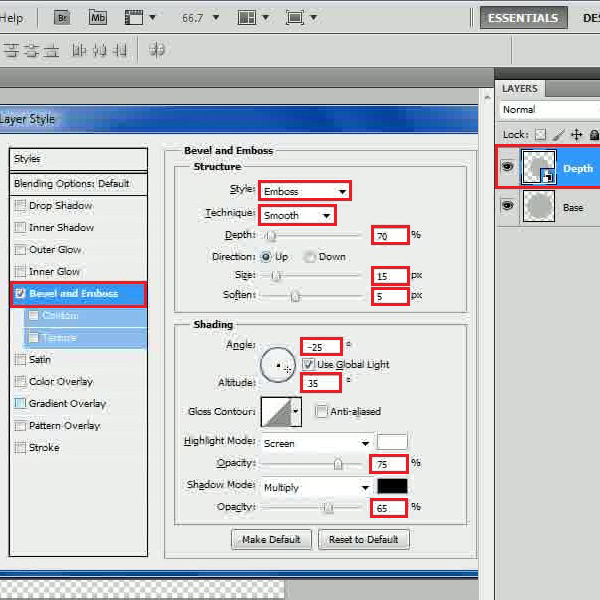
In the next step, convert this layer into a “Smart Object”. Now right click on the layer name, select the “Blending Options” from the menu and move over to the “Bevel and Emboss” tab. Now set the “Style” to “Emboss”, “Technique” to “Smooth”, “Depth” to “70 percent”, “Size” to “15 px” and “Soften” to “5 px”. After changing these settings, set the “Angle” to “-25 degrees”, “Altitude” to “35 degrees”, Highlight mode’s “Opacity” to “75 percent” and Shadow mode’s “Opacity” to “65 percent”.
Step # 4 – Change the Gradient Color Settings
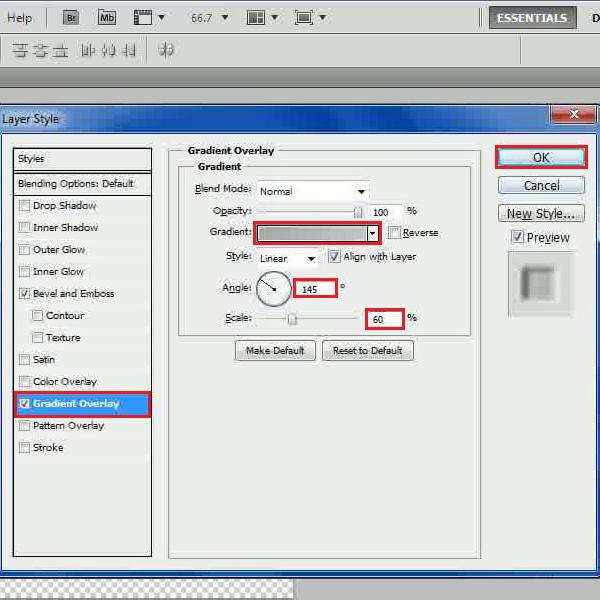
Now move over to the “Gradient Overlay” tab, click on the “Gradient color” and enter the color code “AAACA” for the left side and “C5C7C4” for the right side. After setting up the colors, set the “Angle” to “145 degrees”, “Scale” to “60 percent” and click on the “OK” button to apply these settings on the image.
Step # 5 – Create an Extended Selection
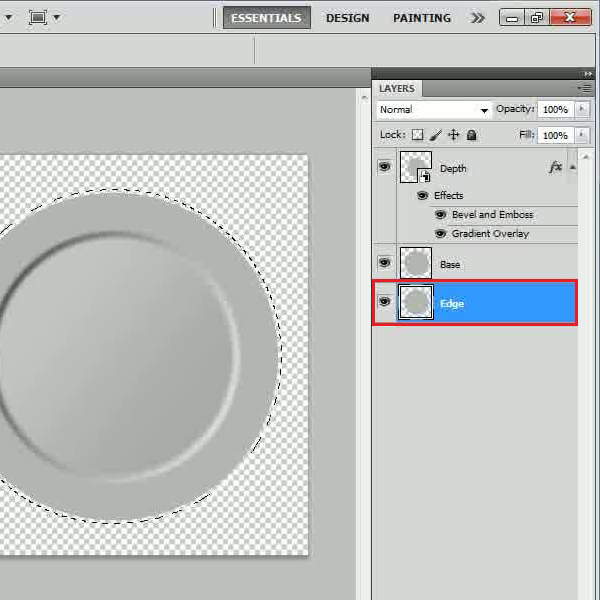
Now press and hold down the “CTRL” key on the keyboard and click on the “Base” layer to load the selection. Once done, go to the “Select” menu, select “Modify” and click on the “Expand” option from the list. Expand your selection by “5 pixels” and click on the “OK” button to expand the selection.
Step # 6 – Create a Layer for Edges
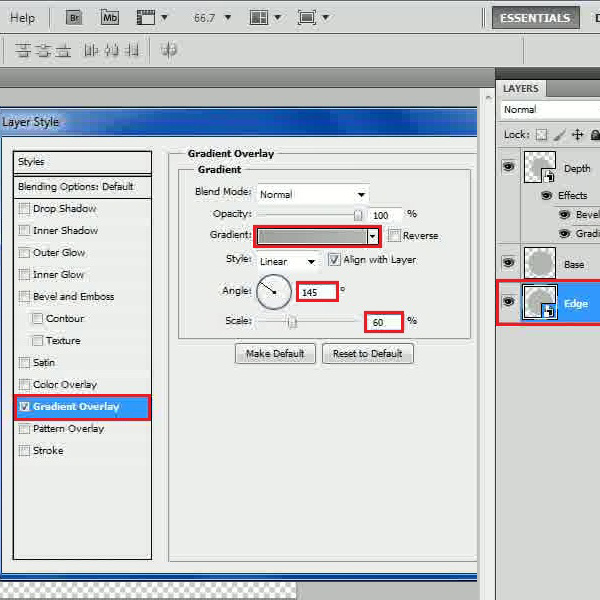
Create a duplicate layer and change its name to “Edge”. Select this newly created layer and move it below the “Base” layer. Now fill this layer with the same grey color. Convert this layer into a “Smart Object” as well. Now open its “Blending Options” and move over to the “Gradient Overlay” tab. Click on the “Gradient color” and pick the grey color from the image for the right side. Now choose a bit darker shade of grey for the left side gradient. After selecting its colors, set the “Angle” to “145 degrees”, “Scale” to “60 percent” and click on the “OK” button to apply these settings on the image.
Step # 7 – Create a Background for the image
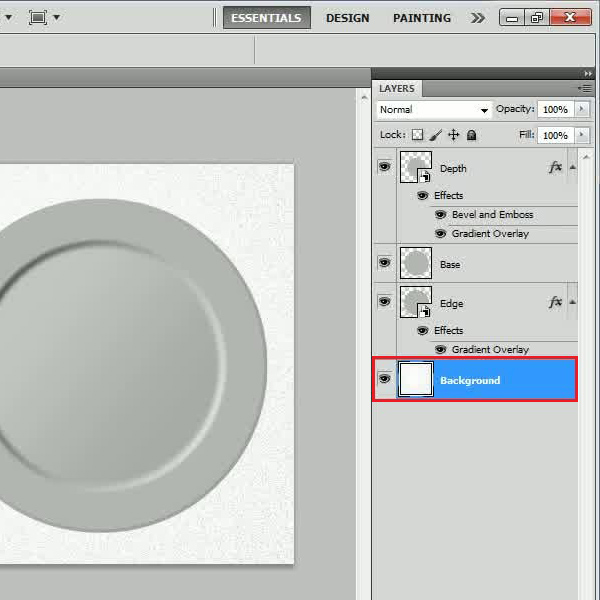
Since our basic object is complete, now we would be focusing more on the background of the image. For this purpose, add a new layer and rename the layer to “Background”. Now select this layer and move it below all other layers. Now fill the “Background” layer with the “White” color and apply the “Gaussian Blur” filter on your background, using “20 percent” for the amount. Pick up the soft brush, increase the size of the brush and apply white color in the center off the image. And that’s it.
 Home
Home