In this video tutorial we will show you how to create a recovery partition in Windows 8.
In order to create a recovery partition in Windows 8, you will need to right click on the “My computer” icon and choose “manage”.
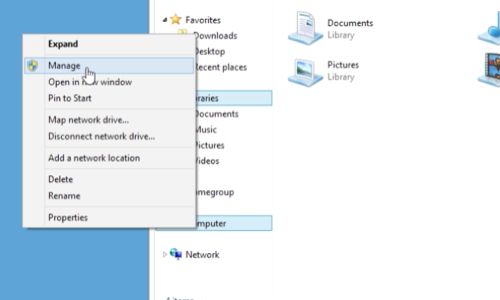
In “computer management” menu we select “Disk Management”.
Now you must right click on Volume (C:) and select “Shrink Volume…”, in drop menu we must enter the amount of space to shrink in MB and click “Shrink”.
The unallocated disk space is created, right-click on it and choose “New simple volume”. Here we can change “simple volume size in MB”, assign a letter to the following drive, choose whether to format this volume or not and enter the “Volume label”. Now the recovery partition is created.