It is very easy to give different effects to backgrounds in Illustrator. You can even create a background and give it a retro illustration. To learn how to create a retro background in Adobe Illustrator follow the tutorial given below.
Step # 1 – Making a rectangle
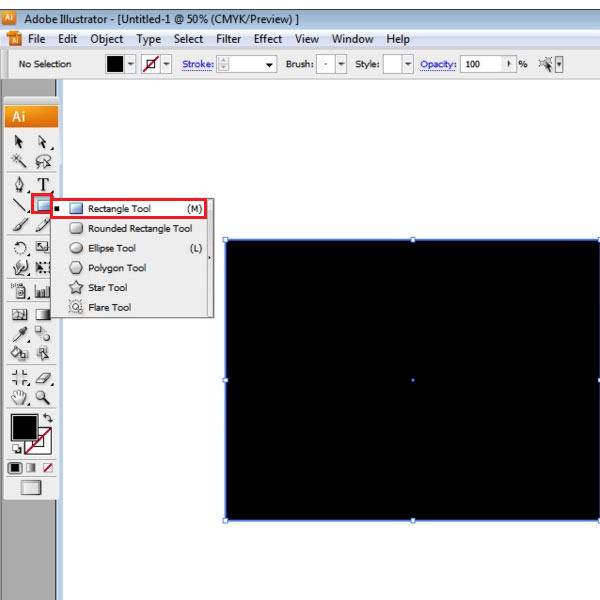
To create a retro background in Illustrator, first of all make a rectangular background. To do this, select the rectangle tool and make it the same size as that of your page. In this case, the dimensions are “800px” by “600px”.
Step # 2 – Adding gradient to the shape
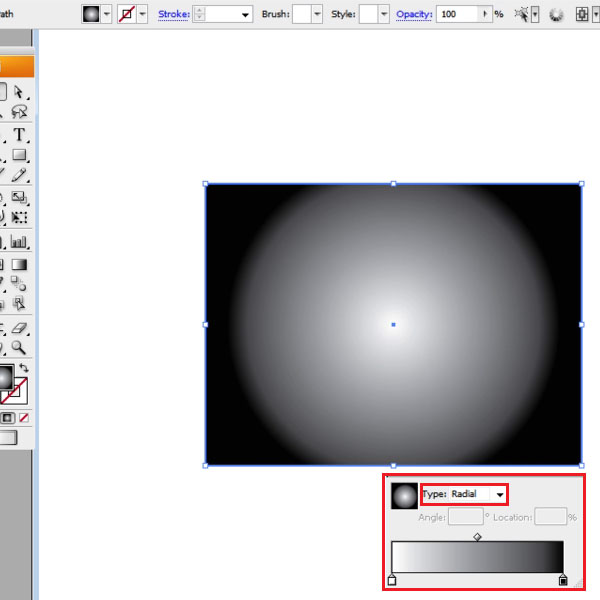
Next, add gradient to the shape from the gradient bar in the panel, on the right. Change its type from “linear” to “radial”.
Step # 3 – Altering the gradient
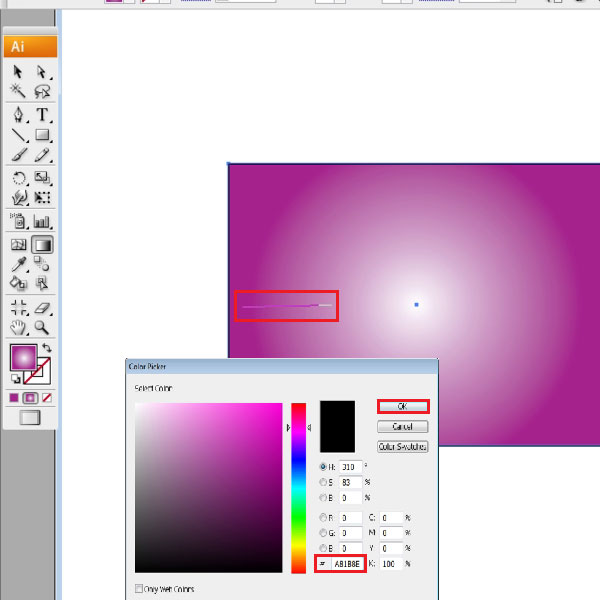
Right now, the color of the slider on the right is black, alter it and add it with a color value of C#”A81B8E”. Make sure no stroke is added to this rectangle. Move the white portion of the gradient towards the left, by selecting the gradient tool and making a line where you want this portion to be.
Step # 4 – Making an ellipse
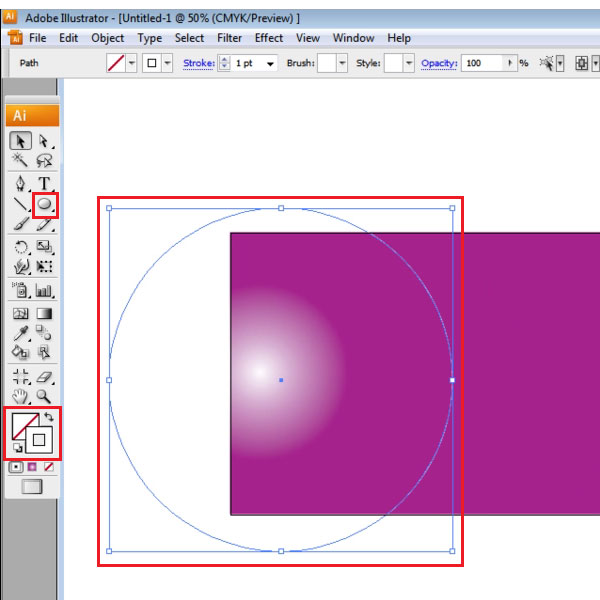
Next, select the ellipse shape tool. Make a circle with the dimensions “730px” x “”730” and adjust the circle as shown on the screen.
Step # 5 – Adding a stroke to the ellipse
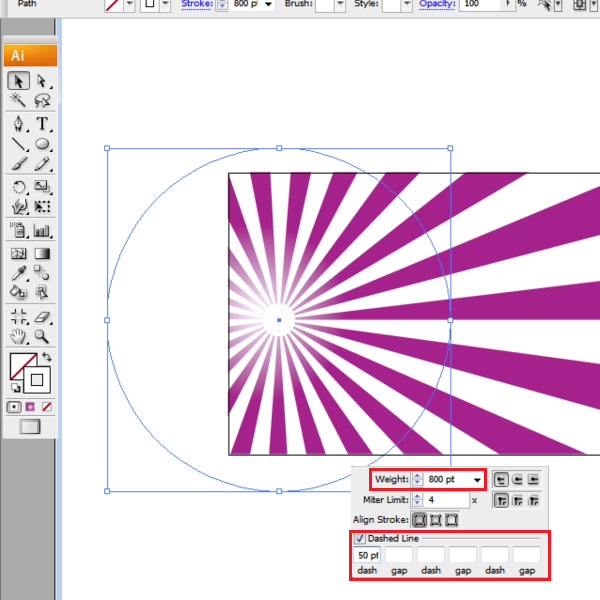
Remove the color from this shape and give it a white stroke. From the stroke panel on the right, increase its weight to “800pt”. Once this is done, check the “dashed line” option and enter “50” in the first dash space provided.
 Home
Home