Photoshop comes as an all in one tool kit for designing, creating and manipulating images, typography and templates. Through its helpful tools and high quality gradients, you can design a web template from scratch. It allows you to design web menus, side panels, buttons and various other web contents. Today we are designing a search field by starting it from a blank page. This tutorial will help you in creating a specific web field, designing buttons and its icons, inserting text and applying gradients.
Follow this step by step guide to learn How to create a Search Field in Photoshop.
Step # 1 – Filling up the Page
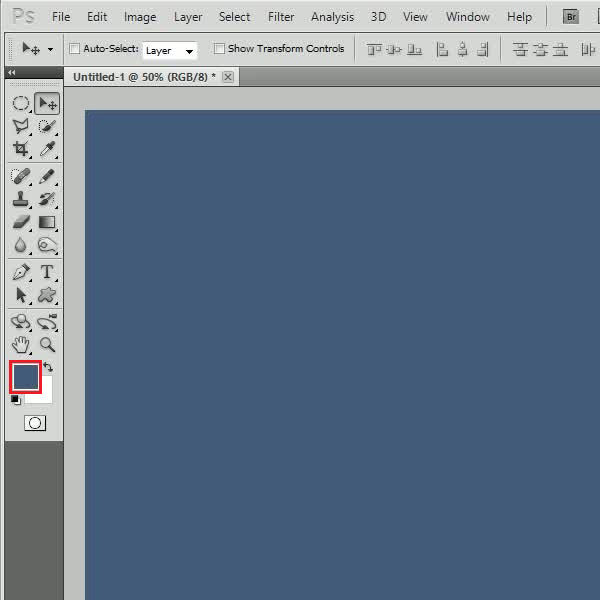
In the first step, click on the “Foreground” color and choose its color as “435c7a”. Now press the “Alt + Backspace” key on the keyboard to fill the page with the selected color.
Step # 2 – Drawing a Button Shape
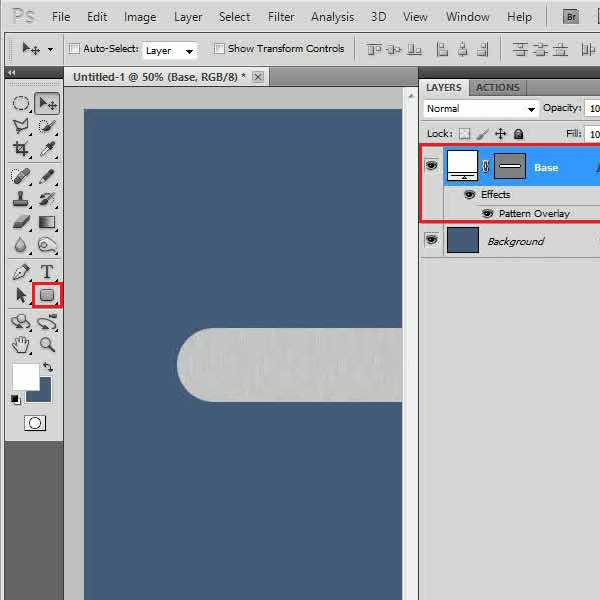
In the next step, select the “Rounded Rectangular” tool from the menu and set its radius to “80px”. Now choose its color as “White” and draw the shape of search field on the page. Change the name of this layer to “Base” and open its blending options by double clicking on it. Once done, move over to the “Pattern Overlay” tab and select a pattern according to the theme and color of the page. After selecting a pattern, click on the “OK” button to apply it.
Step # 3 – Drawing the Inner Shape
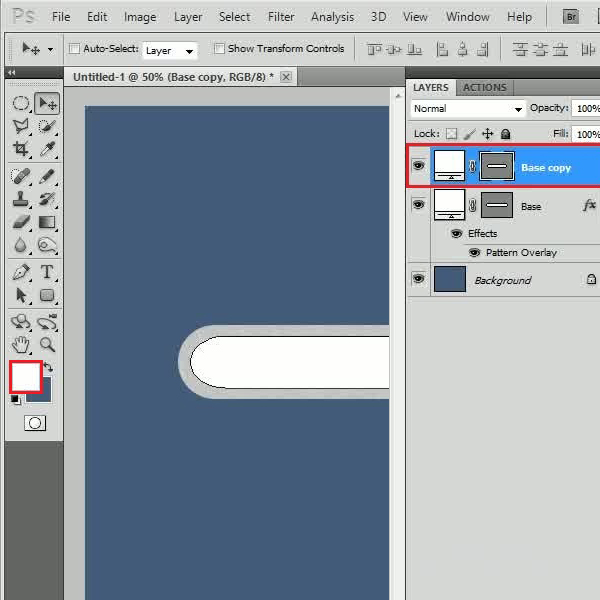
Now create a duplicate layer and reduce its size. Once done, right click on this layer and select the “Clear layer Style” option from the menu to clear out its blending settings. This will make this shape black and white in color.
Step # 4 – Drawing the Search Box
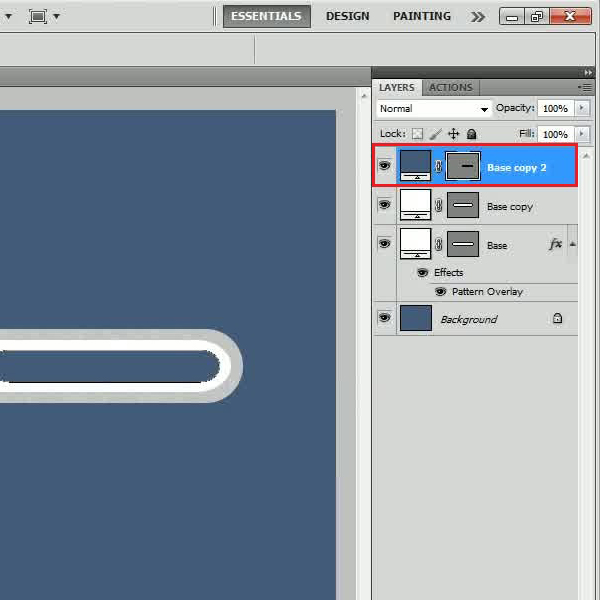
In the next step, create another duplicate of this layer and reduce its size towards the right side. Now change the color of this layer to the same “435c7a” which we used in the background.
Step # 5 – Drawing a Search Icon
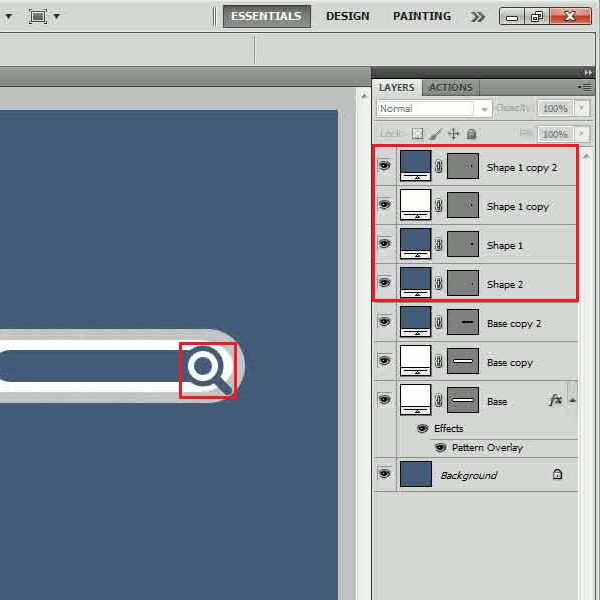
Now select the “Ellipse” tool from the menu and draw three circles overlapping each other. For this purpose, simply draw a circle, duplicate it and reduce its size accordingly. Once done, change their colors as displayed in the image. Now select the “Rounded Rectangular” tool and draw a shape of a holder at the corner of the circle. After adjusting its size and placing, move its layer below the circle layer.
Step # 6 – Inserting the Text
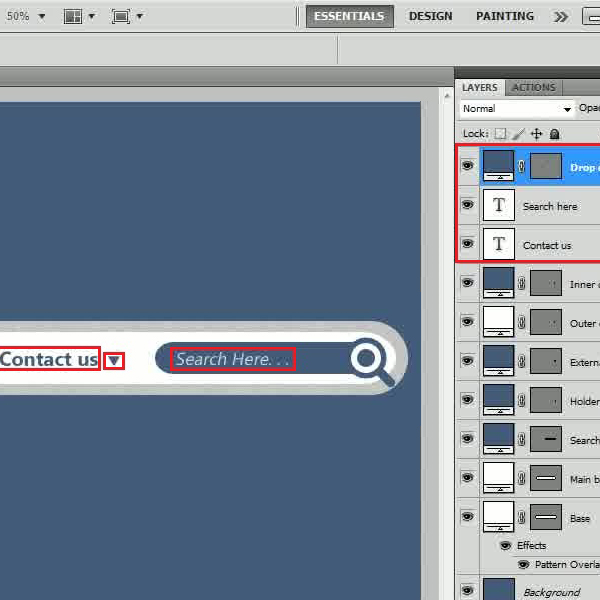
In the next step, select the “Text” tool from the menu and type in the appropriate text according to the search field. Now insert a custom shape to create a drop down menu next to the search label. Once done, rename all layers according to their contents.
Step # 7 – Adjusting the Gradient Overlay Settings
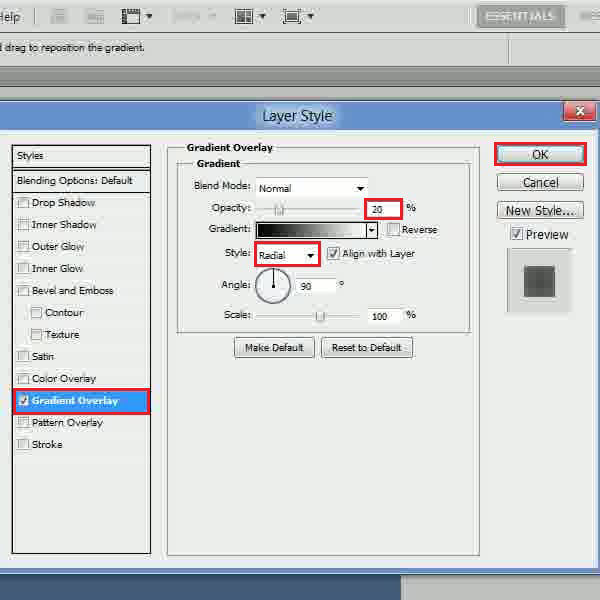
In the final step, open the blending options of the “Inner circle” layer and move over to the “Gradient Overlay” tab. In this tab, choose the style as “Radial” and set its opacity to “20 percent”. After changing these settings, click on the “OK” button to apply it on the layer.
 Home
Home