Different photo effects to photos can be done in Adobe Photoshop. You can edit pictures along with adding different types of effects to the text that you create in this software. Inserting such things by using different tools can seem difficult at first but once you get the hang of it great results can be produced.
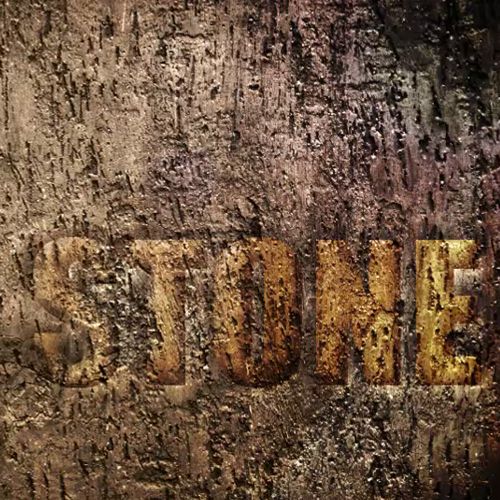
In this tutorial, the type of effect that you will learn create in Photoshop is the stone text effect. To understand how to do this, follow the tutorial given below.
Step 1 – Make background and go to “filter” menu
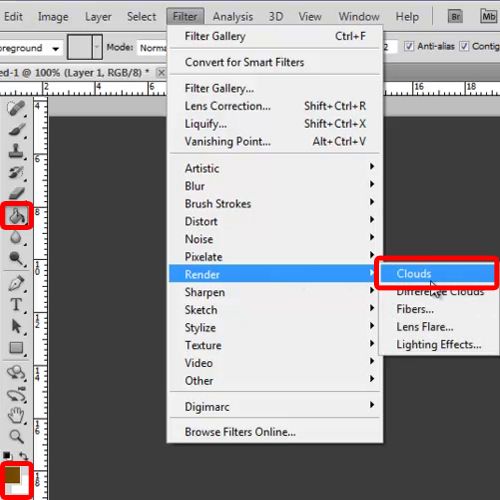
First of all, pick up the paint bucket tool and fill your background with “303d3c” for the color. Now choose “754802”, create a new layer, go to the filter menu, move over render and click on the clouds button.
Step 2 – Apply the ‘filter” option
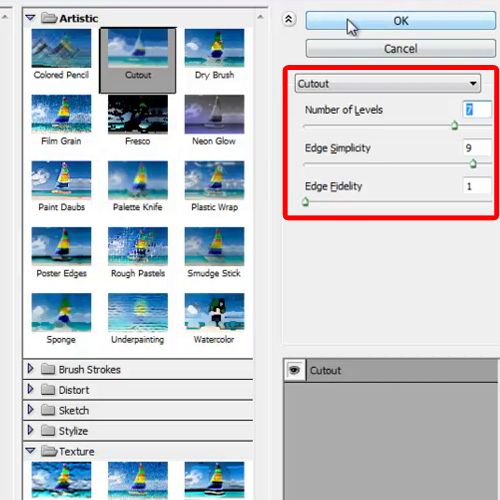
Now, duplicate the clouds layer and move over to the filter gallery. Choose the cutout filter, using 7 for the number of levels, 9 for the edge simplicity and 1 for edge fidelity.
Step 3 – Render the illustration
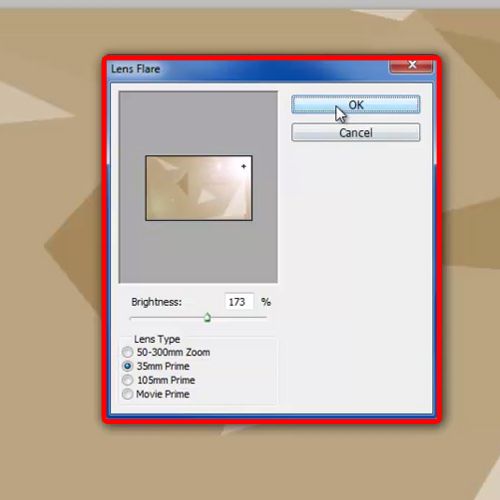
Now click on the Filter Gallery once more, move over Render and click on the Lens Flare option.
Place the source towards the right side, increase the brightness to 173% and use the 35mm prime option for the filter.
Step 4 – Alter the Blend Mode
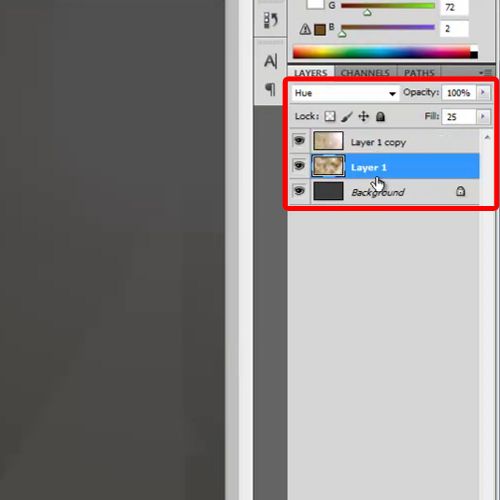
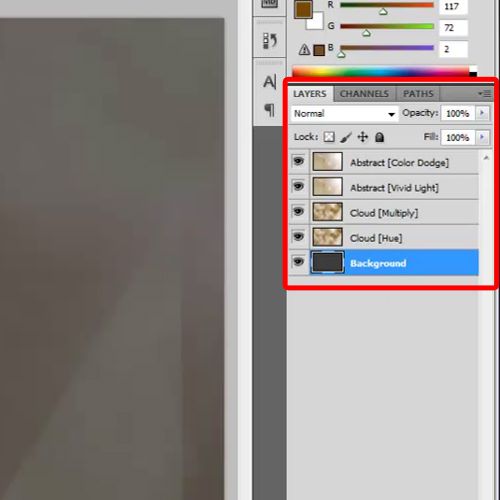
Now change the Blend Mode of the layer to Vivid Light. Select the original clouds layer and change the Blend Mode of that layer to Hue. Now decrease the fill of both the original cloud layer and the lens flare layer to 25 percent.
Step 5 – Duplicate layers and alter the Blend Mode
Now duplicate the original clouds layer and change the blend mode of that layer to “Multiply”. Duplicate the lens flare layer, change the blend mode to Color Dodge and change the fill to 30 percent. Now you can go ahead and rename all the layers before we move further.
Step 6 – Work with textures
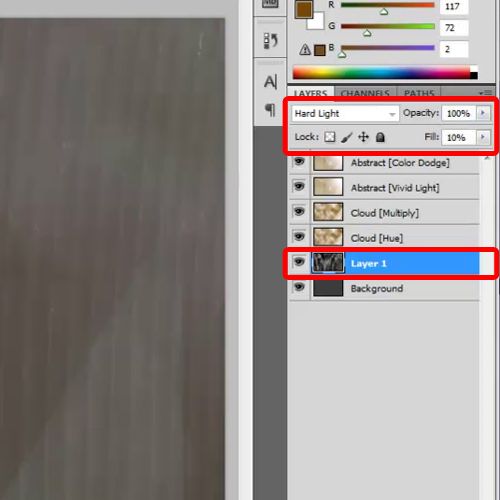
From this point onwards, we would be working with textures. Go ahead and import your first texture on the canvas. Decrease the size according to the canvas, position it right above the background layer, lower its fill to 10 percent, change the blend mode of the layer to hard light and de-saturate the layer.
Step 7 – Modify the layer
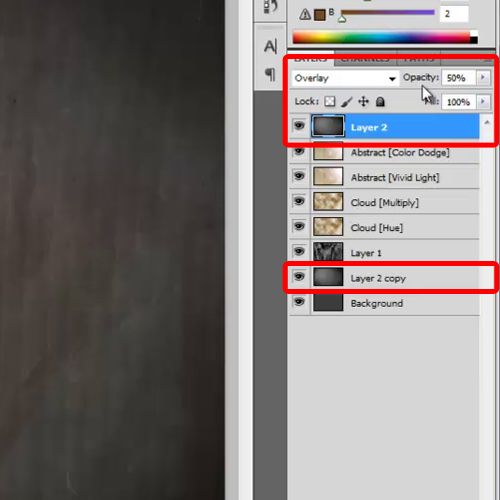
Import the next texture to the canvas. Resize the image according to the canvas and change the Blend mode of the layer to Overlay. Duplicate the same layer, move the layer right above the background layer and change the blend mode of the layer to Luminosity. Reduce the opacity of this layer to 50 percent.
Step 8 – Add a rocky texture
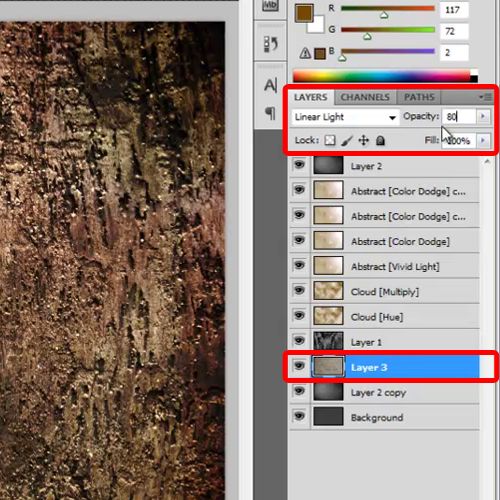
Now add a rocky texture to the canvas and resize the image according to the canvas. Position the layer above the previous texture layer, second to the background layer, reduce the opacity to 80 percent and change the Blend Mode of the layer to Linear Light.
Step 9 – Insert text
Now, we would start adding out text. Pick up the text tool and type in your text. For this tutorial, we would be using “Impact” for the font. Position the text layer below the rocky textured layer.
Choose “754802” for the color of the text layer, change the Blend Mode of the layer to Lighter Color and position the text on the canvas.
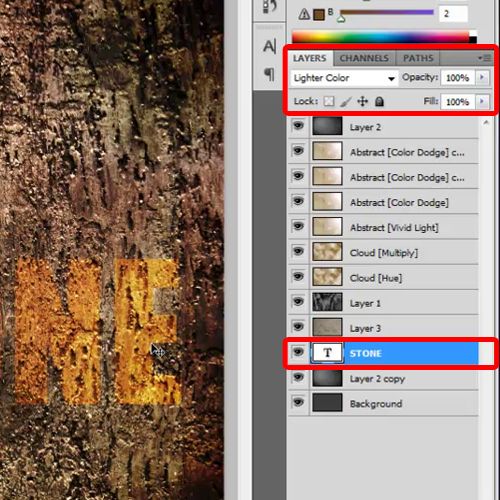
Step 10 – Alter layer style options
Now, open up the layer style options and move over to the Bevel and Emboss tab. Choose pillow emboss for the style, change the color of the Highlight mode to “4f5600” and shadow mode to “871c07”.
Increase the depth to 358 percent, size to 18 pixels and soften to 16 pixels. Make sure you tick on the checkbox titled contour.
It is goo to explore these options and properties as they come in handy while editing photos and making new illustrations from scratch.
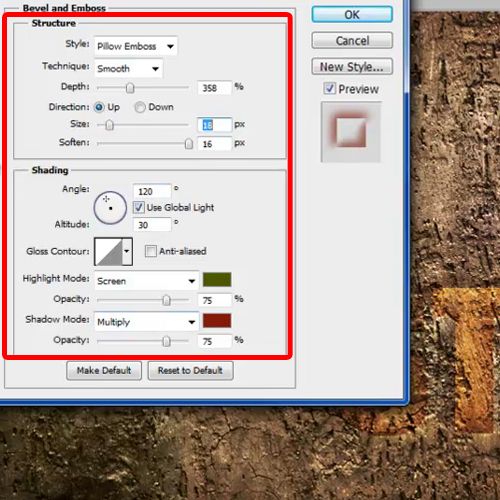
Step 11 – Open the “satin” tab
Once done, move over to the Satin tab. Change the color to “9c7109”, blend mode to normal and opacity to 50 percent.
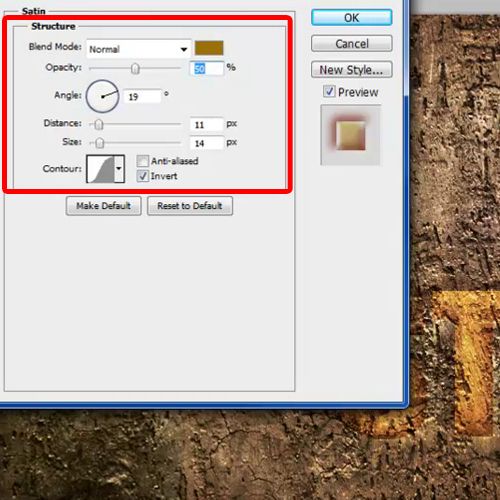
Step 12 – Work with the layers
Now press the ctrl key and click on the text layer to load the selection. Once done, click on the rocky texture layer, press ctrl c and paste the selection on a new layer. Change the blend mode of the layer to darker color and duplicate the layer. Move the duplicated layer right on the top. Now change the blend mode of this layer to Soft Light.
Now there’s a lot you can do to play with the colors and add depth to the image. Play around with the different layers a bit.
You can also play around with these textures while adding photo effects to different photos in Adobe Photoshop which you may not have made from scratch yourself.
 Home
Home