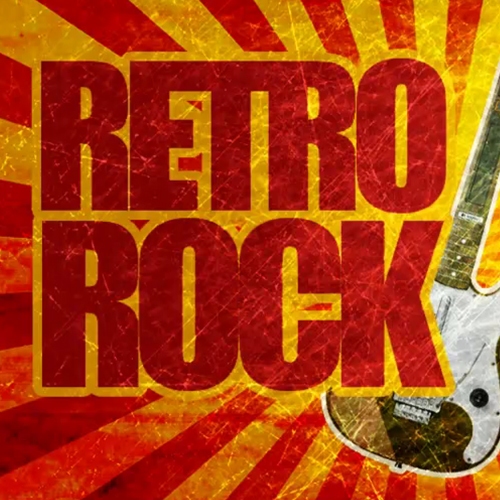
Adobe Photoshop is a software that can be used to express creativity or simply fix photographs. The inticrate options available in Photoshop allow users to create works of art with simple tool. You can create Retro in Photoshop and use these images as part of collages etc. Follow this step by step tutorial to learn how to create vintage posters in Photoshop.
Step # 1 – Use ‘Polygonal Lasso’ tool
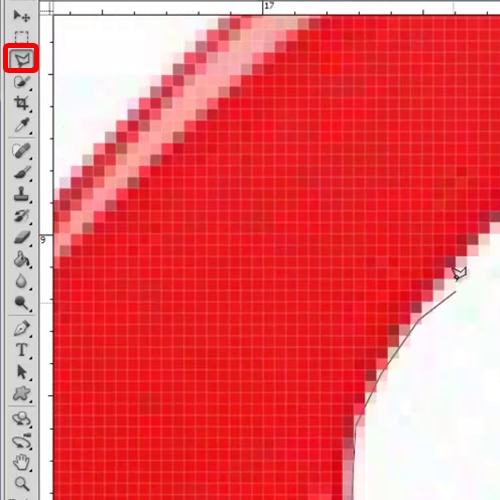
To begin creating a vintage poster in Photoshop, we will cut out this guitar from the background. Since it’s a white background, there are a lot of ways to go about this. We will stick with the “Polygonal Lasso” tool and separate the guitar from the background.
Step # 2 – Add a ‘Retro’ background
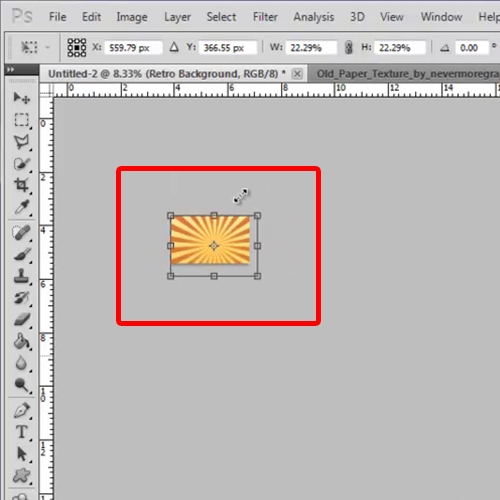
With that done, bring in the first background on to the canvas, a basic retro background that would serve as the basis of the whole poster. Resize the background according to the canvas and bring in the other background on the canvas.
Step # 3 – Add a ‘Grunge’ background
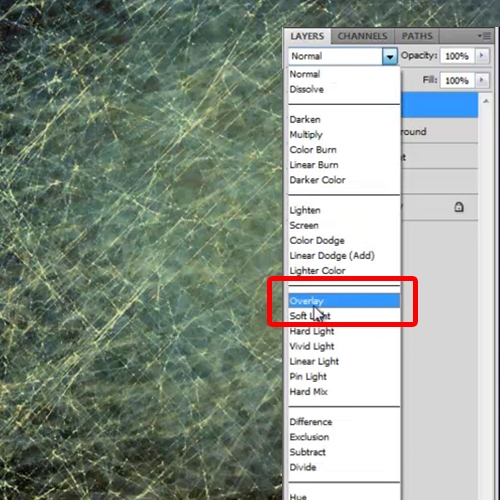
Now bring in a Grunge background with a retro feel to it. Resize the image according to the canvas and change the Blend Mode of this layer to “Overlay”. Now select the guitar cutout layer, place it between the two layers and tilt the image a bit.
Step # 4 – Set Blend Mode to ‘Hard Light’
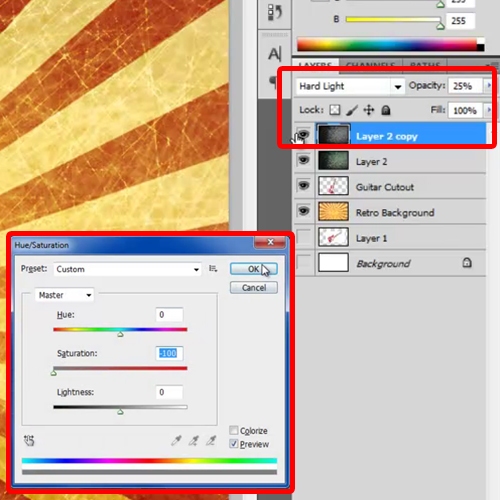
Now duplicate the Grunge background layer, Desaturate it and change the Blend Mode of the layer to “Hard Light”. Once done, reduce the opacity of the layer to 25%.
Step # 5 – Use “Overlay” & “Color Burn” Blend Mode
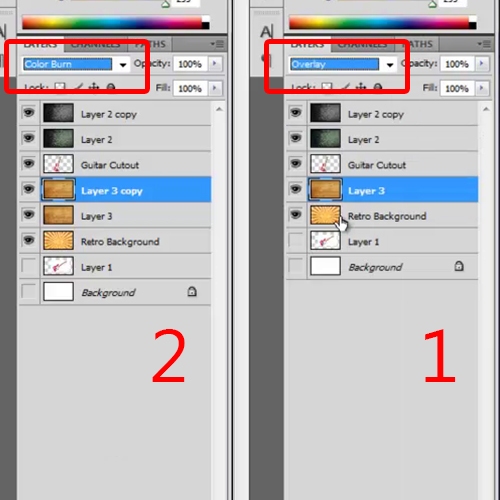
Now, add in the third background which is the old paper texture. Bring the image on the canvas, resize it and position it on the canvas. Now move the layer below the guitar cutout layer and change the Blend Mode of the layer to “Overlay”. Duplicate the old paper texture layer and change the Blend Mode of the layer to “Color Burn”.
Step # 6 – Copy to new Layer
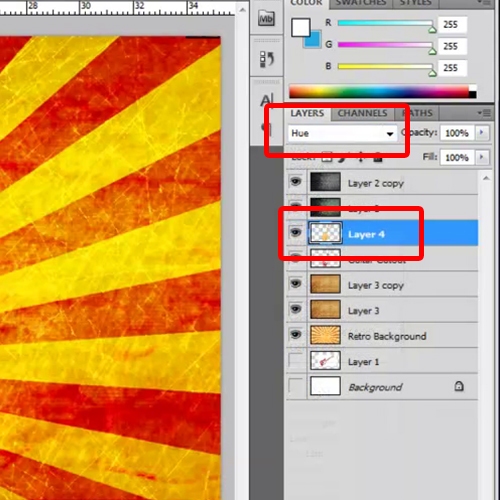
The guitar here isn’t blending that well with the background, so press the CTRL key and click on the guitar cutout layer. This is going to load the selection of the layer. Now select the retro background layer, copy the selection and paste it on a new layer. Move the layer above the guitar cutout layer and change the Blend Mode of this layer to “Hue”. The created look in completely Retro in Photoshop.
Step # 7 – Apply ‘Stroke’ to 10 pixels
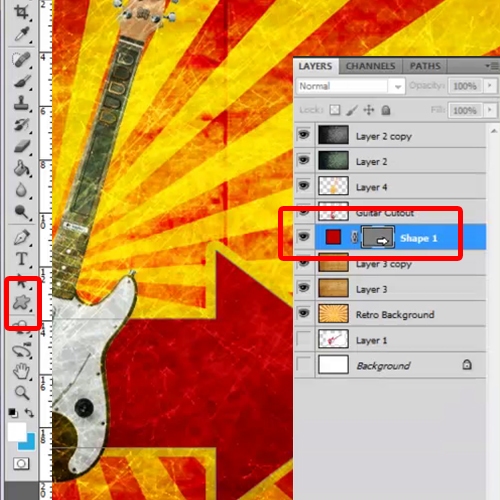
Now, pick up a custom shape, for example here we would be selecting the shape of an arrow. Draw the shape besides the guitar and choose “BB0100” for the color fill. Open up the “Layer Style” options of the shape layer and move over the “Stroke” tab. Choose “F1CA00” for the color fill and increase the size of the Stroke to 10 pixels.
Step # 8 – Reduce ‘Stroke’ to 5 pixels
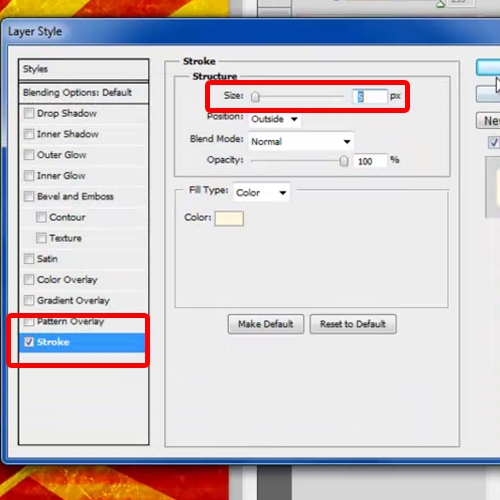
Now select the guitar cutout layer and open up the “Layer Style” options. Move over to the “Stroke” path, change the size to 5 pixels and use white color for the “Fill”.
Step # 9 – Create text
Now we will input our text. For this, we would be selecting “Impact” for the “Font”, keeping the “Font Size” at “222”, “Font Spacing” at “-70” and “Line Spacing” at “187”. Select “CD1D1B” for the font color and move the layer on top of the guitar cutout layers. Open up the “Layer Style” options of the text layer and move over to the “Stroke” tab. Set the “Stroke Size” to 10 pixels and choose “FFC104” for the color of the stroke. Now what we’ve done here is duplicated the same arrow shape and arranged it accordingly on the canvas.
Step # 10 – Copy selection to New Layer
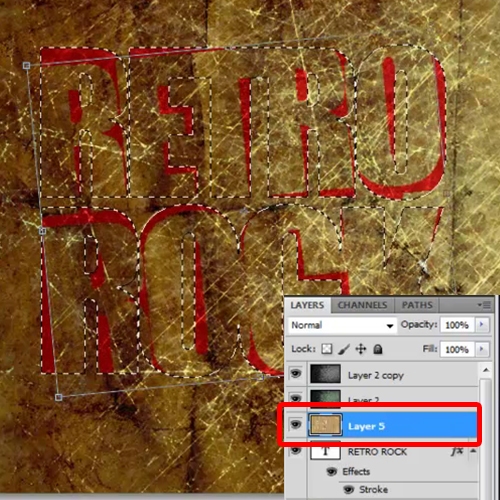
Now we will be adding another grunge pattern in the document for the text. Once done, press the Ctrl key and click on the “Text Layer”. This will load the selection of the text layer. Tilt the selection a bit using the “Transform” tool and copy paste the selection onto a new layer. With that done, change the Blend Mode of the layer to “Difference” and you’re done.
 Home
Home