In this tutorial, we are going to create a beautiful design of a water surface. For this purpose, we are using Adobe Photoshop. We are using various Photoshop filters and few coloring techniques to complete our design. By going through this Photoshop tutorial, you will learn how to use different filters to create a design.
Follow this step by step guide to learn how to create a water surface background in Photoshop.
Step # 1 – Applying the Clouds Filter
In the first step of this tutorial, launch Adobe Photoshop and open up a blank document. It is recommended to use a white background for this design. Now press the “D” key on the keyboard to set the “Foreground” color to Black. Once done, we will apply a series of filters on this layer. First of all, go to the “Filter” menu, select “Render” and click on the “Clouds” filter from the list.
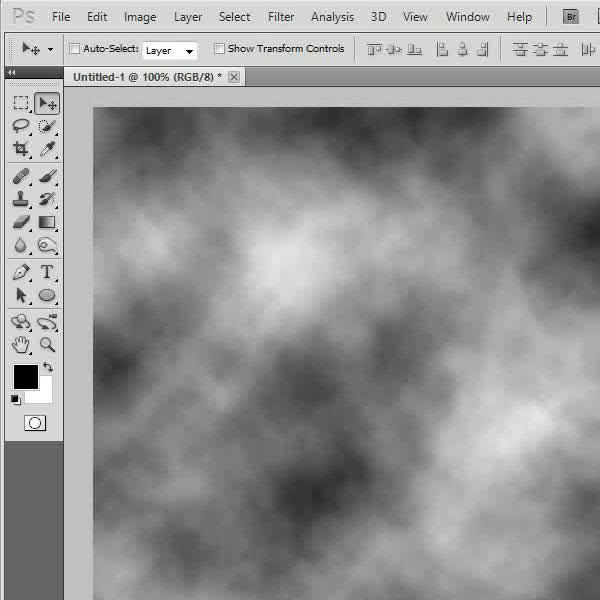
Step # 2 – Applying the Radial Blur
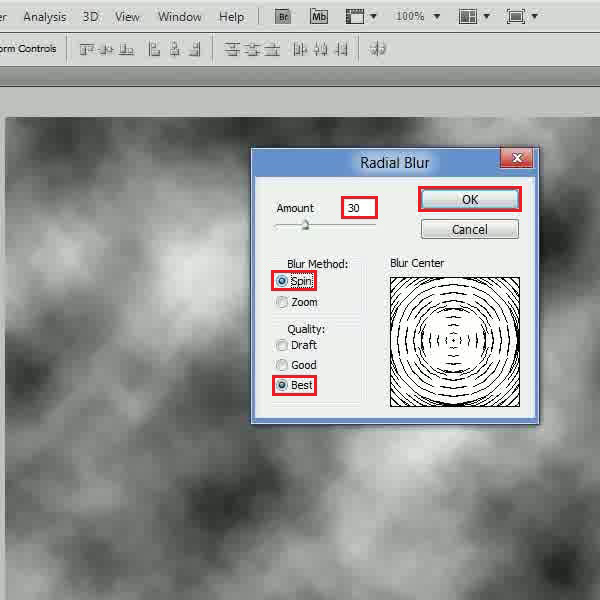
In the next step, go to the “Filter” menu, select “Blur” and click on the “Radial Blur” filter from the list. Set the blur “Amount” to “30”, “Blur Method” to “Spin” and “Quality” to “Best”. After changing these settings, click on the “OK” button to apply it.
Step # 3 – Applying the Gaussian Blur
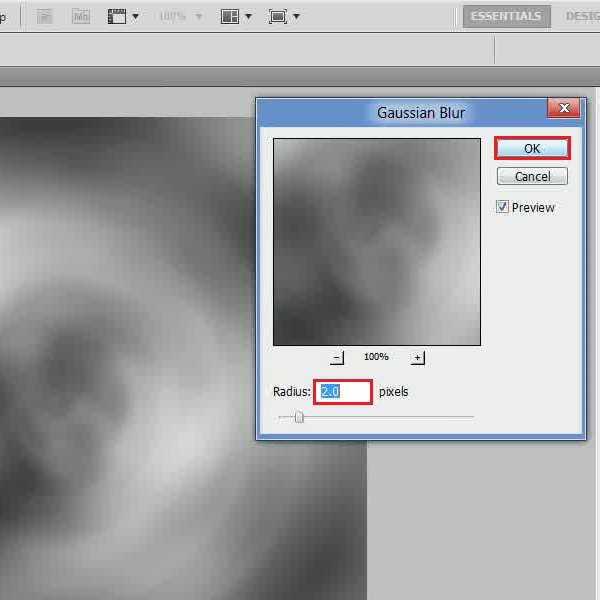
Now again go to the “Filter” menu, select “Blur” and click on the “Gaussian Blur” filter from the list. In the filter settings panel, set its “Radius” to “2 pixels” and click on the “OK” button to apply it on the layer.
Step # 4 – Applying the Bas Relief
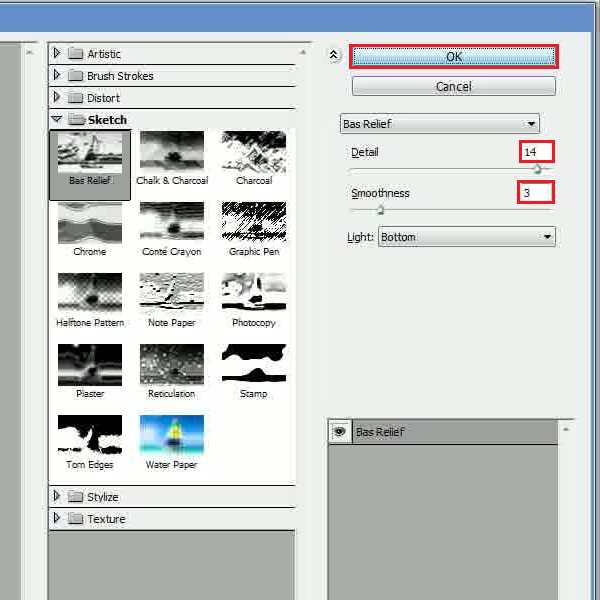
Now in the next step, go to the “Filter” menu, select “Sketch” and click on the “Bas Relief” filter from the list. In the filter settings panel, set its “Details” to “14”, “Smoothness” to “3” and apply it on the image.
Step # 5 – Applying the Chrome Filter
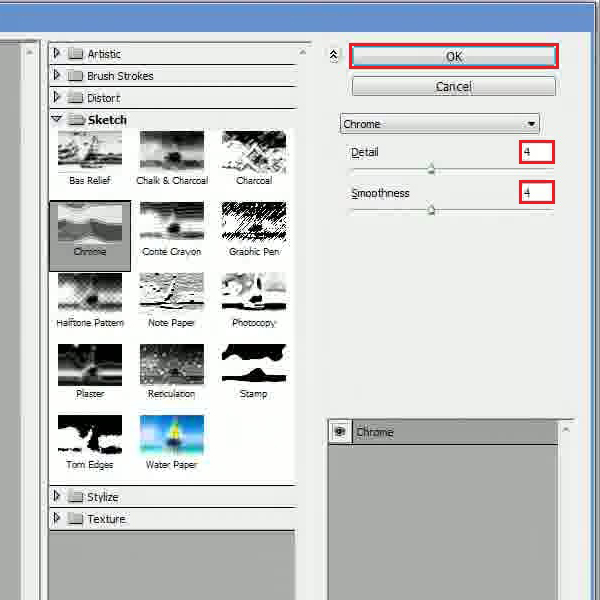
Now go back to the “Filter” menu, select “Sketch” and click on the “Chrome” filter from the list. In the filter settings panel, set its “Details” and “Smoothness” to “4” and click on the “OK” button to apply it on the layer.
Step # 6 – Adjusting Hue/Saturation
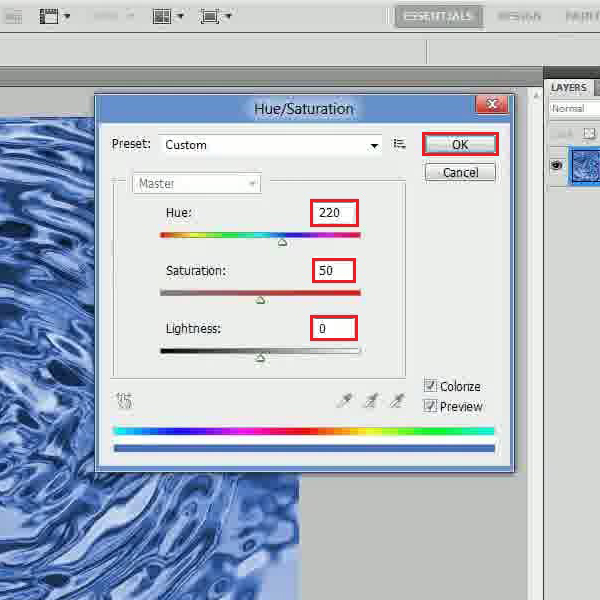
In the last step, go to the “Image” menu, select “Adjustments” and click on the “Hue/Saturation” option. Select the “Colorize” option then set the “Hue” to “220”, “Saturation” to “50”, “Lightness” to “0” and click on the “OK” button to apply it.
 Home
Home