Wood texture is one of those textures in particular that seems to be hugely popular. The wooden texture can be used almost anywhere in any project and still look elegant. In this Photoshop tutorial, we’ll be creating a wood text treatment. We’ll go over some basic blending modes and use some filters and layer styles to create a look that would be perfect for different posters and artwork.
We will learn how to create a wood effect in Photoshop in this tutorial. Over here, we will only be using textures to apply a wooden effect on the text layer.
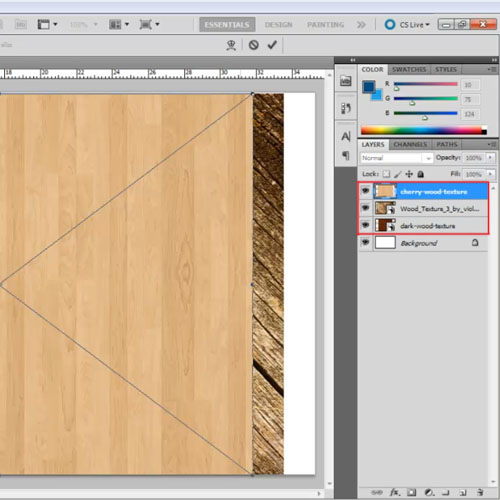
Step # 1 – Open all the textures
So first of all, bring all of the different textures you’re going to work with on the layers. Here, we’ll be working with 4 texture layers.
Step # 2 – Insert the text
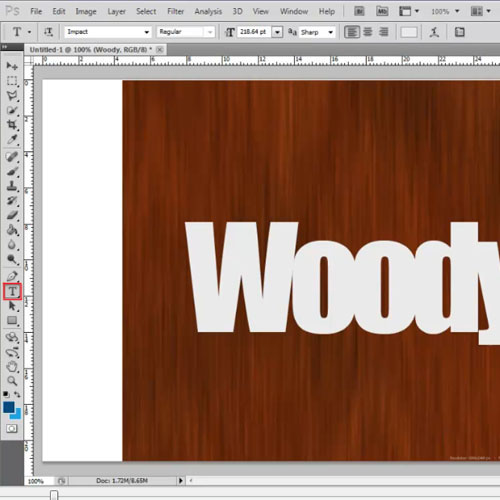
So first of all, pick up the “text tool” and type in your text. Over here we have used “Impact” for the font. Make the textured layer visible and increase the size of the text layer using the “transform tool”. You can position the text layer accordingly.
Step # 3 – Expand the selection
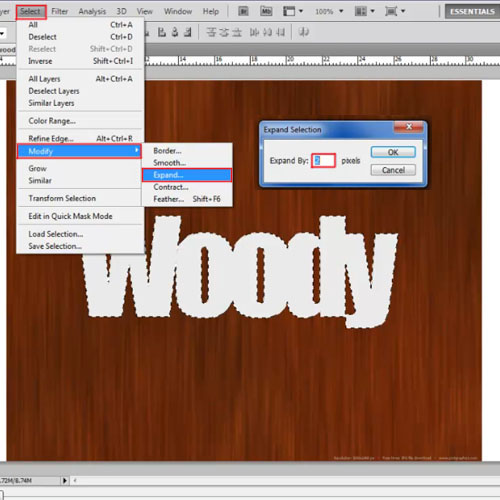
Now press the “control” key and select the text layer. This will load the selection automatically. Now go to the “select” menu, move over to “modify” and choose the “expand” option. Expand the selection by 2 pixels. Now select the texture layer and simply copy paste the selection on to a new layer.
Step # 4 – Create the outline of the text
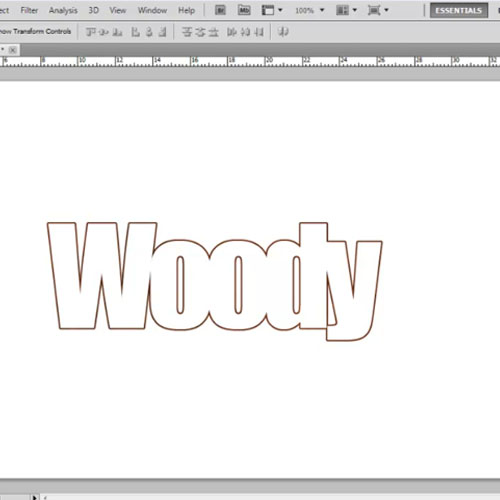
In this step, hide the texture layer, and here you can see that an outline has been created for the text. But if you hide the text layer, you can see that the newly created texture layer covers the body of the text, not just the outline. Press the “control” key and select the text layer to load the selection. Move over to the newly created textured layer and hit “delete”. We now just have the outline of the text left.
Step # 5 – Create the body of the text
Load the selection of the text layer once more and make another textured layer visible, in this case the cherrywood texture. We will use this for the body of the text. Copy and paste the selection on to a new layer.
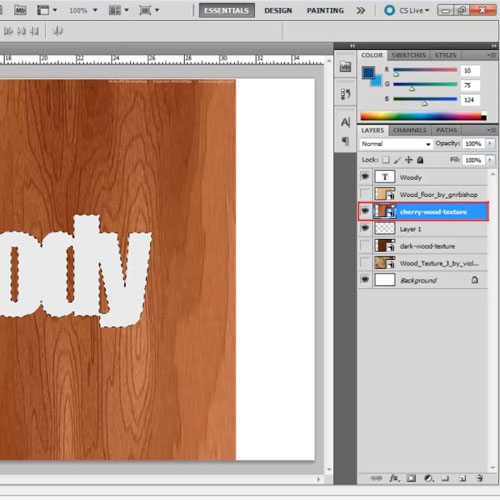
Step # 6 – Apply Layer style options
Now open the “layer style” options of the “Outline” layer and move over to the “Bevel and Emboss” tab. Over here, choose “Pillow Emboss” for the style, “Chisel Soft” for the technique, keep the depth to “500%”, size to “20 pixels”, soften to “0 pixels”, set the angle to “0 degrees” and altitude to “90 degrees”. For the Highlight mode and Shadow Mode, choose “68260d” for the color fill. Set the highlight mode to “Screen” with the opacity as “75%” and the Shadow mode as “Multiply” with the opacity at “100%”.
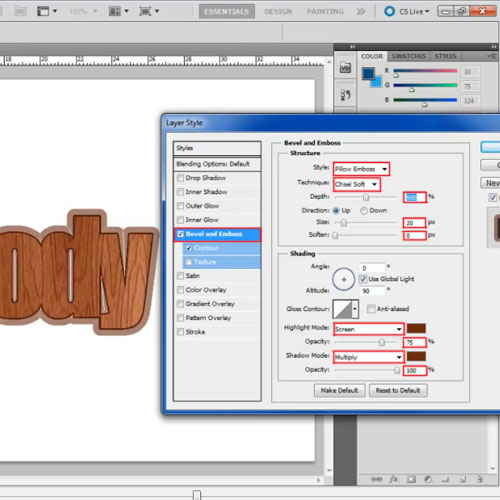
Step # 7 – Apply contour option
With that done, click on the “Contour” option and set the range to 100%. Now close the layer style window, right click on the “outline effects” option and choose “create layers”. This will create separate layers for each effect that we had added to the layer.
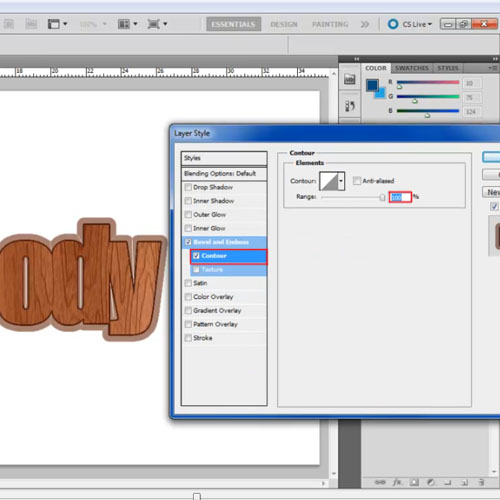
Step # 8 – Change the blending mode to hard light
Now load the selection of the Outline’s Outer Emboss effect layer, make another textured layer visible, which in this case is the wood floor texture and then copy and paste the selection on to a new layer. Now move the newly created layer right at the top, below the “Inner Body” layer, and change its blending mode to “hard light”.
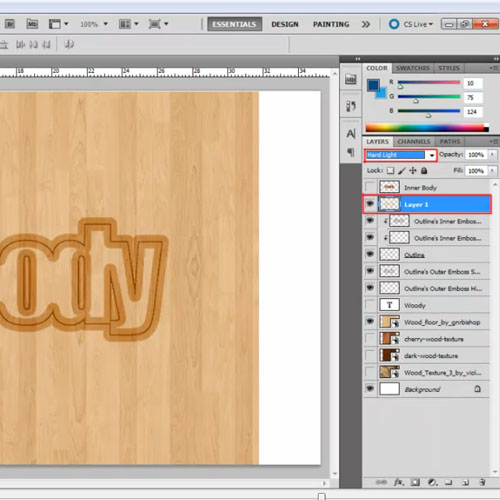
Step # 9 – Apply another texture to the body text
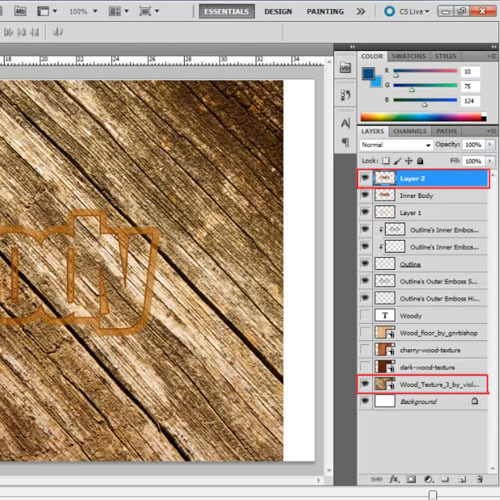
Now load the selection of the inner body layer and copy the selection from a new texture, which in this case is “wood texture 3”. Paste the selection on to a new layer and move it right at the top. With that done, change the blend mode of the layer to darker color.
Step # 10 – Apply texture layer to outline layer
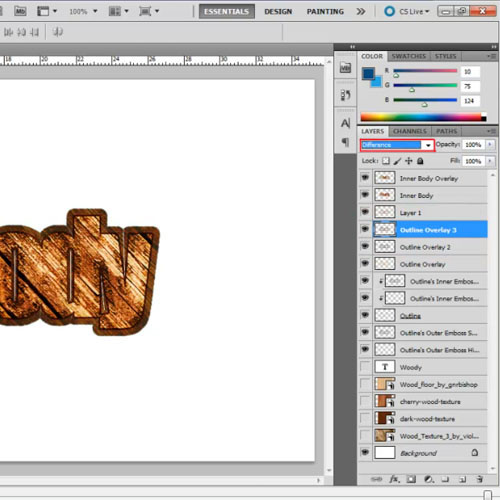
Over here what we’ve done to create a wood effect in Photoshop is that we added 2 additional texture layers for the “Outline” layer, following the same steps as before. For the second “outline” layer we have used the dark wood texture and set its blend mode to “Overlay”. For the third outline layer we have simply copied the second one and changed its blend mode to “Difference”.
Step # 11 – Apply background
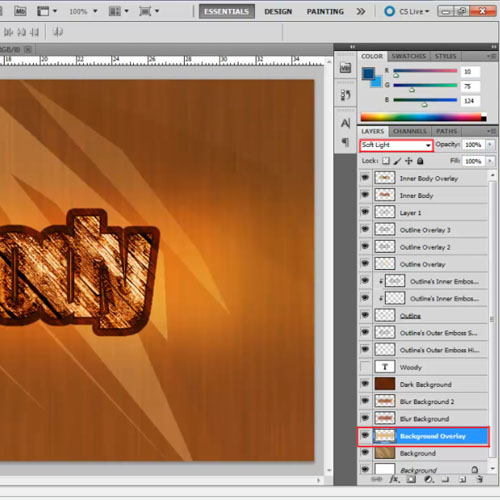
In the last step of this Photoshop tutorial, we’ll work on the background using nothing but these four texture layers and different effects.
 Home
Home