Tutorials for Photoshop provide us with information of how to perform different actions in this software. They give you training as to how to use it as a photo editor to using it for typography or to create images from scratch.
In this tutorial, we are going to create an iPhone app icon by using Adobe Photoshop. This tutorial is perfect for beginners who are looking for the basic web designing techniques. We are using few blending options to complete the design. By going through this tutorial you will get a clear idea on how to design small icons, banners and headers.
Follow this step by step guide to learn how to create an iPhone style icon in Photoshop.
Step # 1 – Draw a Basic Icon Shape
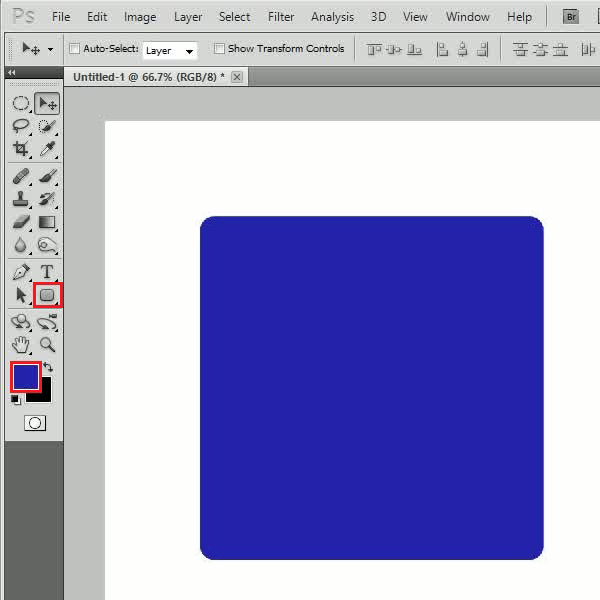
In the first step, launch Adobe Photoshop and open up a blank page. Now select the “Rounded Rectangular” tool, choose its color as “2020ad”, set its radius to “20px”. Draw it on the canvas. Once done, align it to center of the page.
Step # 2 – Draw the Outline
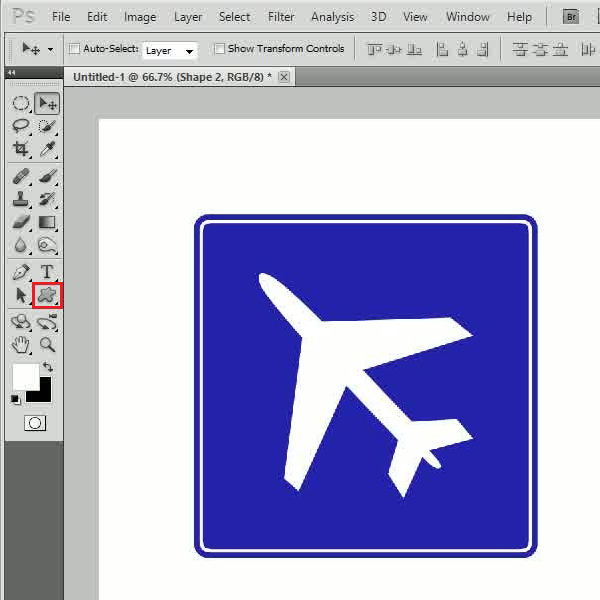
In the next step, insert a new layer and “Ctrl+Click” on the shape layer to select its outline. Once done, contract the selection by “10 pixels”, give it a stroke of “5px” using the “White” color.

Step # 3 – Insert a Custom Shape
Now select the “Custom Shape” tool from the menu and insert “Custom Shape” of your choice over it. Here we are using the custom shape of a “Plane”. It is recommended to use a “White” color for your shape.
Step # 4 – Adjust the Inner Shadow Settings
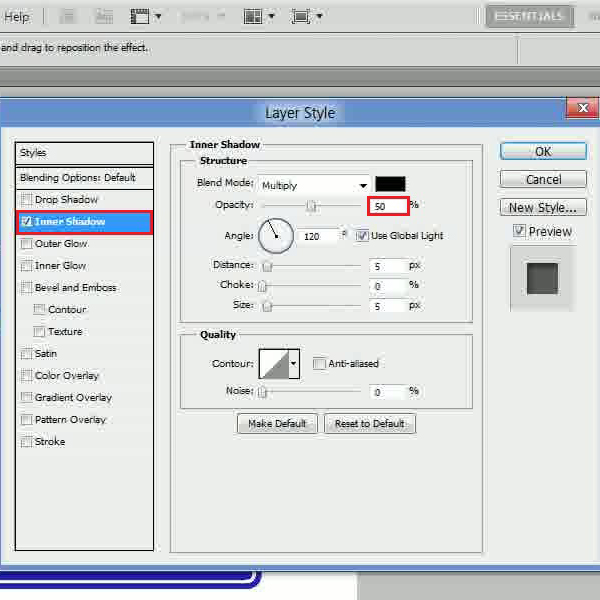
Now open the blending options of the custom shape layer and move over to the “Drop Shadow” tab. In this tab change the opacity of the drop shadow to “50 percent”.
Step # 5 – Adjust the Bevel and Emboss Settings
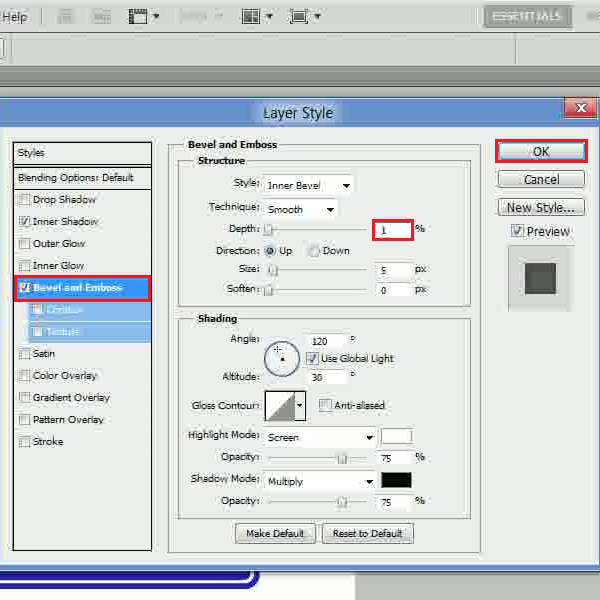
In the next step, move over to the “Bevel and Emboss” tab and set its depth to “1 percent”. After changing its settings, click on the “OK” button to apply it on the image.
Step # 6 – Apply a Gradient
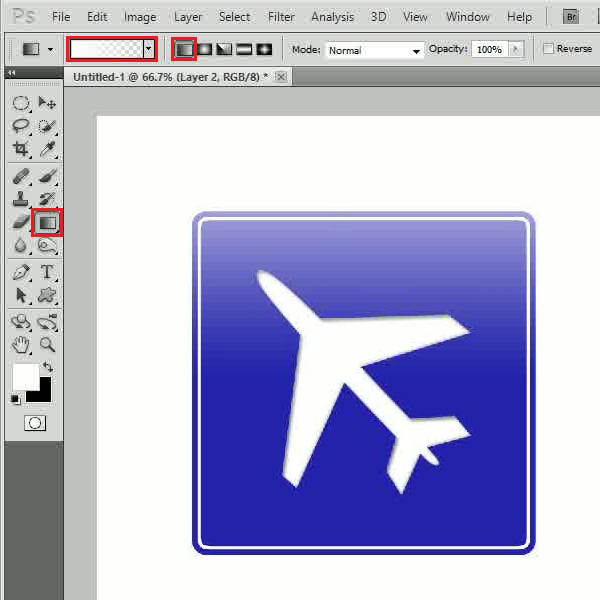
Now, insert a new layer and apply the “White to Transparent” gradient from the top to bottom on the layer.
Step # 7 – Apply a Reflection Effect
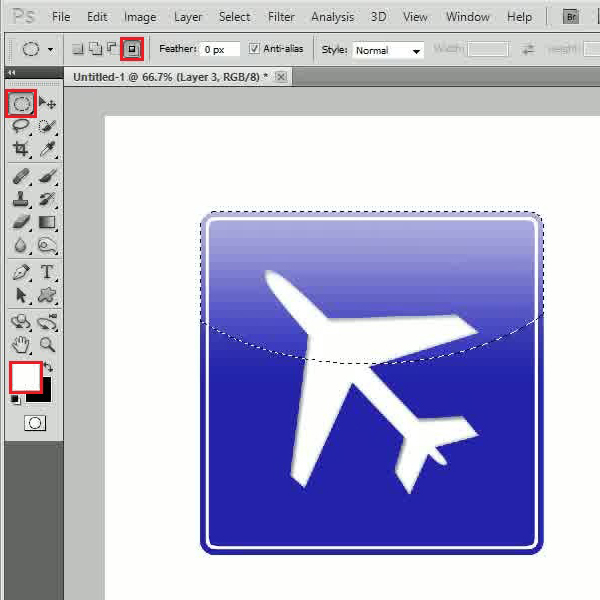
Insert another layer, select the “Eliptical Marquee” tool, choose the “Intersect with Selection” option and select the upper part of the icon. Once done, fill the selection with “White” color, change its blending mode to “Overlay” and decrease its opacity to “20 percent”.
These options can also be used in Photoshop on an existing image where they would help and work as photo editor tools.
Step # 8 – Adjust the Drop Shadow Settings
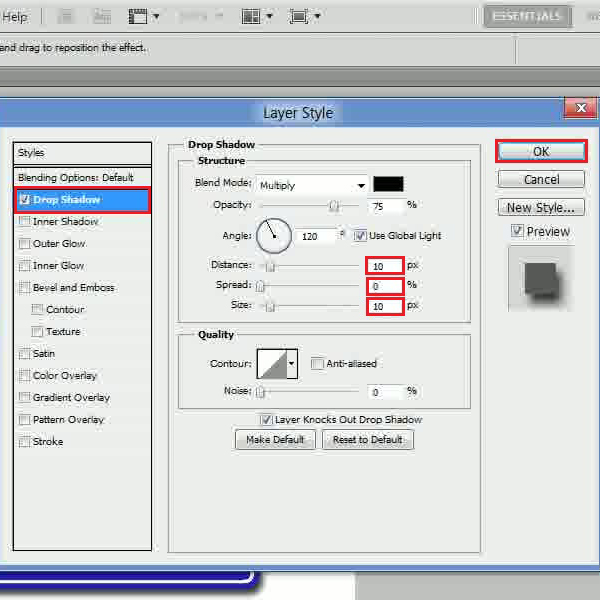
In the last step, open the blending options of the “Shape 1” layer and move over to the “Drop Shadow” tab. Now set its distance to “10px”, spread to “1 percent”, size to “10px” and click on the “OK” button to apply it.
You can even learn to create other effects and images by looking at different tutorials for Photoshop so as to learn more about the use of this software.
 Home
Home