What makes a website eye-catching and special is its interface. There are various key factors in a display of a website like its fonts, colors, style, images and themes. With Photoshop, it’s fun to create different types of image edits and fonts designs. Today we are going to show you how to design a simple typography. We are using few simple techniques to give a folded effect to specific text.
Follow this step by step guide to learn how to create folded typography in Photoshop.
Step # 1 – Inserting Text
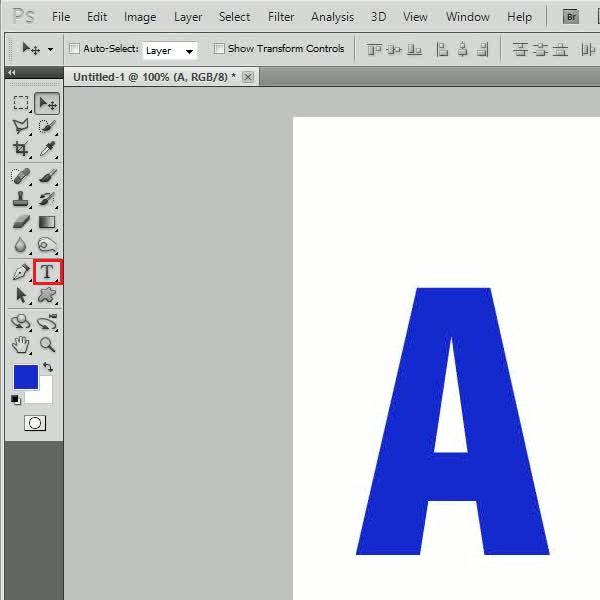
In the firsts step, launch Adobe Photoshop and open a blank document. Now select the “Text” tool from the menu located at the left corner of the screen. After selecting it, choose your desired fonts, its size and color. Now insert a text or a single character of our choice on the page. Once done, align it to the center of the page. After aligning it, go to the “Layer” menu, select “Rasterize” and click on the “Type” option to rasterize the layer.

Step # 2 – Using the Layer via Cut Option
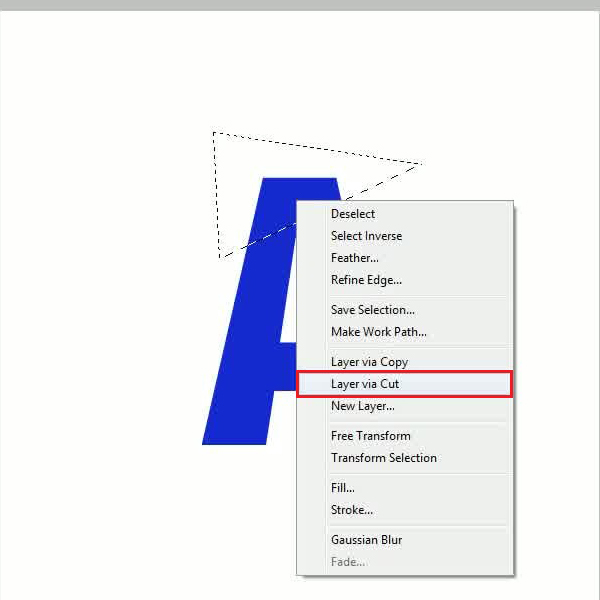
In the next step, select the “Lasso” tool from the menu and create a selection at the top corner of the character. After making the selection, right click on it and select the “Layer via Cut” option from the menu. This will cut the selection and make a separate layer for it.

Step # 3 – Creating a Fold Layer
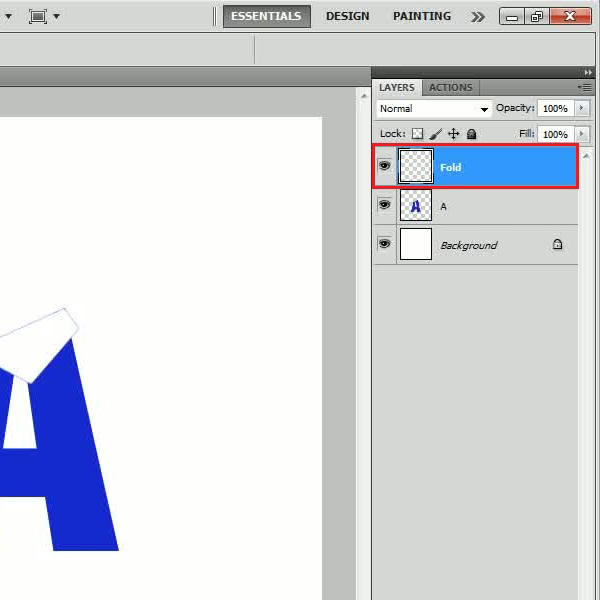
Once you have created a new layer for the selection, transform it upside down and adjust its placing. Now select the foreground color to white and press the “Alt+Backspce” key on the keyboard to fill the selection with it. After filling it up, rename this layer to “Fold”. Now double click on its layer name to open its blending options.

Step # 4 – Adjusting the Gradient Overlay Option
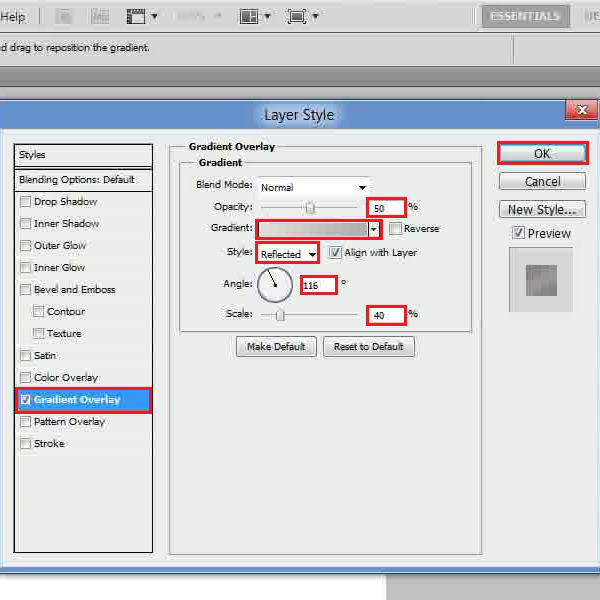
Once the blending option panel has opened, move over to the “Gradient Overlay” tab and set its opacity to “50 percent”. Now choose the color as “e2dede” for the left and “b2afaf” for the right gradient. Choose the style as “Radial”, set the angle to “116 degrees” and scale to “40 percent”. After changing these settings, click on the “OK” button to apply it.

 Home
Home