Most of the time you see images and text appear in the form of clouds, lighting, textures and other beautiful patterns in movies or adds. Well this is not as difficult as it looks. By using Photoshop, you can easily create these cool effects. Here we are using an image of a tiger and manipulating it so that it appears like a cloud.
Follow this step by step guide to learn how to create images from clouds in Photoshop.
Step # 1 – Applying a Clouds Filter
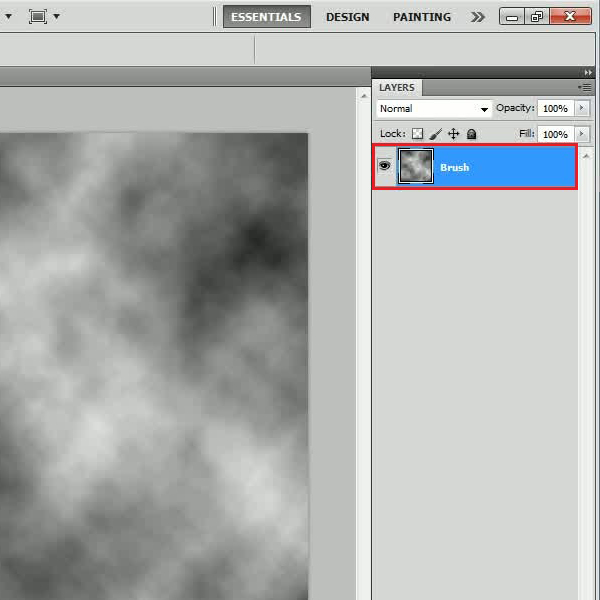
In the first step, launch Adobe Photoshop and open up a new transparent document. Now go to the “Filter” menu, select “Render” and click on the “Clouds” filter from the list. Make sure that you have selected the “Black” color for “Foreground” and “White” color for the “Background”.
Step # 2 – Creating a Selection
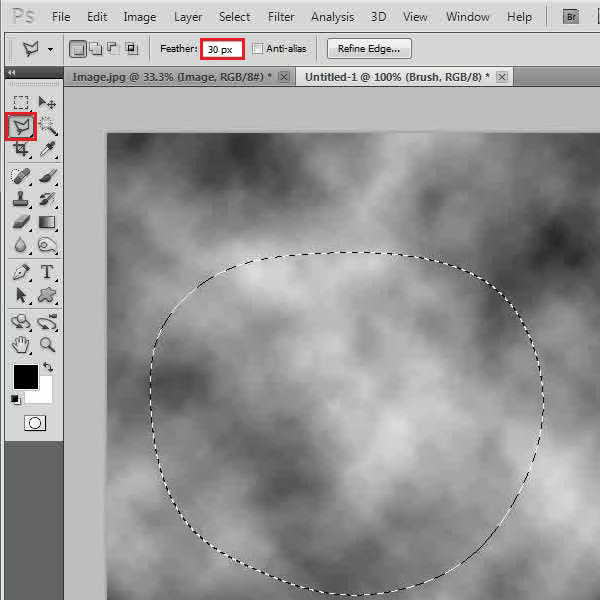
Now select the “Polygonal Lasso” tool from the menu, choose its “Feathers” to “30 px” and draw a rough round shape.
Step # 3 – Removing Borders
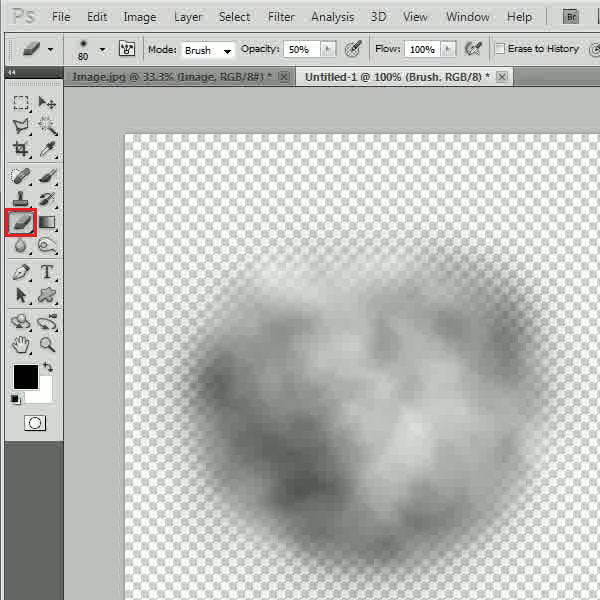
In this step, press the “Ctrl+Shift+I” key on the keyboard to inverse the selection and press the “Del” button to remove it. Now select the “Eraser” tool with a soft brush and remove edges around the image to make it smooth.
Step # 4 – Creating a Clouds Brush
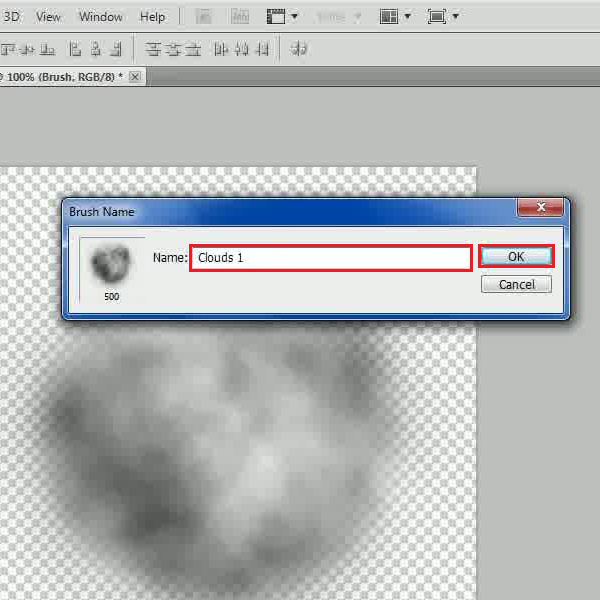
Now go to the “Edit” menu and select the “Define Brush Preset” option. Once done, enter its “Name” as “Clouds 1” and click on the “OK” button to save it.
Step # 5 – Changing the Brush Size
Once done, select the “Brush” tool, go to the “Windows” menu and select “Brush” option to open its properties. In the “Brush Tip Shape” tab, select the “Clouds 1” brush and change its “Size” to “430 px”.
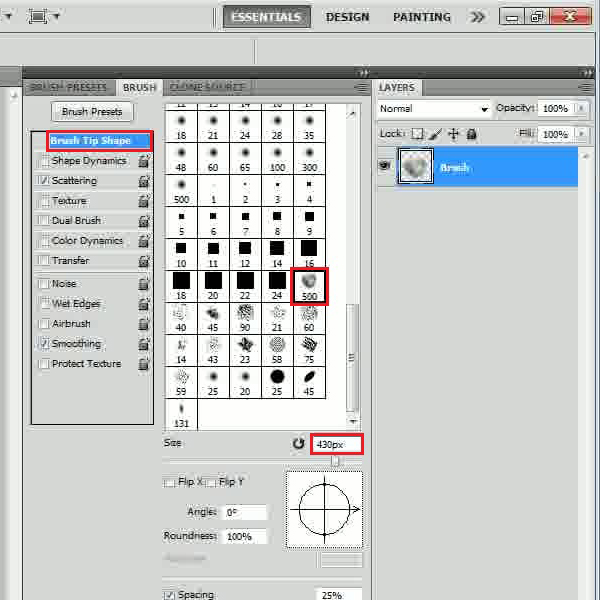
Step # 6 – Changing the Brush Scattering
In the next step, go to the “Scattering” tab, choose the “Scatter” to “160 percent”, “Count” to “2” and “Count Jitter” to “15 percent”.
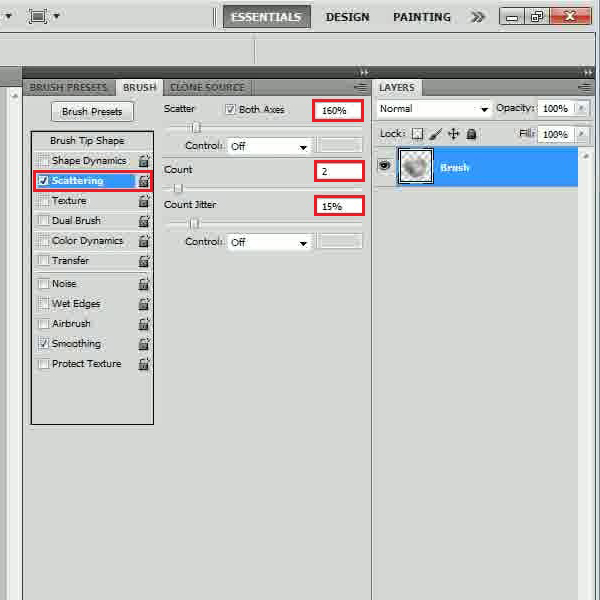
Step # 7 – Creating a New Clouds Brush
Now click on the “Create New Brush” icon at the bottom of the panel and enter the name of this brush as “Clouds 2”.
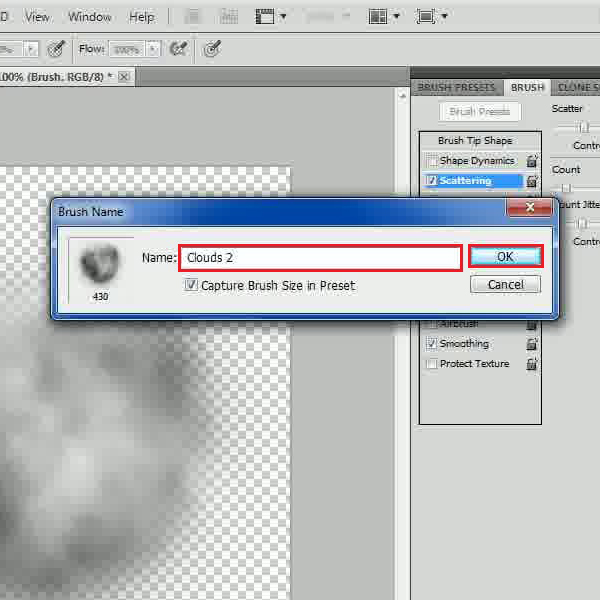
Step # 8 – Opening an Image
Once you have created a clouds brush, close this panel and the document. Now move on to an image.
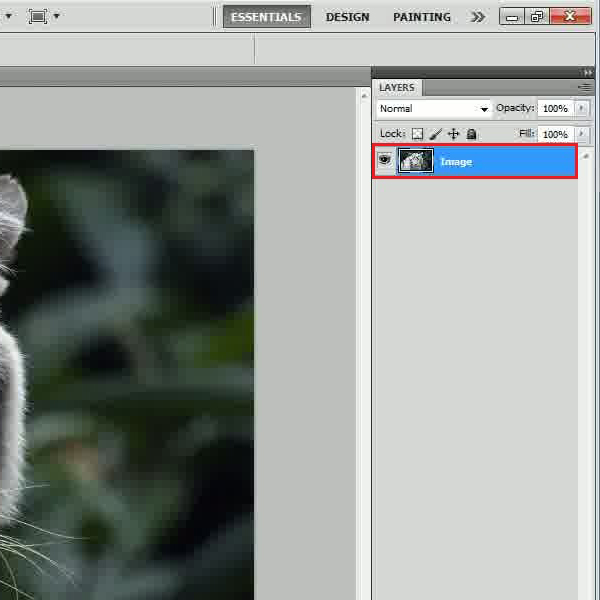
Step # 9 – Applying a Gradient
In this document, insert a new layer and change its name to “Sky”. Now set the “Foreground” color to “192559” and “Background to “91aac8”. Once done, select the “Gradient” tool and draw a linear gradient from the top to bottom on this layer.
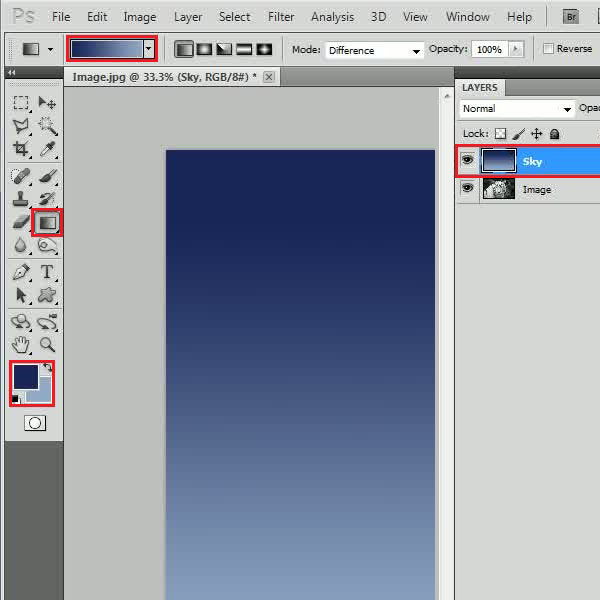
Step # 10 – Using the Clouds Brush
Now move the “Image” layer on top, select the “Eraser” tool and choose the “Clouds 2” brush. Apply it on the whole image, use “50 percent” opacity near the tiger’s face. Continue applying the Eraser once whole image is removed except the tiger face.
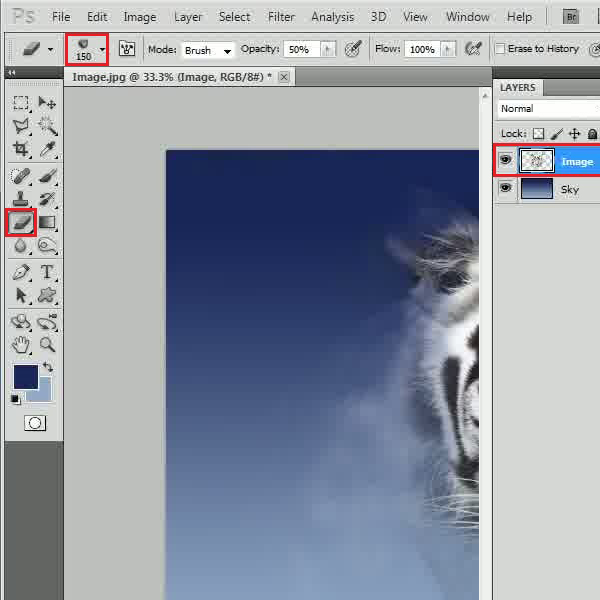
Step # 11 – Desaturating the Image
Once done, go to the “Image” menu, select “Adjustments” and click on the “Desaturate” option from the list.
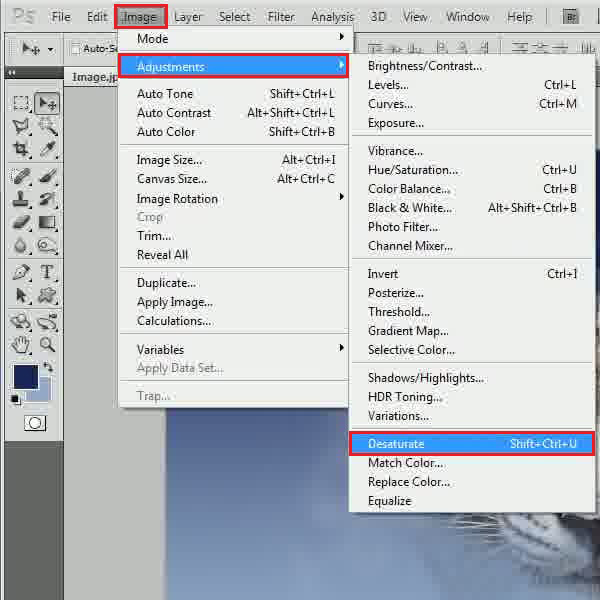
Step # 12 – Increasing the Brightness
Now again go to the same “Image” menu, select “Adjustments” and click on the “Brightness/Contrast” option. In this panel, increase the “Brightness” level to “100” and click on the “OK” button to apply it.
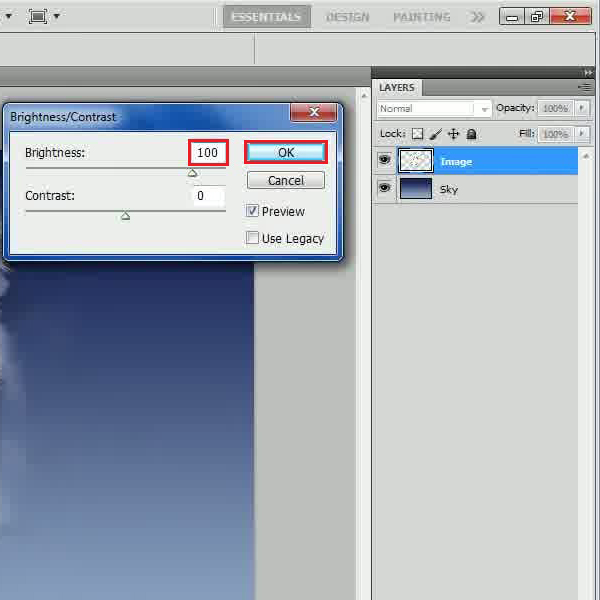
Step # 13 – Applying a Gaussian Blur
Now we’ll apply a series of blur filters on the image. First start with the “Gaussian Blur” filter with the “Radius” of “5 pixels”.
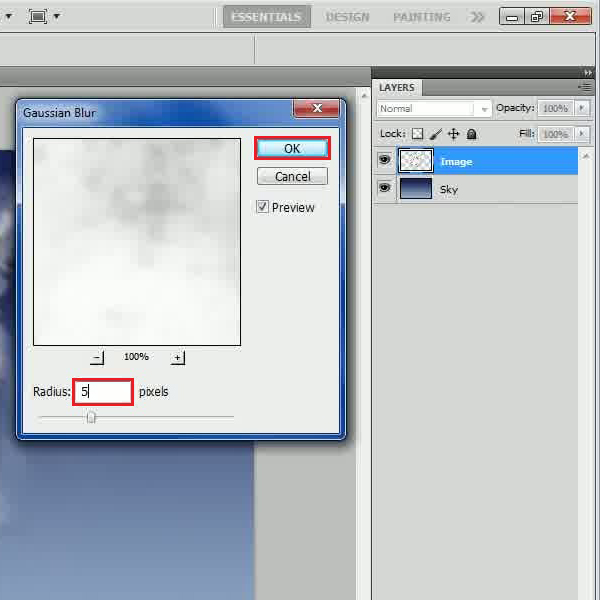
Step # 14 – Applying a Smart Blur
Once done, apply a “Smart Blur” filter by setting its “Radius” as “15.0” and “Threshold” as “25.0”.
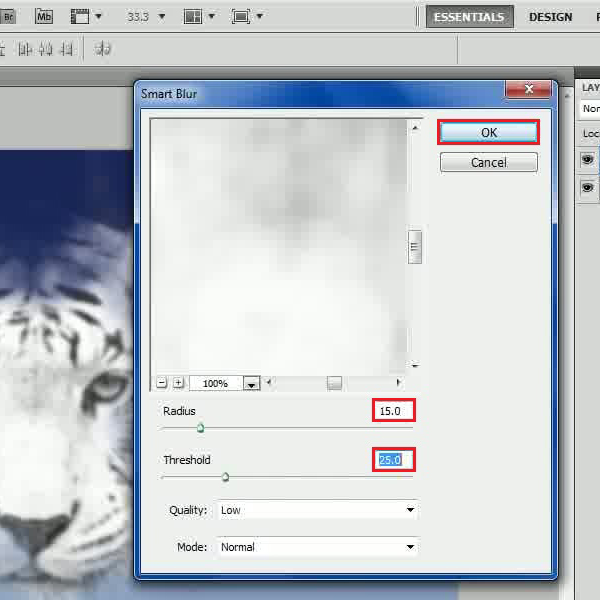
Step # 15 – Applying a Motion Blur
Now apply a “Motion Blur” filter by settings its “Angle” to “0 degree” and “Distance” to “40 pixels”.
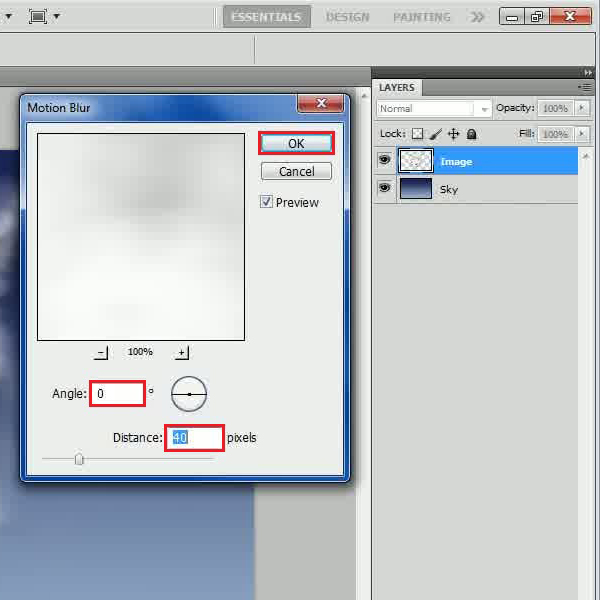
Step # 16 – Changing the Blending Mode
Once you have applied all these filters, your image should look like the snap shot. Now change the “Blending Mode” of this layer to “Soft Light”.
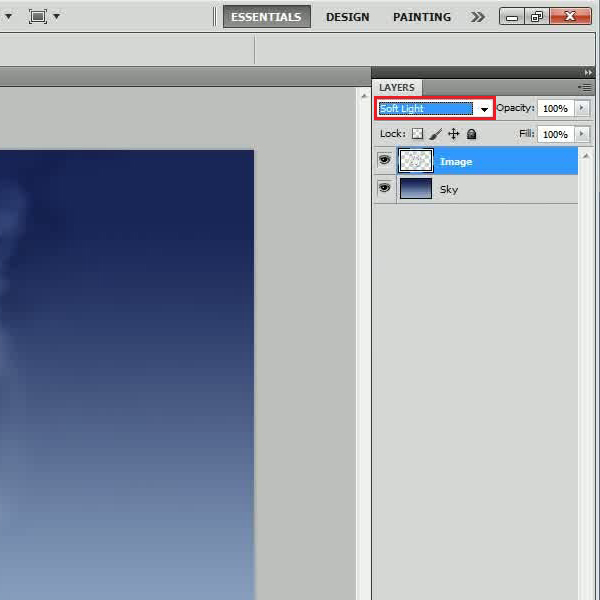
Step # 17 – Creating a Clouds Layer
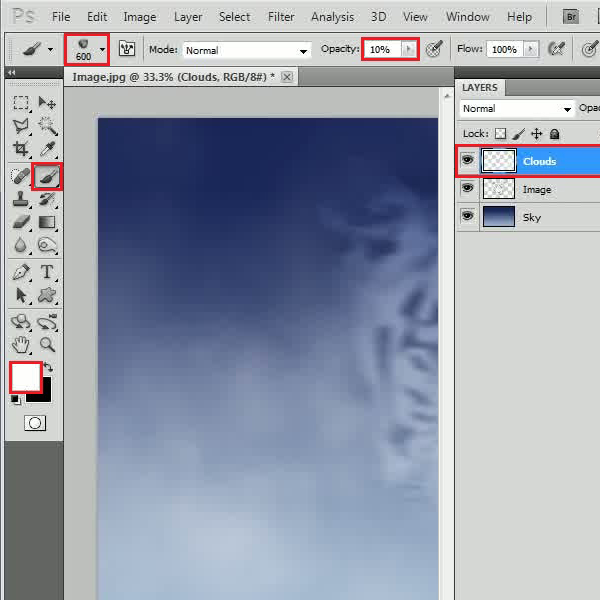
In the next step, insert a new layer and change its name to “Clouds”. Now select the “Brush” tool with the same “Clouds 2” brush and apply it on the layer by using “White” color.
Step # 18 – Creating a Shadow Layer
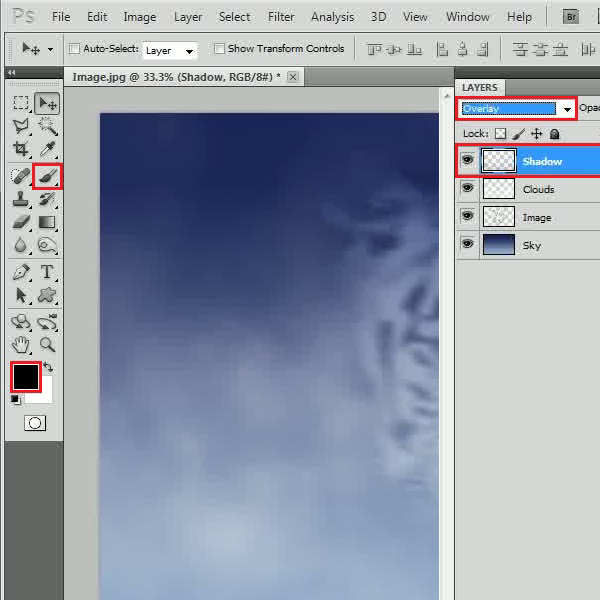
Once done, insert a new layer and change its name to “Shadow”. Now slightly apply the same brush by using “Black” color. After applying it, change the “Blending Mode” of this layer to “Overlay”.
Step # 19 – Decreasing the Opacity
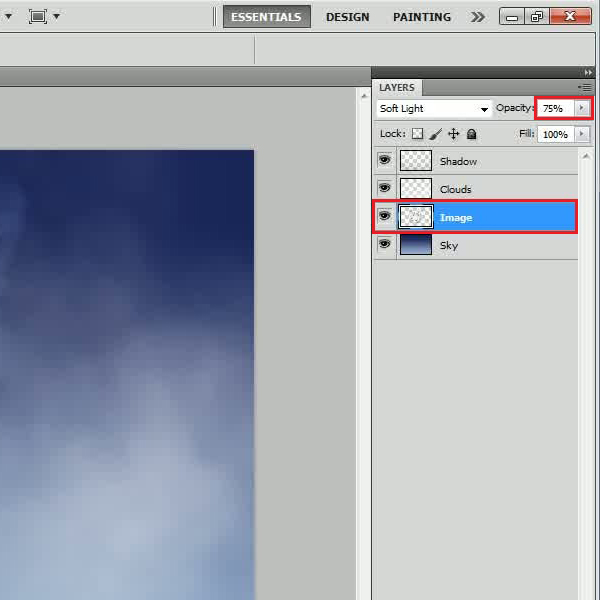
In the final step, select the “Image” layer and decrease its “Opacity” to “75 percent”. There you have completed the image with a nice clouds effect.
 Home
Home