Text in Illustrator can be given different effects including a metal text effect. Doing this is not as difficult as it may appear to be, and one can do so by following a few simple steps.
To find out how to create a metallic text in Adobe Illustrator follow the directions given below.
Step # 1 – Inserting text
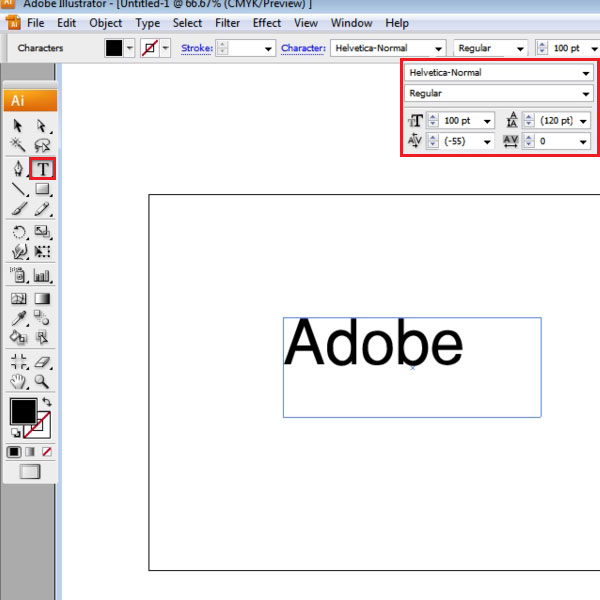
Start off by entering text. Here you can choose the font type and size. In this case, the type used is “Helvetica-Normal” at “100pt”.
Step # 2 – Adding a new fill
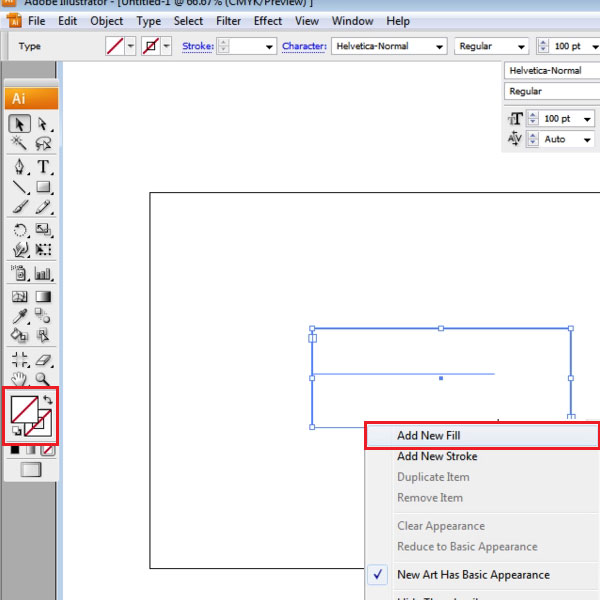
Remove the color of the text and go to the appearance panel on the right. From the drop down key on the right of the panel, open the popup menu and press the “add new fill option”.
Step # 3 – Adding gradient to the fill
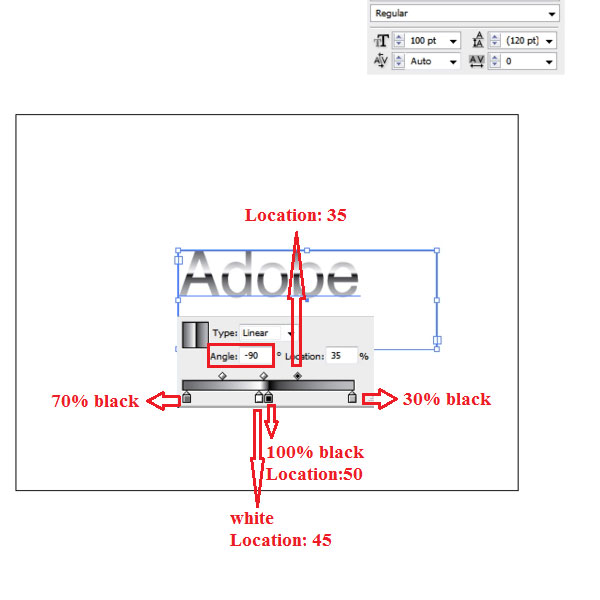
Next, add gradient to the fill. Currently there must be two color stops on the slider. Add two more and keep the fist one 70% black, second white, third 100% black and the fourth one at 30% black, while moving from left to right. Adjust the sliders with the white one’s location at “45”, the black one at “50” and the midpoint at “35”. Keep the gradient angle at “-90”.
Step # 4 – Adding gradient into a new fill
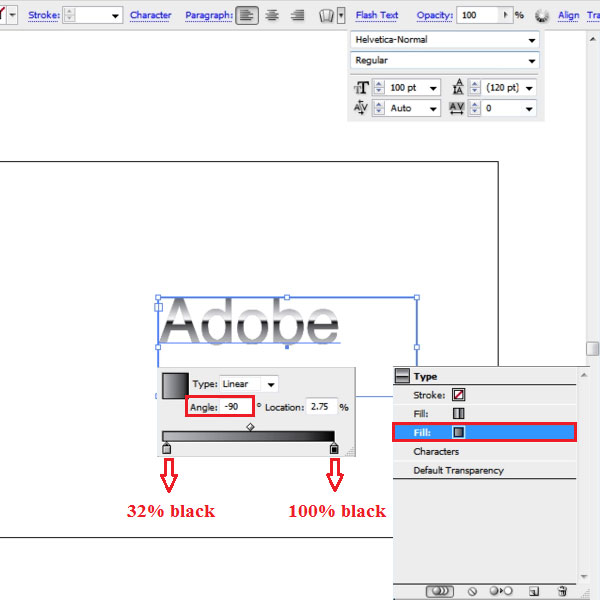
Add another fill and insert gradient into it. Delete two of the sliders from it by just dragging them downwards. Leave two of them and fill in the right one with 100% black and the left one with 32% black. Make sure that the angle to this gradient is also set to “-90”.
Step # 5 – Offsetting the new fill
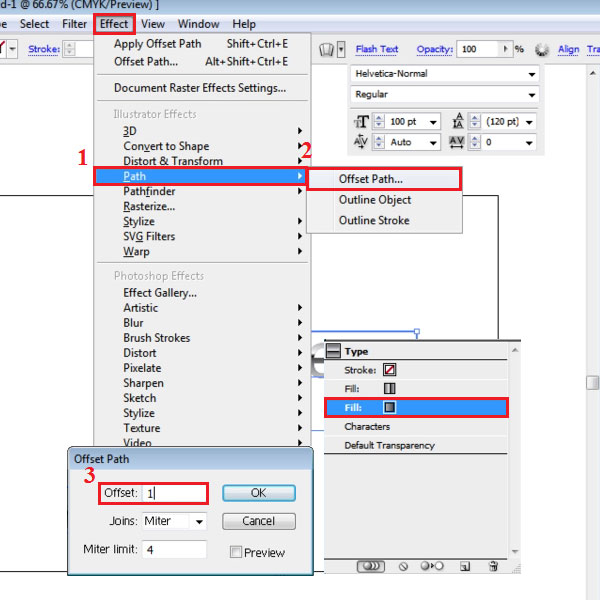
Offset this at “1px”, by going to, “effect> path>” offset path and setting the offset to “1px”.
Step # 6 – Duplicating the fill
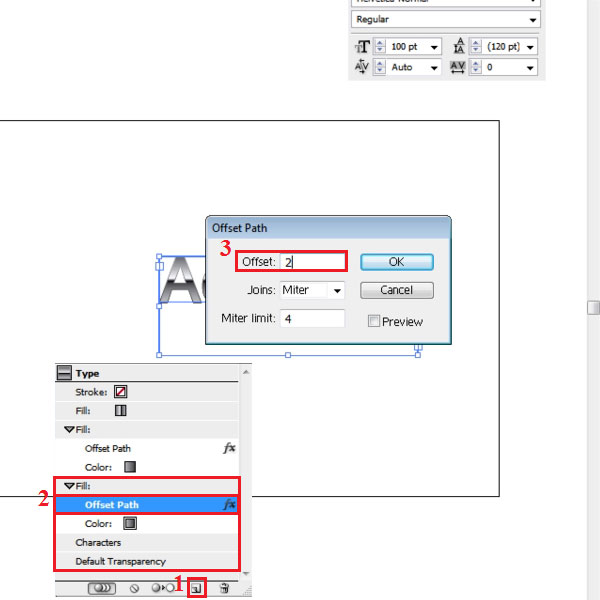
For the next step, duplicate this fill by clicking the “duplicate selected item” button present on the bottom of the panel. Click on its offset effect to open the settings and change the offset to “2px”.
Step # 7 – Adjusting the gradient
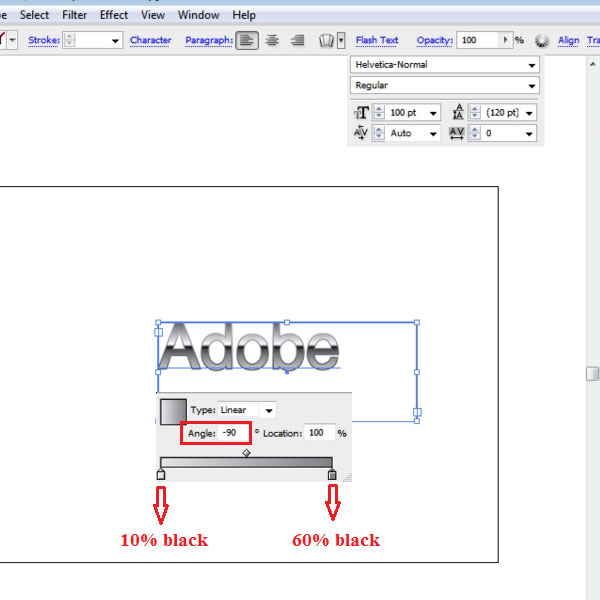
Now, change the gradient on the copy by changing its fills. Fill in the left gradient slider with 10% black and the right one with 60% black.
Step # 8 – Creating a background
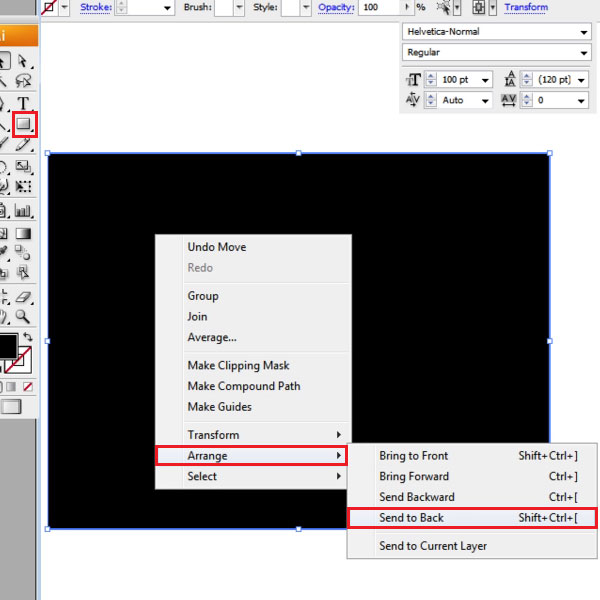
The effect on the text is now ready. To provide it with a background create a rectangle the size of the page, in this case it is “800px” x “600px”, and change its color to black. Align it with the page and send it back by right clicking on it, going to “arrange” and clicking on the “send to back option”. You can zoom in to view your text more clearly.
 Home
Home