In this tutorial we will learn how to create a motivational fitness poster in Photoshop.
We will divide the tutorial into two parts. Firstly we’ll see how to create a background for our visual and then we’ll work on the visual.
Step 1- Initialization
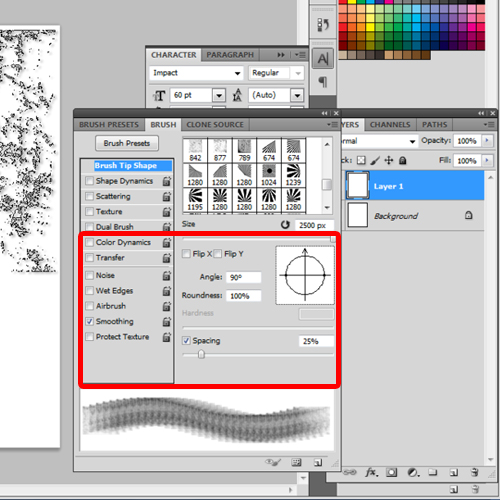
Let us create a new layer by taking a copy of the background layer. We can click on Ctrl+J or go to the create new layer icon in the layers tab. Choose the brush tool from the tool bar and choose the grunge brush in its maximum size. After choosing respective tool, an option bar appears right below the menu bar which consist options for the tool you chose. In that bar there would be an icon named ‘toggle the brush panel’ right after the brush tool. Click on it to change the settings for the brush. A small window will appear where different options will appear. Here on the center right, we have to change the angle of the brush to 90 degrees. We’ll keep the spacing as 25%.Now let’s Give a single stroke on the top in a way that it covers the top block of our background. After that click on ‘flip x’ under the brush size option and repeat the stroke for bottom. Choosing the color for the grunge texture totally depends on the design but here we’ll choose 15% Gray from the swatches menu. We’ll observer our whole background will get covered with a light gray color grunge texture. Now we’ll click on the same brush options icon and click on ‘flip y’ under the brush size option. Now we’ll again go back to the brush tool and choose a different brush i.e. the sun rising brush here in maximum size. Let’s give its pattern on the top left corner of our canvas in same 15%Gray color and 100% opacity. Now minimize the opacity into 70% and brush size into 1500 and give a stroke in the right bottom corner of the canvas. We can easily download these brush presets online and load them into the brush tool options. We did all this to give a little texture and stylization to our background.
Step 2- Background Completed
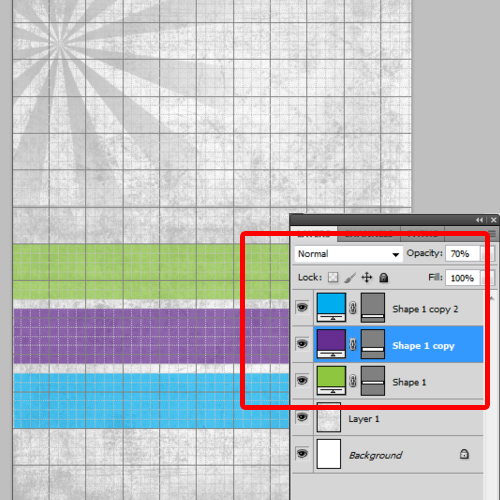
With all that done, our background is ready and we’ll move on to the copy of our poster. Create a new layer and select the rectangular tool from the tool bar. Make a shape and select ‘pure pea green’ color from the swatches menu with 70% opacity. Take its copy and give it Pure Cyan color in 70% opacity. Take another copy of this linear rectangular shape and this time the color will be “Pure Violet” again in 70% opacity. We can set the alignment of these 3 shapes by seeing on the backgrounds grids or by clicking on the horizontal align center which is in the options bar for alignment.
Step 3- Writing text
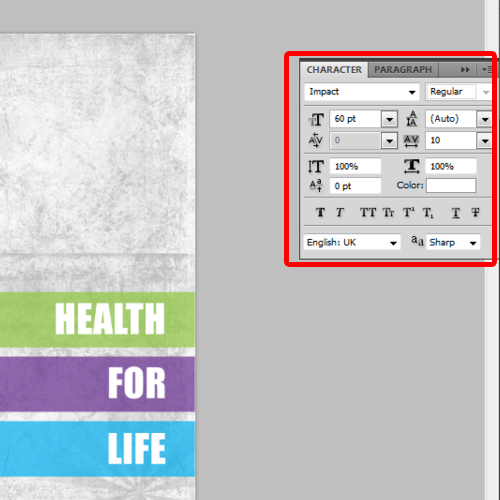
Now let’s choose the horizontal type tool and write “Health” in font Impact, size 60 and color white. Write “For” and “Life” in the same manner and format. Put Health on green shape, For in violet and Life on blue towards the right side of these shapes. Our Background and copy is ready now we’ll start working on the Visual.
Step 4- Using Magic Wand Tool
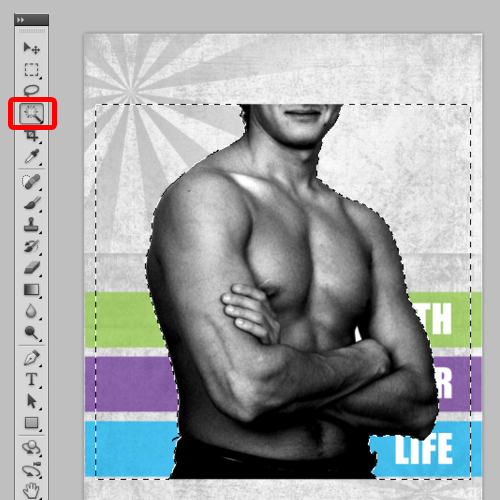
Here we’ll manipulate 2 images for our visual. We’ll use an image of an athletic body and place another face on. Take a new layer for this and place the image of the athletic body. Rasterize this layer and select the Magic wand tool. Add the selection then hit the delete button to erase the background. To deselect the selection click on Ctrl+D. Bring this athletic body image towards the left corner of your canvas.
Step 5- Cropping
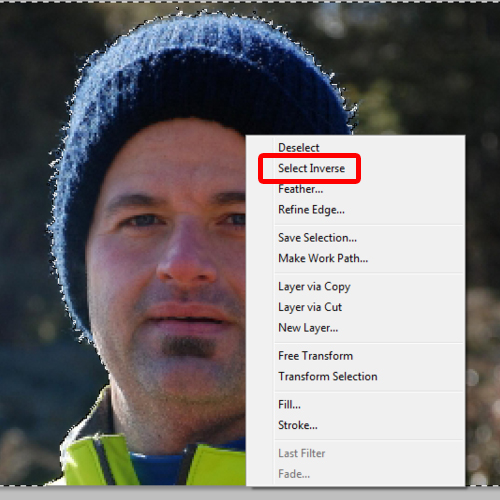
Now open the other image, the face image that you’re going to use. Once you’ve opened it, crop the face only by using the crop tool in the tool bar. Now choose the magic wand tool again and select the background to delete it. To select in detail, choose the “subtract to selection” in the options bar. After selection of background right click and select inverse to get your image on a new layer automatically.
To copy this image first we’ve to select this image by using Ctrl+Right click. Go to edit in the menu bar and click on copy in the drop down menu. Open the original window and go to edit and click paste.
Step 6- Adjusting face Size
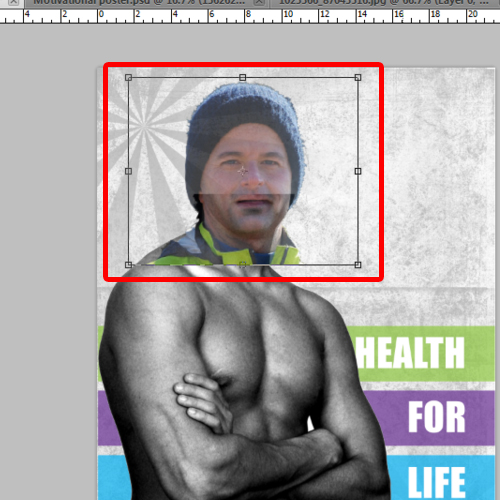
Now that you’ve pasted this face on the body, Transform this layer by clicking on Ctrl+T and change the size of the face according to the body. You can do it by pressing shift+alt. Keep the opacity of this face layer lighter so that you can see the background layer of the body and they both fit to each other’s size.
Step 7- Erase Tool
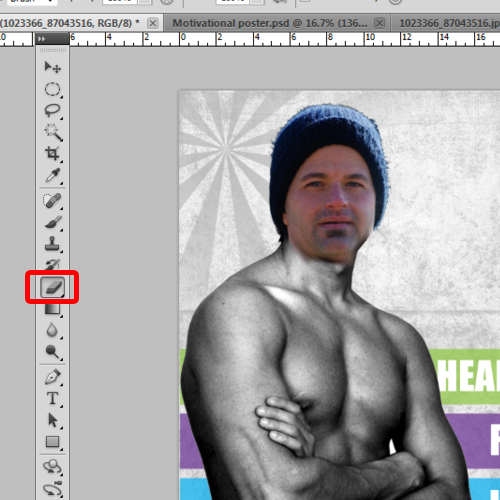
Once you’ve done that you can use the eraser tool to remove the clothes and rough edges. Keep the eraser size small like here we’ll keep it 78 and its hardness also less like 49.Once you’ve removed the extra edges and clothes pieces off from the face in a way that it looks like its 1 single person’s face and body you can lessen the opacity again to see if they both are placed perfectly onto each other or not.
Step 8- Desaturation
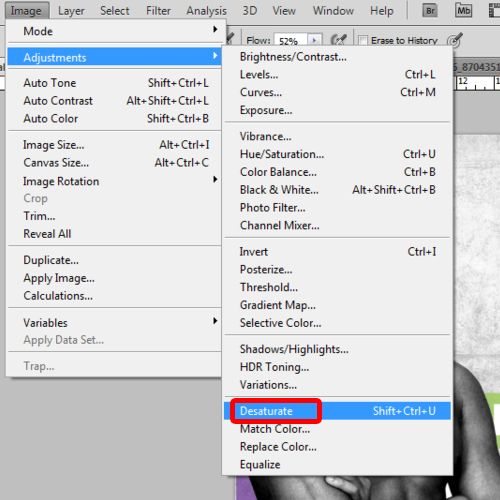
Now go to the ‘image’ button in the menu bar and click on ‘adjustments’ button in its drop down menu. You’ll see several options but you’ve to click on ’Desaturate’ here or simply by shift+Ctrl+U.
Step 9- Adjusting face Levels
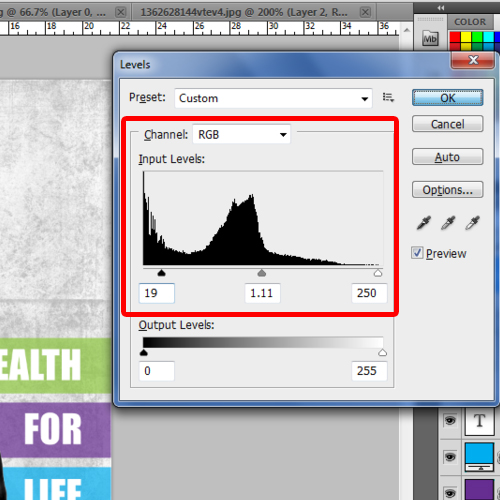
Now click on Ctrl+L to adjust the levels of the face to match with the body color. Levels can be found in the adjustments tab also.
Step 10- Adding tagline
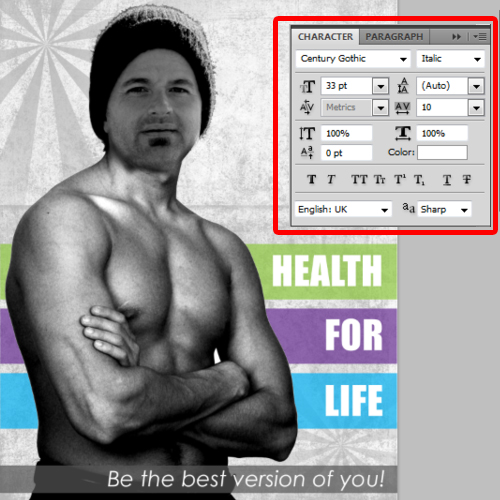
Now that the image in set you’ll add a tagline for your poster. Select the rectangular tool and make a linear rectangular box right below the other 3 shapes in 75% gray color. Choose the horizontal type tool and write your tagline i.e “Be the best version of yourself” in century gothic font and size 33pt.
Step 11- Setting Skin Tone
Now, to set the skin tone of fitness poster, we will use Dodge tool and Patch tool. Select the burn tool and dark those areas of neck to make a one skin tone. Same like burn tool, apply dodge tool to match the skin tone.
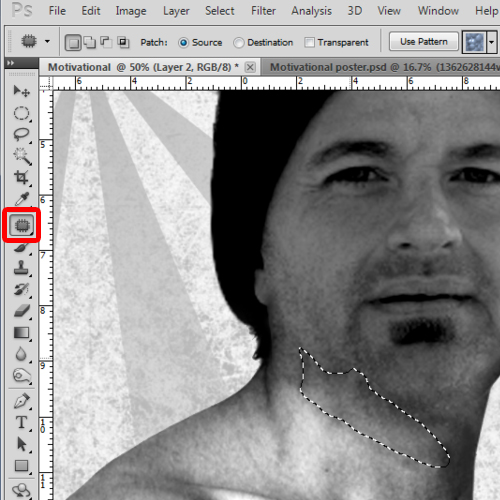
To make it more realistic, we will use Patch Tool. Select the patch tool and drag it where you need to fix it.
And this is all about the motivational fitness poster.
 Home
Home