Adding a rainbow to a photograph can make even a dull photo interesting. In this tutorial you are going to learn how to create a rainbow in Photoshop.
Step # 1 – Creating a Layer and Accessing the Gradient Tool
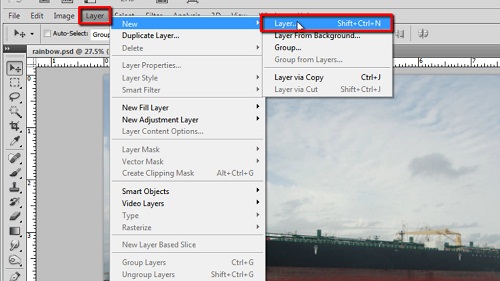
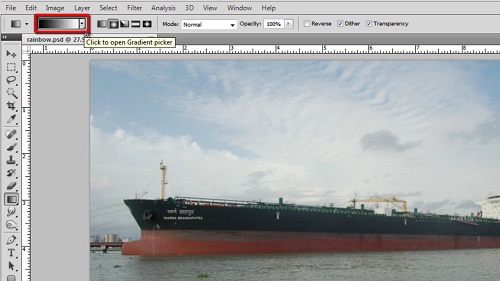
Start Photoshop and make sure that you have the photograph that you want to use open. In the toolbar click “Layer” then navigate to “New” and click on “Layer”. Click “OK” in the dialog box that appears. Now, select the gradient tool from the menu on the left and at the top click on the drop down arrow next to the gradient box. Click on the small arrow in the right of the box and in the menu that appears click “Special Effects”. In the dialog box that appears click “Append”.
Step # 2 – Adding the Rainbow
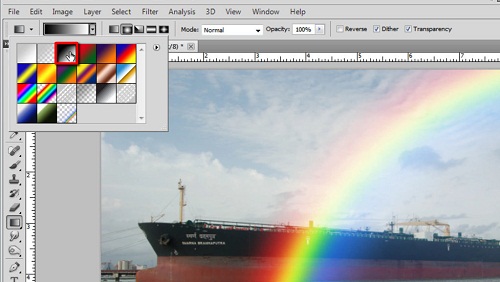
New gradients will be added and you want to click on the last one available. Click on the “Radial Gradient” icon. Now click on the bottom right of the image and drag all the way along the image to the point where you want the rainbow to end.
Step # 3 – Blurring the Rainbow
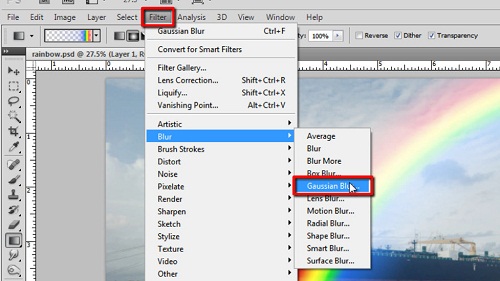
Now we are going to have to make the rainbow look more realistic. Click on the drop down menu in the layers panel that currently reads “Normal” and from the options that appear click “Screen”. In the main menu click “Filter”, “Blur” then “Gaussian Blur” and set the radius to around 40 pixels. Click “OK”.
Step # 4 – Fading the Rainbow
In the layers panel click on the layer mask icon and then click on the gradient selector again and choose the one that goes from black to white. Click and hold at the bottom of the image, close to the end of the rainbow and drag all the way up to the top of the image then release.
Step # 5 – Removing Part of the Rainbow
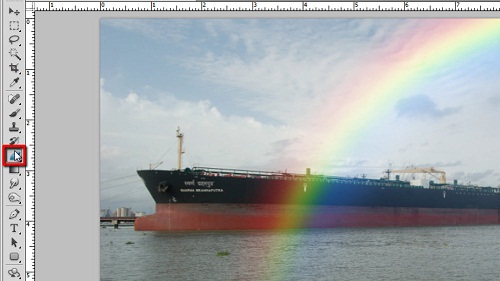
Finally, we want to erase part of the rainbow that comes in front of the object. If you photo is over a wider landscape you probably don’t need to do this step. Select the eraser tool from the tools and use it to erase the part of the rainbow in front of the object – here the large ship. That’s it, you now know how to add a rainbow in Photoshop.
 Home
Home