In this video tutorial we will show you how to create a slow motion in Adobe After Effects.
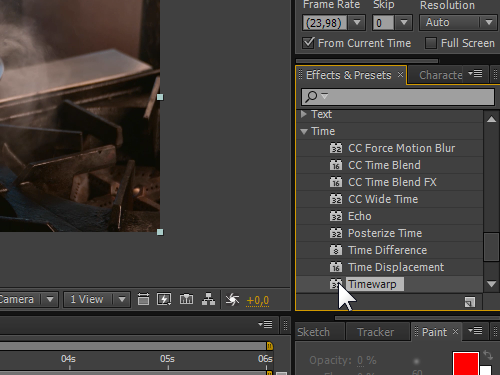
Run After Effects and create a new composition. In the Project window, move the selected file onto the “New composition” icon. Then go to the “Preview” tab and press the “RAM Preview” button to check the project. Then go to the “Effects & Presets” tab, select the “Time” effects collection and find “Timewarp” effect.

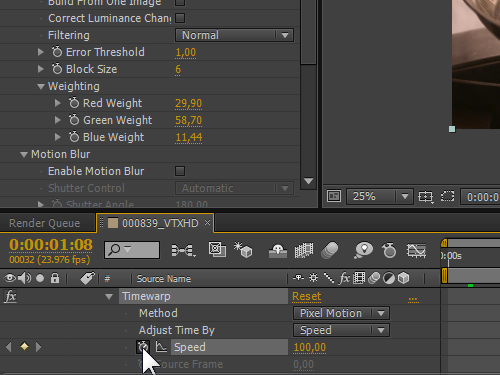
Drag and drop it into the track timeline. Go to the appeared “Effect Controls” window, set the speed value to 100 and press “Enter”. In the next step, open the “Timewarp” options in the “Effects” tab and go to the timeline in order to set the time indicator to the necessary position.
Then create a keyframe by pressing on the “Watch” icon inside the track options window.

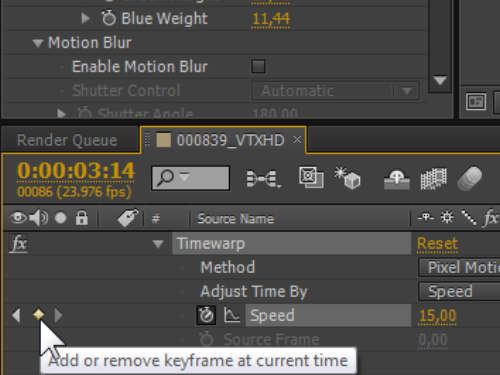
After that, move the time slider, create a second keyframe and change the speed value. Then, move the slider along the timeline and create a third keyframe with the same speed value, by clicking on the “Add keyframe at current time” icon.

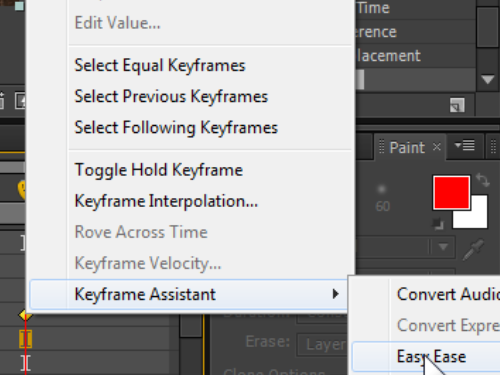
In the next step, create a fourth keyframe with the original speed value. When it is done, select all keyframes by holding the left mouse button and right click on them. Select the “Keyframe assistant” from the appeared menu and click on the “Easy Ease” option.

This action will smoothen the playback of the frames. Go to the “Preview” tab and click on “RAM Preview” to see the final result.
And that is how to create slow motion in Adobe After Effects!
 Home
Home