In this video tutorial we will show you how to create vintage style effect in Photoshop.
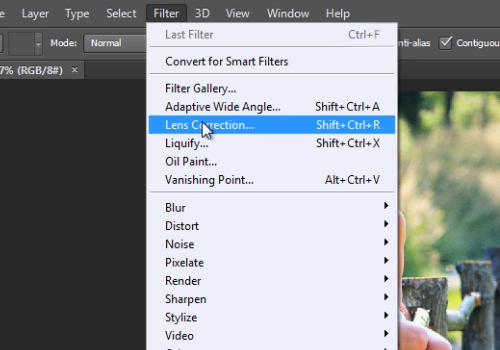
Launch the Adobe Photoshop. Go to the “File” menu and press “Open”. Select a photo you want to edit. Go to the “Filter” menu and click on the “Lens Correction” option.

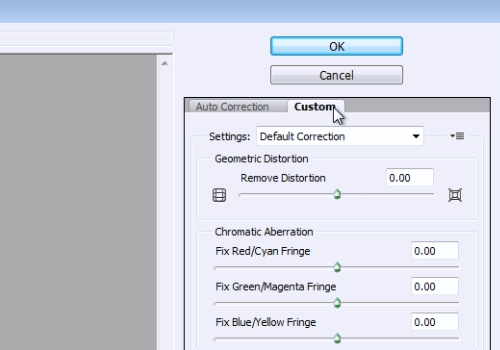
Go to the “Custom” tab in the following window.

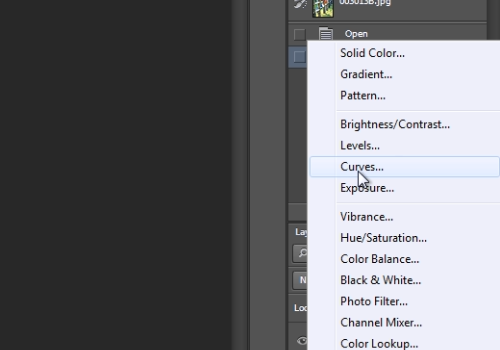
In the “Vignette” section, adjust the “Amount” with a slider and press “Ok”. Then, click the “Create new fill or adjustment layer” icon and from the popup menu select the “Curves” option.

In the appeared window adjust the “RGB” color scheme and the “Blue” color scheme. Go to the “Layer” menu and select the “Flatten Image” option.
 Home
Home