In this tutorial you are going to learn how to create water drops in photoshop.
Step # 1 – Creating the Shape for the Droplet
Start Photoshop and make sure you have the image that you want to add the water drops to open – it will work best if you use a macro photograph, such as this one of a leaf. Click “Layer”, “New”, then “Layer” and click “OK” in the dialog box that appears. From the menu on the left select the “Elliptical Marquee Tool”, zoom in on the image, hold down “Shift” on the keyboard and drag a small circle onto the leaf – this should be roughly the size of a waterdrop.
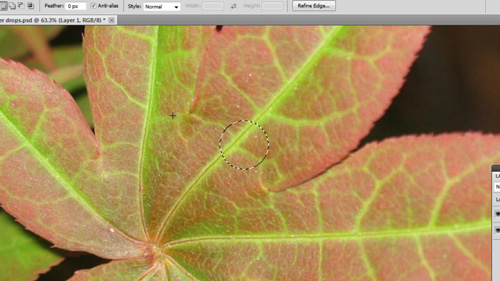
Step # 2 – Changing the Blending Options
Now, click the gradient tool in the menu and in the gradient selector at the top choose the third option from the left – the standard black to white gradient. Hold “Shift” on the keyboard and drag a line from the top left of the drop to the bottom right. In the layers panel on the right, click in the drop down box that currently reads “Normal” and select “Overlay”.
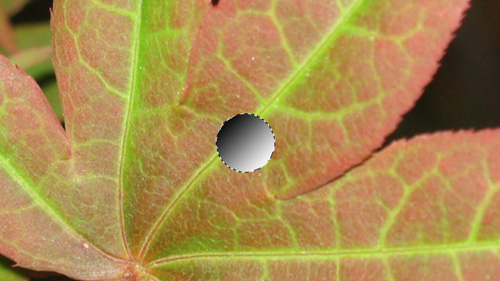
Step # 3 – Adding Some Shadowing
Double click on this same layer to open the “Layer Style” window. Click on the “Drop Shadow” tab and ensure “Blend Mode” is “Multiply” and the color is “Black”. Set the “Opacity” to “70%”, the angle to “-29”, and the “Distance” and “Size” should both be “5”. Spread should be set to “0”. Go to “Inner Shadow” and apply the same settings, but increase “Opacity” to “75”. Click “OK”.
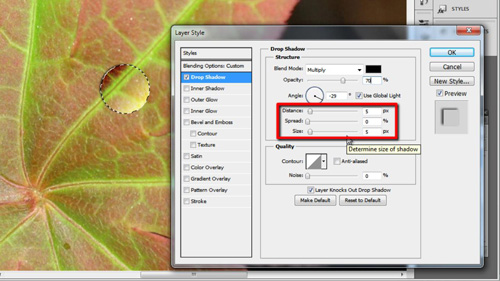
Step # 4 – Giving the Drop a Shine
Click the new layer icon in the layers window. Select the brush tool and make sure it is set to white with a hardness of 100%. Use this to create a small dot on the water droplet, the pixel size of the brush will depend on the resolution of your image, but aim to have it similar to what you see here. Press “Control” and “D” to deselect the drop and it should be looking pretty good.
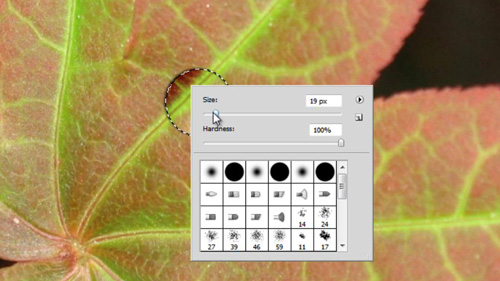
Step # 5 – Duplicating and Transforming the Drop
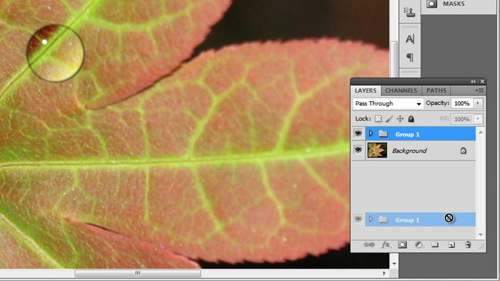
Now, to create a second drop, press “Control” on the keyboard and click on the layers that contain both the drop and the shine on it. Drag these to the folder option at the bottom of the layers panel which will group them. Duplicate the group by dragging the newly created folder onto the new layer icon. Use the move tool to drag the copied drop off the first one and place it somewhere else on the leaf.
Step # 6 – Changing the Shape of the Drop
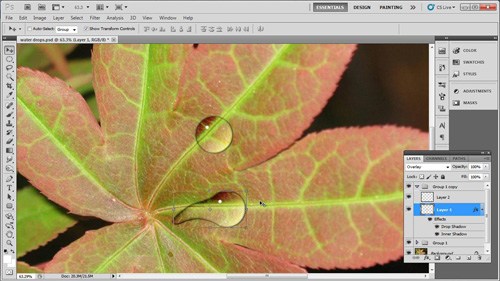
Open the group by clicking on the drop down arrow to the left of its folder icon and click on the layer that contains the drop – here “Layer 1”. Click “Filter” in the main menu, then “Liquify”. In the window, zoom in on the drop, then select the “Forward Warp Tool” and use the mouse to drag the shape of the gradient to resemble a water droplet. Click “OK” and it will be applied to your water droplet. This process can be repeated to create as many water droplets as you want and that is how to create water drops in Photoshop.
 Home
Home