Music and art go hand in hand. And the best way to get a potential buyers’ attention is with an eye catching album cover. CD covers can be extremely expressive and convey the message of the album in a number of creative ways. There are many ways in which the artwork can be designed for the cover. You can use a photograph or some illustrations or even typographic design but your cover should convey the type of music the album contains. In this tutorial, you will learn how to design CD covers in Illustrator while getting an idea about the CD cover dimensions and to how to design the layout for the cover of the CD.
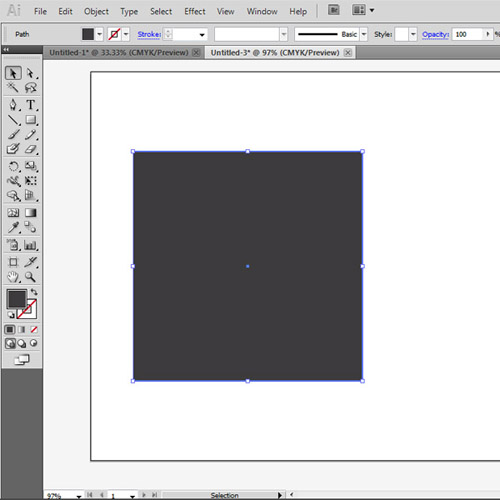
Step # 1 – Create a new document
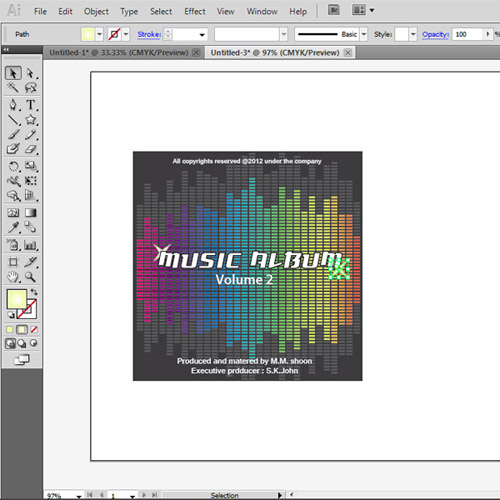
Open a new document in adobe illustrator. Use the “rectangle tool” to draw a box of 120 by 120 mm. This is the standard dimension of a CD cover. Change the color of the square to dark grey. You can choose any other color depending on the theme of the music album. This will be the front side of the cover.
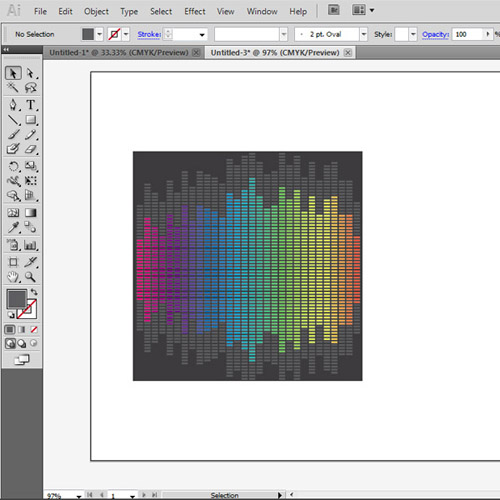
Step # 2 – Copy the artwork
Now we will place the artwork on the CD cover. We are going to use the same music equalizer as an artwork which we created for the CD design. Create a new layer, copy the vector image of the music equalizer and place it on the square. Remove any extra parts if needed.
Step # 3 – Insert the text
Now we will create a new layer above all the layers and use the “type tool” to insert the text. The music album cover should have the title of the album and the edition number or volume number. It should also include the name of the artist or band. Depending on the requirement, you can add more information on the cover.
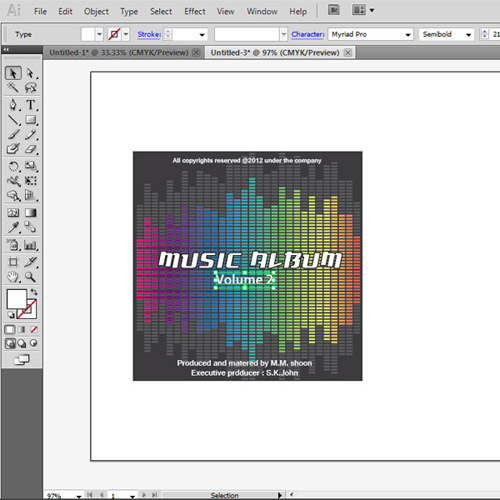
Step # 4 – Create a sparkle
Use the “star tool” to create a sparkle and place it with the text. This is an optional step. If you don’t want to add sparkles or if it doesn’t go with the theme of your music album, you can always omit it. Now the front side is ready.
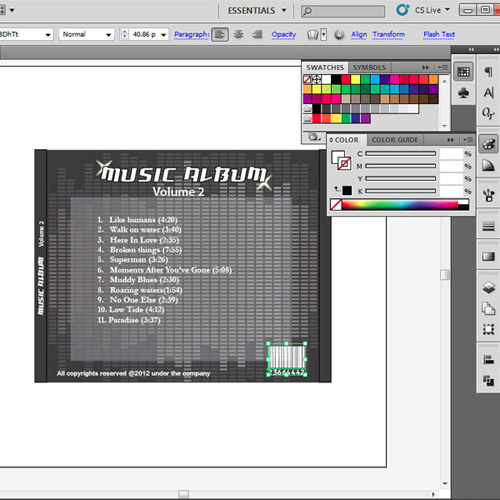
Step # 5 – Draw a rectangle
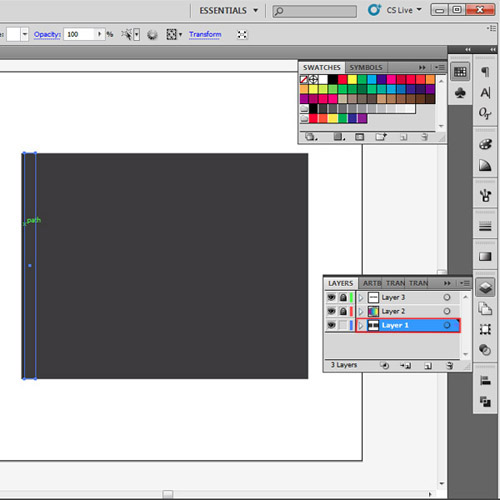
Now we will start working on the backside of the cover. First of all we will go back to “layer 1” to create the back side of the CD cover. The CD cover dimension of the back side is larger in width than the front one. Use the “rectangle tool” to draw a box of 150 mm by 118 mm. This measurement includes the folding flaps on both sides. Now draw a box of 6 mm by 118 mm and place it on both sides of the bigger rectangle. This will be the margin for the folding flap.
Step # 6 – Add design to back side
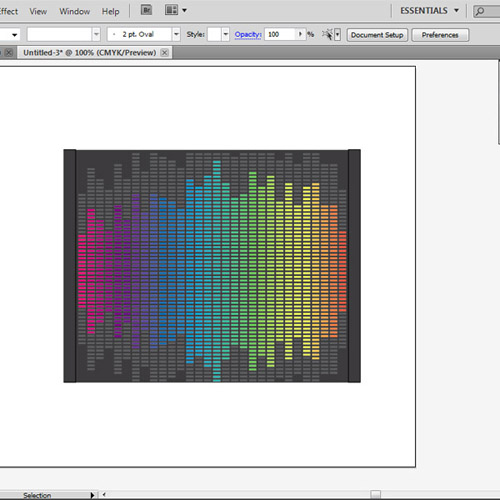
Next we will add some artwork on the back side of the CD cover. You can create a new artwork for the backside or use the artist’s photograph. In this tutorial, we are going to use the same artwork which we used in the front. We will select layer 2 and copy the equalizer from the front side and paste it on the back side of the cover. Adjust the size if needed.
Step # 7 – Convert the artwork into grayscale
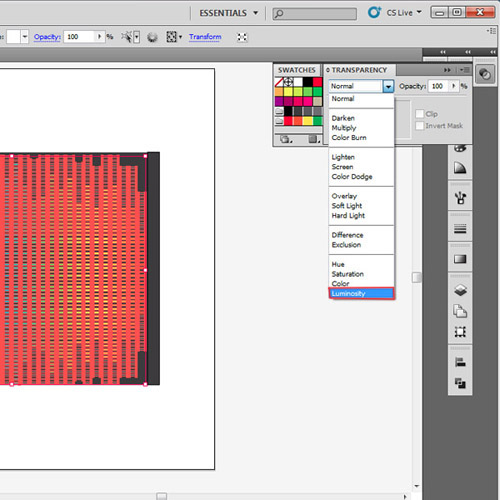
Once the artwork is placed, we will change its blending mode to convert the music equalizer into grayscale. We will select the colored equalizer and change its blend mode to “luminosity”. Decrease its opacity to 50%.
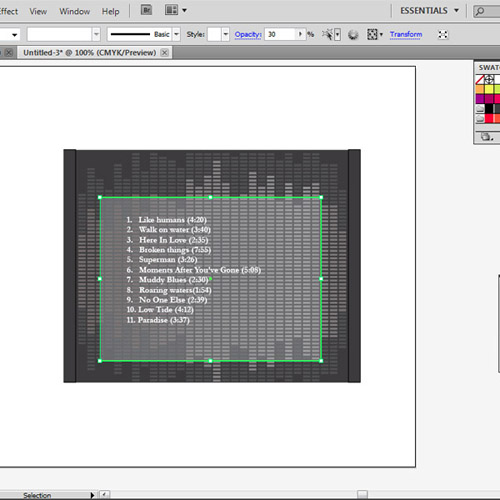
Step # 8 – Insert the text
The backside of the cd cover should have a list of all the tracks on the album. To add the playlist, we will draw a smaller box in the center in grey color and reduce its opacity to 30%. Insert the playlist text and adjust its placement.
Step # 9 – Place the text
You should also place the title of the album on the backside. Copy the text from the front side and paste it on the back side. You can decrease the size of the font. Insert the name of album and volume on the folding flap by rotating it 90 degrees anti-clockwise.
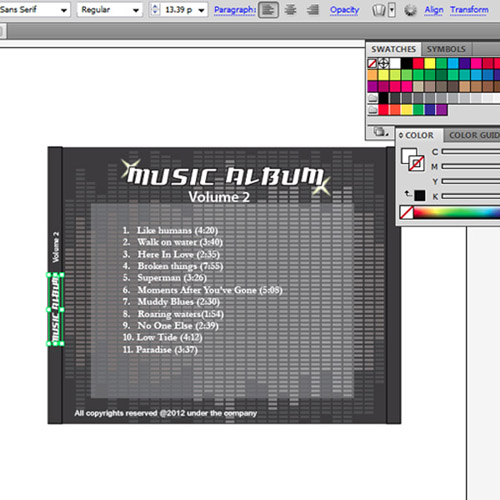
Step # 10 – Place the logo
In the end we will add the barcode at the back side of the cd cover. If there is a company logo, you can also place it at the backside. The CD cover in Illustrator is now ready.