A Facebook cover photo is a larger photo at the top of the timeline, right above the profile picture.It is very easy to create your own Facebook cover for your timeline. You can create it if you want your Facebook cover to be as unique and individualized as you are.
In this tutorial, you will learn how you can design an interesting Facebook cover photo using your own photographs. All you need is some interesting photographs of yours of different ages. Over here, you will learn some new techniques by using different effects in Adobe Photoshop which will help you to create an interesting background. You will also see how you can manipulate different images to create an interesting layout.
Follow the given instructions to design a Facebook cover using your photographs in Adobe Photoshop.
Step # 1 – Create a new document
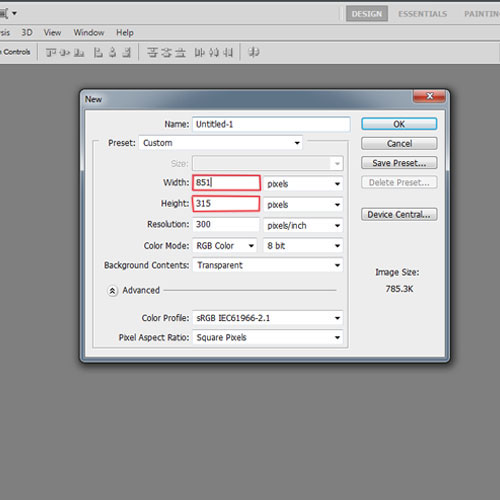
First of all we will launch Adobe Photoshop and open a new document of size 851 pixels by 315 pixels. This is the standard dimension of the Facebook cover. If you use smaller than this size, your Facebook cover will be stretched and distorted.
Step # 2 – Apply gradient
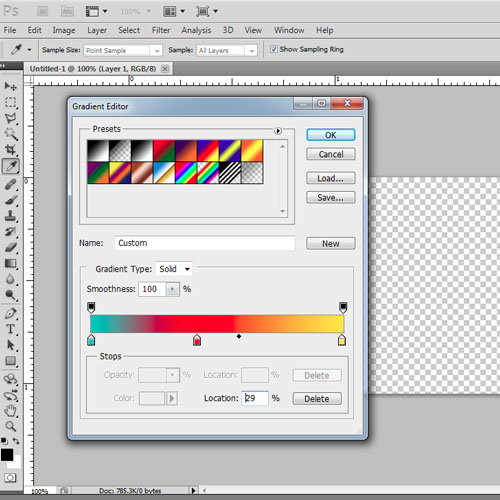
The first thing will be to create a background. We will select the “gradient tool” and fill the layer with a gradient. You can use any bright colors as per your requirement.
Step # 3 – Create texture using filter
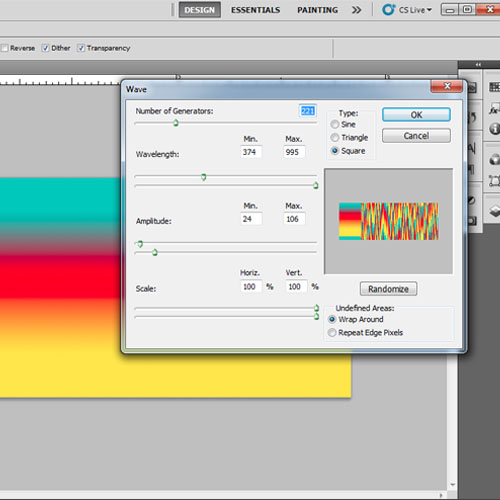
Once the gradient is applied, we will create some texture. We will use effects in Adobe Photoshop to create a texture for the background. Go to “filters”, select “distort” and then from the options click on “waves”. Adjust the settings to create an interesting texture and apply it. You can experiment with different settings to check which seems to give the most interesting effect.
Step # 4 – Transform to resize
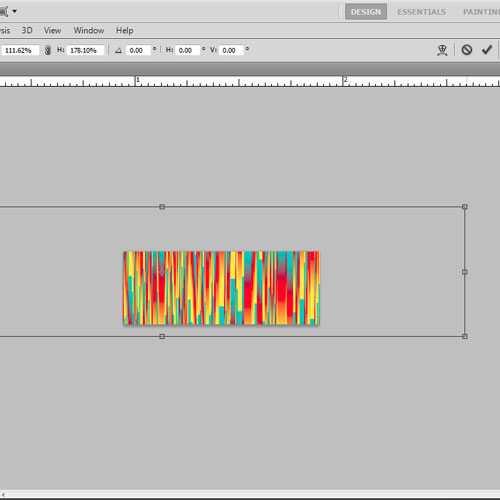
This is an optional step. If you want to make further changes in the texture, you can transform it by pressing “Ctrl+T” and then resizing it.
Step # 5 – Create depth in texture
To create some depth in the texture,we will create a new layer and fill it with black color. Change the layer mood to “soft light”. You can use the different layer moods to create interesting effects.
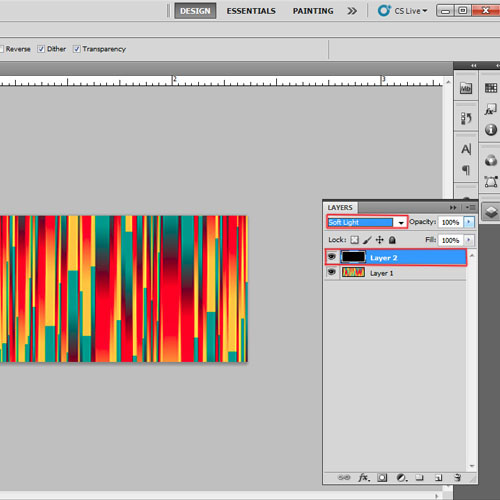
Step # 6 – Open an Image
Now we will add some more effects to the background. Load an image of a texture paper and change the layer mode to “soft light”. You can use any texture paper image for this design which can be downloaded from a website.
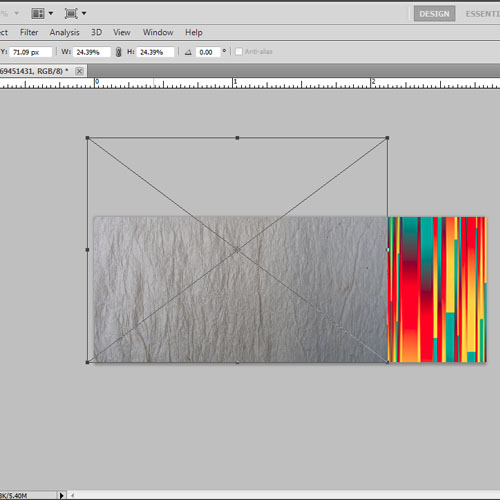
Step # 7 – Create a pattern
Now create a new layer and select the “brush tool”. Choose the “grunge frame” style and apply it in black color on the layer. You can reduce the opacity to 80%. This will help to create an interesting pattern.
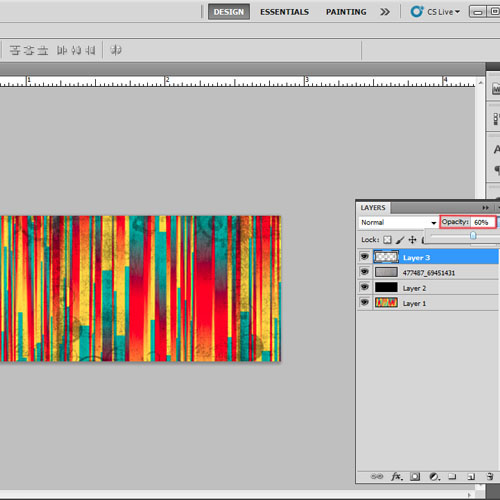
Step # 8 – Drag your images
Once the Facebook cover background is done, load some images of yourself of different ages and place them at different positions to create an interesting layout. Remember not to place anything at the lower left side of the cover as this area will be covered with the profile picture.
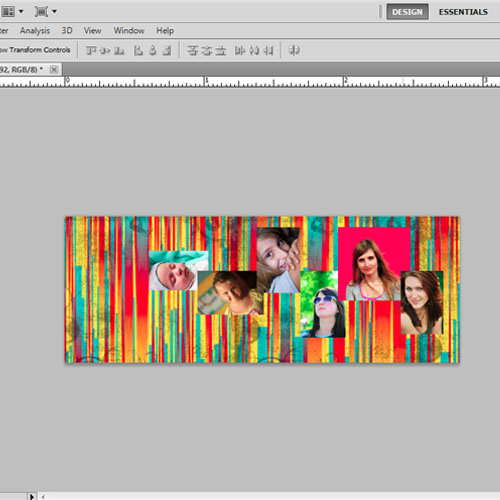
Step # 9 – Load Images
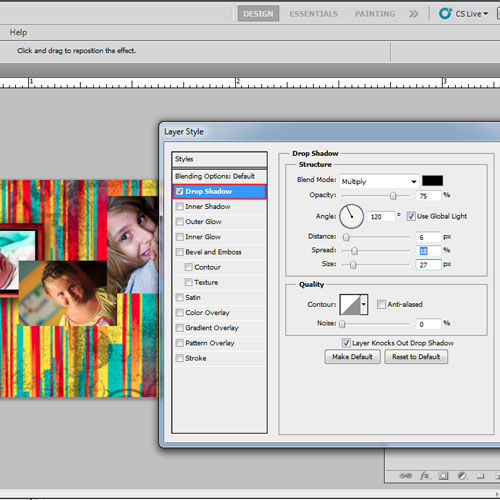
Now we will enhance the photographs by creating a frame around them. Load images of a photo frame and place it around the photograph or you can also make frames using the “brush tool”. Once you have the frame, open the blending options of the layer and apply the “drop shadow” effect. Apply this effect on every frame.
Step # 10 – Insert text
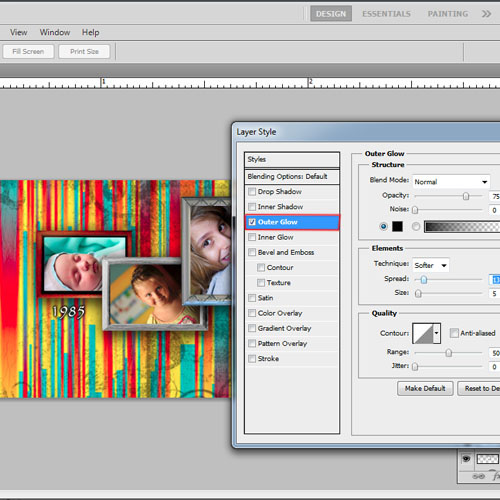
Once all the photographs are set, use the “type tool” to insert the years and place them below each image. You can use any font and color. From the different effects in Adobe Photoshop apply the “outer glow” effect to it.
Step # 11 – Insert heading
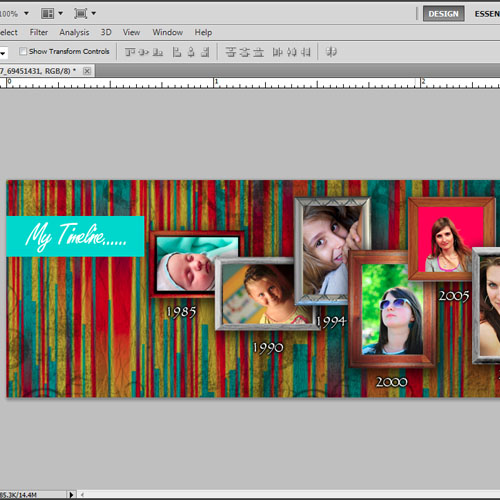
In the end create a new layer and draw a small rectangle in the left corner in any color. Use “type tool” to insert the text. The Facebook cover photo is now ready.
 Home
Home