A 3D logo looks creative, unique and can easily be identified by the customer. It can create a long term impact and can be used for different purposes. In this Adobe Illustrator tutorial, you will learn how to create a 3D symbol for a logo. Adobe illustrator is usually used for creating illustrations but in it you can change a 2D shape into 3D as well.
To learn how to design a logo in 3D Illustrator follow the tutorial given below.
Step# 1 – Make a perfect square
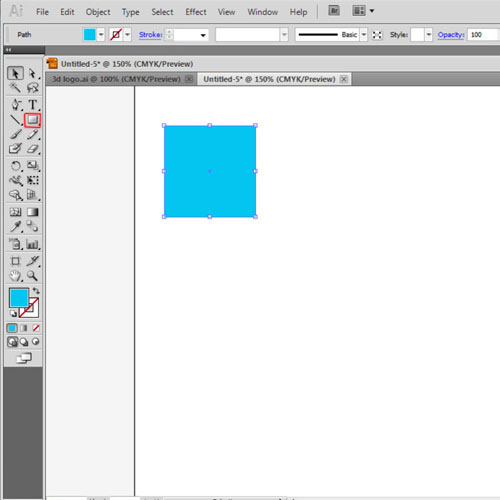
First of all, launch adobe illustrator and open a new document. Select the “rectangle tool” from the tool bar and draw a perfect square. The square can be in any color.
Step# 2 – Make copies of square
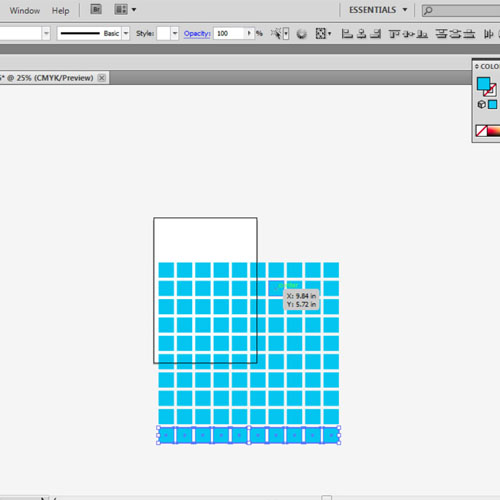
We have to make copies of the square so press “Alt” and drag the square a bit to the right to make a copy. Once the copy is made, press “Ctrl+D” eight times to make a eight more copies. In this way all the squares will be of same size and at equal distance.
Now, we have to make rows of squares so now select all the squares in a row and press “Alt” and drag it down a bit to make the copy. Once the copy is made, press “Ctrl+D” eight times to make the copy eight more times.
Step# 3 – Create a symbol
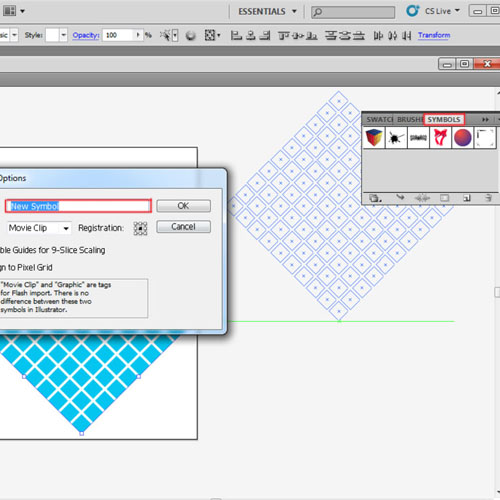
When this is done, we will now get a bigger square made of these small ones. Select all the squares and rotate the object to 45 degrees. Then drag to the symbol panel to create a new symbol. Once the symbol is created, delete the squares from the artboard.
Step# 4 – Make a sphere
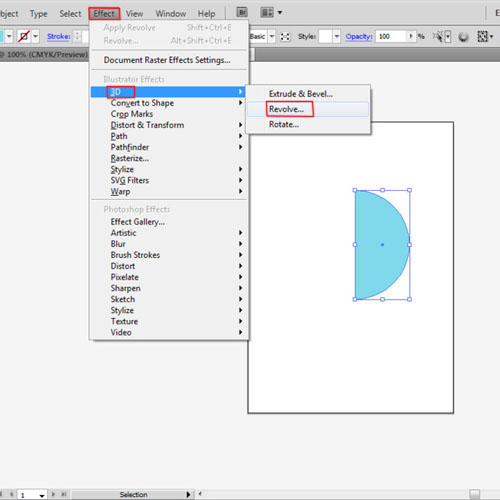
To create 3D look use the “ellipse tool” to make a circle in any color. Now remove half of the circle to create a semi-circle. Make a copy of semi-circle and place it outside the artboard.
Now select the semi-circle which is inside the artboard and go to effects. Select 3D and then choose “revolve”.
Step# 5 – Add symbol to the sphere
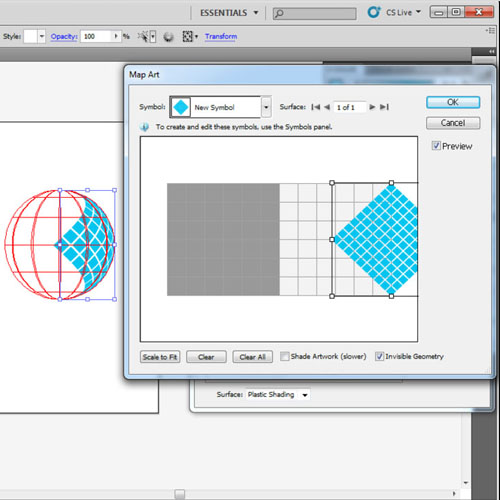
A revolve panel will appear. Change the position to front and then go to “map art”. Select the new symbol from the list that we created and place it accordingly.
Step# 6 – Apply 3D effect
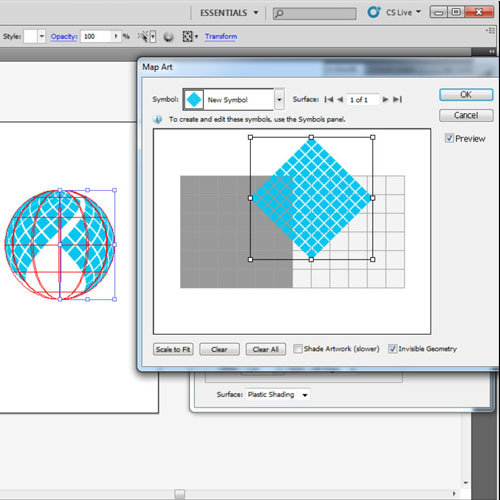
Now select the other semi-circle, place it over the previous semi-circle and apply the “revolve” effect, same as before. Just change the placement of the new symbol.
Step# 7 – Change the color
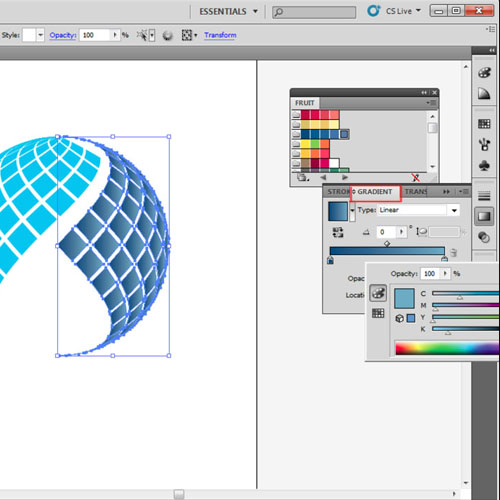
Once this is done, you will get an abstract 3D globe shape. Now we will add color to it. Right click on the globe and click “release the compound”. Delete extra circle outlines. Select half of the globe and go to the “gradient panel”. Change the fill to “fade to black”. Set the color to “5B7FAD” and “005F94” and the opacity level to 100%. The colors can vary according to your requirement.
Now select the “gradient tool” from the toolbar and apply the gradient to the globe in the required direction. Repeat the same steps with other half of the symbol to give it the same effect.
Step# 8 – Add highlights
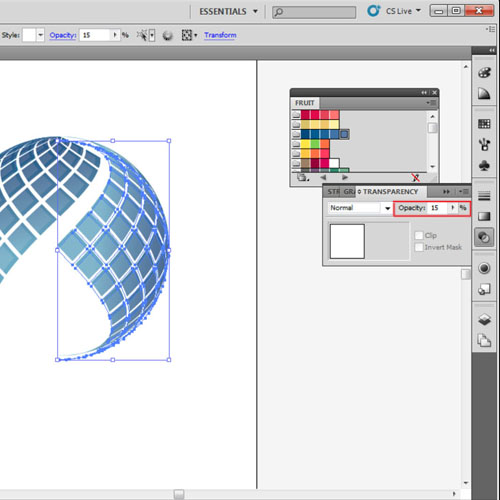
Once the globe is in color, we will create highlights. Make a copy of the symbol and place it slightly below the original one. Change its color to “ffffff” and the opacity to 15%.
Step# 9 – Add shadow
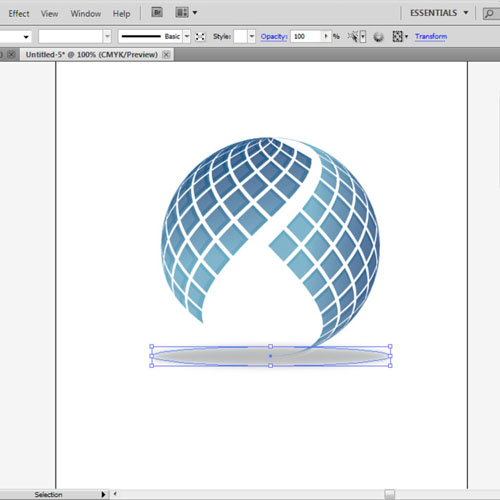
As this Adobe Illustrator tutorial shows the 3D look of this logo can be enhanced by creating a shadow. Select the “ellipse tool” and draw an elongated oval below the abstract symbol. Change its color to “BCBEC0”. Go to effects, select blur and then apply “Gaussian blur”. Change its opacity to 30%.
Step# 10 – Add Text
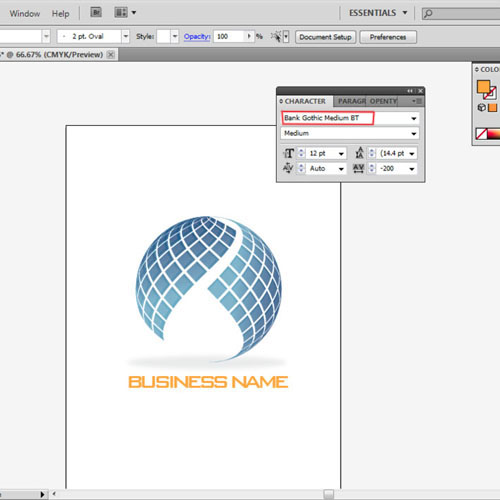
In the end add the business name below the 3D globe in “Bank Gothic” font style. You can use any other font style if you want.
Your logo in 3d in Illustrator is now complete.
 Home
Home