In this tutorial, we will teach you how to design a poster using the halftone effect in Adobe Photoshop.
Step 1 – Configuring the document settings
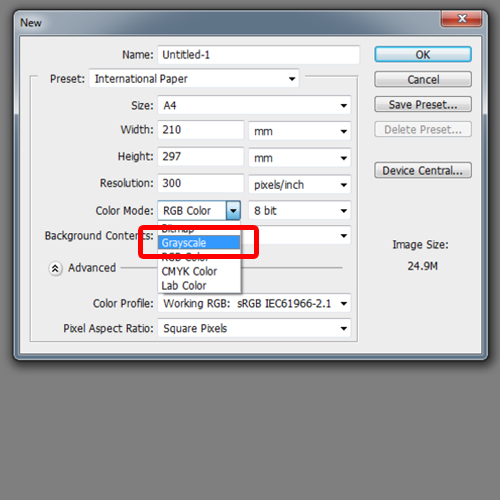
First of all, let’s open a new document and make sure that the color mode is set to grayscale.
Step 2 – Applying the brush in the middle of the canvas
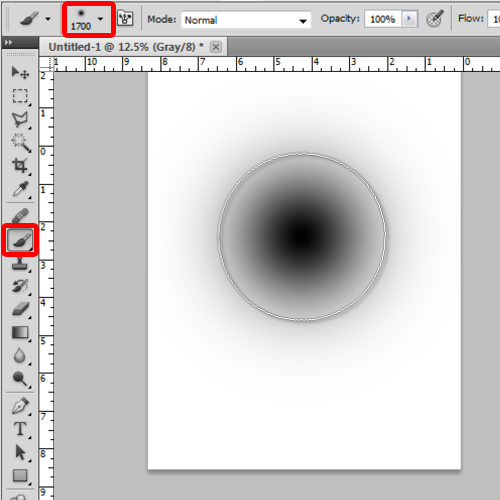
With that done, let’s pick up the brush tool and make sure you have the soft brush selected with black color. Now we will use a considerably large brush size and apply it in the center of the canvas.
Step 3 – Color Halftone Effect
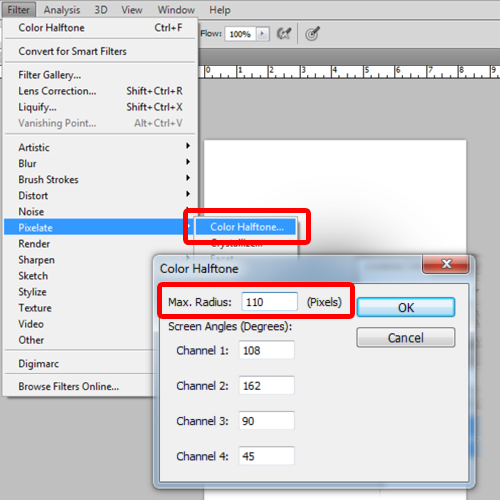
With that done, let’s go to filter menu, move to pixelate and select the color halftone option.
Over here, we will change the maximum radius to 110 pixels and leave the rest of the options as it is. With that done, you should see the brush changing into a halftone sphere.
Step 4 – Adjusting the color halftone layer
Now let’s load the image we want to give the halftone effect to. For this tutorial, we will be working on the image of a flower. You can get your hands on such free stockphoto from sxc.hu.
http://www.sxc.hu/browse.phtml?f=view&id=1267328
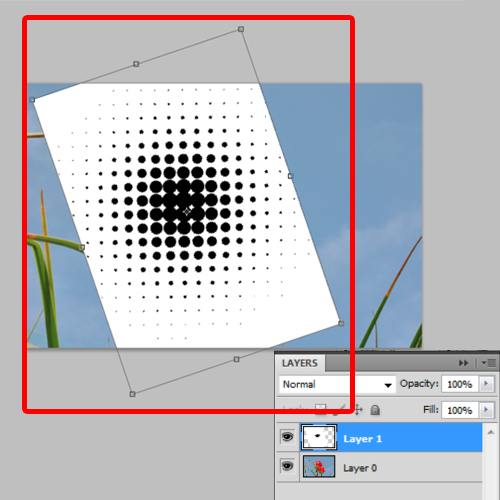
With that done, let’s go back to the halftone effect window and drag it over the image layer. Now we will press “Ctrl +T” to rotate the layer a bit and adjust the placement over the background image.
Step 5 – Changing the layer mode
Let’s change the layer mood to Subtract so that we can see what portion of the image will fall within the effect. Now we will adjust the background image so that we can fit in the part we want to include in the effect.
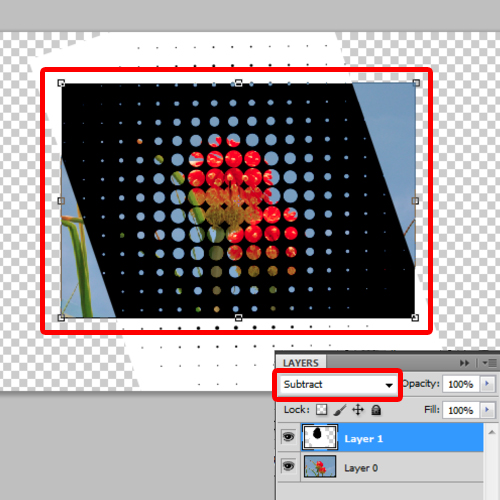
Step 6 – Copying the contents of the Halftone layer
Now we will create a new layer below the halftone layer. Fill it with white color and merge both the layers. This is just so that the halftone layer can fill the entire canvas.
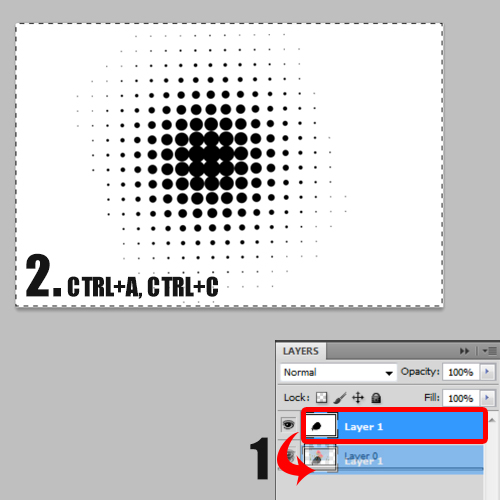
Now let’s drag the halftone layer below the image layer and hide the image layer for now.
With that done, let’s select the halftone layer and press “Ctrl+A” to make a selection of the entire layer and then press CTRL C to copy that selection.
Step 7 – Creating the halftone effect on the image layer
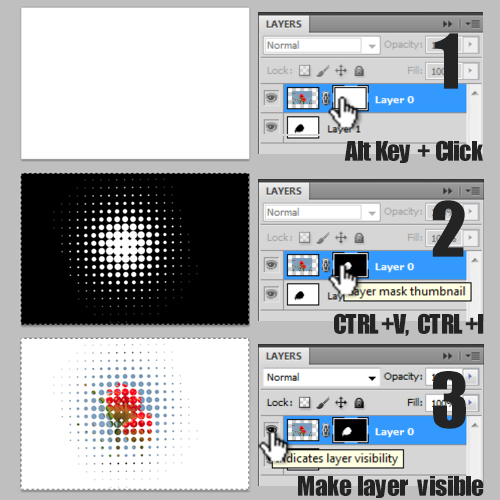
Next, we will go to the image layer and click on the “add a mask” button in the right side of the panel below. When the mask layer appears, press the “alt” key on your keyboard and click on the mask layer.
When the blank canvas appears, press “Ctrl+V” to paste the halftone layer and then press “Ctrl+I” to invert it. Now when we make the layer visible, the background image will be included in the halftone effect layer, filling the spots of the sphere.
Step 8 – Finalizing the effect
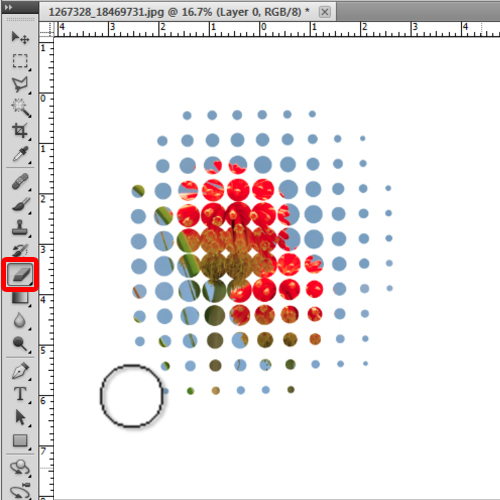
Once this is done, let’s remove the extra parts of the halftone image using eraser tool. The image is a bit scattered right now, so let’s remove a bit from the edges, forming a rough circle. With that done, we will move the image to an A4 size document for our poster.
Step 9 – Adding the tag line
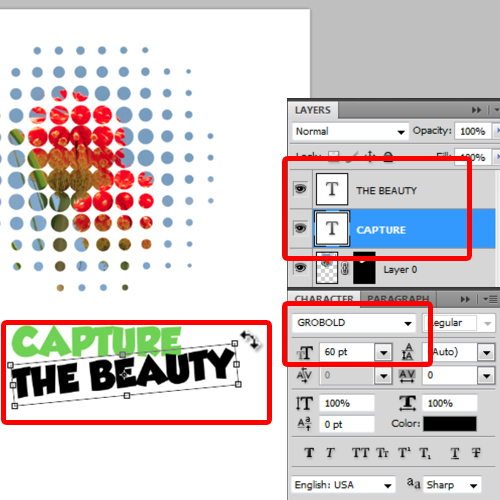
Now let’s move on the text. For that, we will use the type tool to insert the heading of the poster. The heading is Capture the Beauty, and we will have Capture in a different layer and the other text in a different layer. Now let’s change the font to Grobold and the font size to 60 points.
Now we will select the first layer that contains the word Capture and change its color to light green. With that done, let’s select the second layer, press CTRL T and tilt the layer to overlap it on the first layer. After that, let’s change the color of the layer to a darker shade of green.
Step 10 – Adding the text
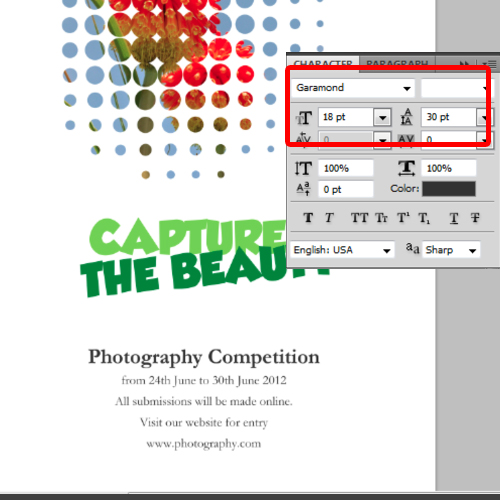
With that done, let’s enter the rest of the text on the canvas. For the details, we will use the Garamond font , keeping size at 18 points, except for the heading. Next, we will change the font color to black and set the line spacing to 30 points. With that done, our halftone poster is complete.
 Home
Home