It is quite easy and interesting to create your own wallpaper in Photoshop for your desktop. Wallpapers can be created using different design elements like photographs, illustrations and typography. Adobe Photoshop is usually used to design wallpapers using different tools and effects. In this tutorial, you can learn how to create light effects in Photoshop and use it to design wallpaper.
Follow the steps below to learn how to design a wallpaper using Adobe Photoshop.
Step # 1 – Apply brush mark
Open a new document in Adobe Photoshop. Set the size to height: 1024 and width: 768. There are many different sizes for wallpapers. The standard one is 1024px by 768px but you can design on a different size if you have a monitor with a higher resolution.
The first step is to create a background. Use the “bucket tool” and fill the background with the color whose code is “000000”. You can fill it with any other as well but it is recommended that you use darker colors while creating light effects in Photoshop.
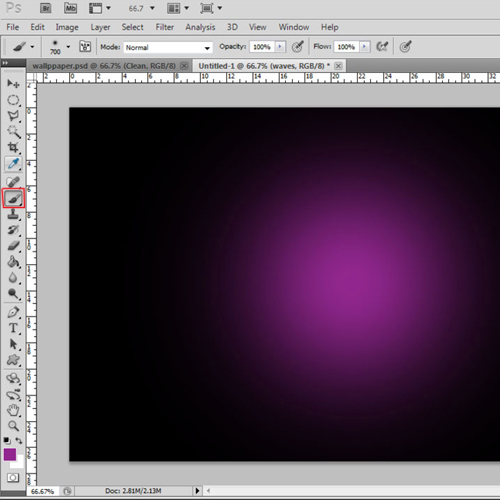
Now we will give some texture in the background. Create a new layer and rename it “waves”. Then select the “round brush” from the “brush tool menu” and apply it in the middle of the canvas.
Step # 2 – Add “waves” effect to the layer
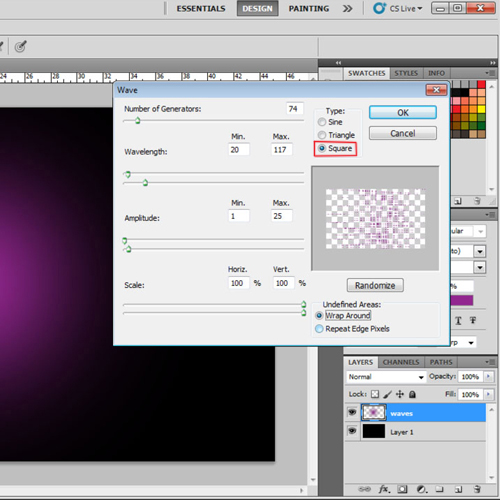
Once you are done, go to the “filter” menu, select “distort” and then choose “waves”. Set the type to “squares” and adjust the levels according to the variation and type of texture you want to create. Apply this filter.
Step # 3 – Apply Gradient to the texture
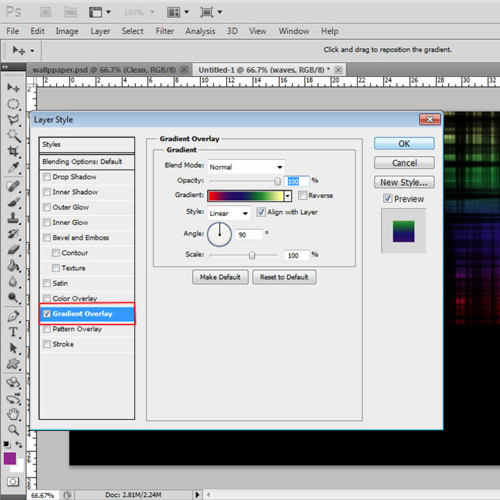
Now you have the texture, adjust its size and placement and then double click on the layer to open its blending options. Select “gradient overlay” and change the gradient to “multicolor”.
Once the gradient is set, make a copy of the “waves” layer and use it to fill the negative space in the canvas.
Step # 4 – Apply “waves” filter
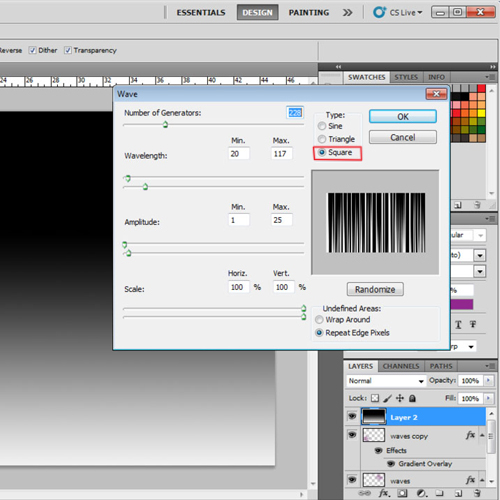
Once the texture is created for the background, we will then create a new layer and fill it with default black/white gradient. Then go to “filter”, select “distort” and then choose the “waves” option. Set the type to “squares” and adjust the level according to the numbers of lines you want in your light effect.
Step # 5 – Duplicate and merge the layer
Now we will shrink the size of the lines by pressing “Ctrl+T”. Make a copy of this layer. Adjust its placement having its edge slightly over the original layer. This will increase the length of the lines. Use the “eraser tool” to remove extras. Merge both the layers by pressing “Ctrl+E” and rename it “lines”.
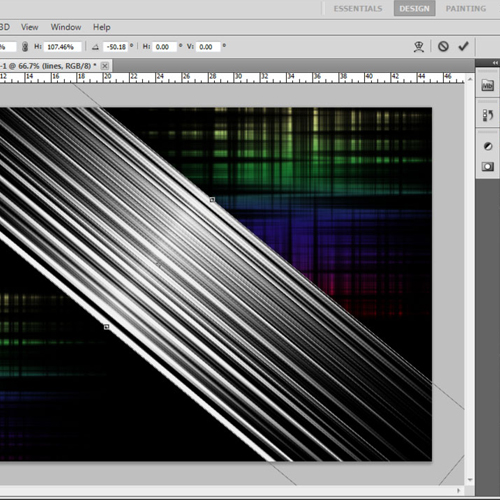
Step # 6 – Apply gradient to lines
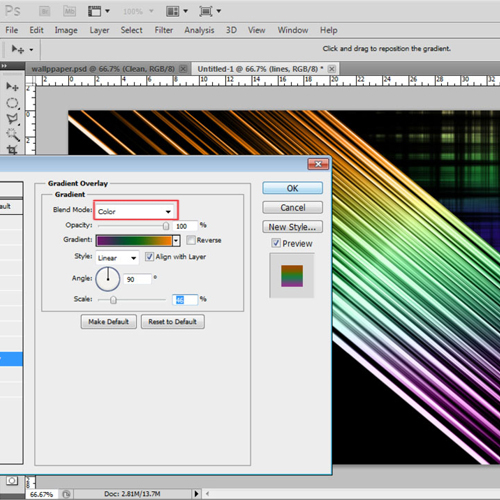
To create light effects in Photoshop we will adjust the placement of the lines and give them a glowing effect. Press “Ctrl+T” to select the “lines” layer and rotate it to 45 degrees. Then double click on it to open its blending options. Go to the “gradient overlay options” and set the gradient in tri-color. Change the blending mode to “color” and apply. You can add more colors in the gradient.
Step # 7 – Change the opacity of the lines
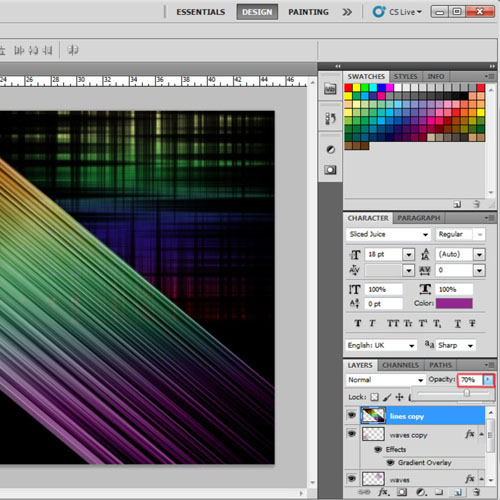
To make the light effect more vibrant make a copy of the “lines” layer and place below the original layer. Then press “Ctrl +E” to merge both the layers and change its opacity to 70%.
Step # 8 – Add text
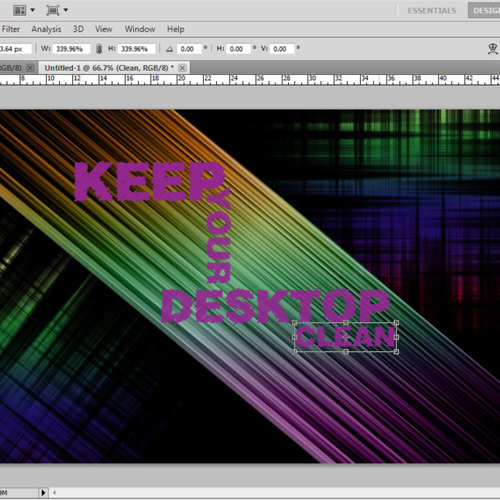
Now, select the “waves” layer and adjust its placement according to the glowing lines if they do not look accurate. Use the “eraser tool” to remove the extra parts. Insert the text using the “type tool”. Use the “sliced” font style with different font sizes and adjust its placement. The choice of font style and placement depends on your requirement.
Step # 9 – Apply layer Style to the text
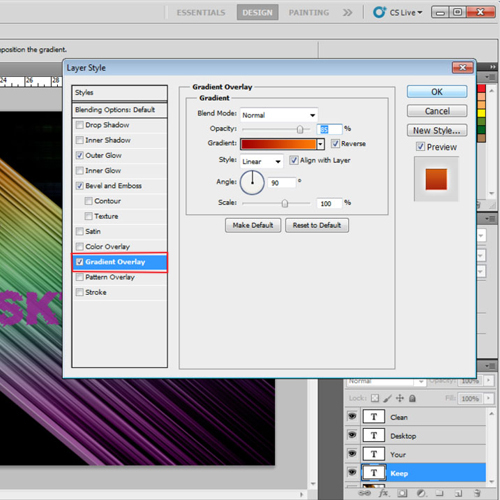
Now we will give a glowing effect to the text. Double click on the font layer to open the blending options. Select the “bevel and emboss” option and adjust the settings with the depth: 11, size: 0, soften: 0, highlight mode to “multiply” and shadow mode to “linear dodge”.
Then go to “outer glow” and change the settings color to: “ffffff” and size: 16.
Now go to “gradient overlay” and change the gradient colors to “a10000” and “fe7b06” and apply. To give the same effect to all the text, copy the layer style and paste to all other font layers.
Step # 10 – Apply brush mark
Now create a new layer over the lines layers and use the brush tool “fusion” pack and apply it in the center of the text with its color code as “ffffff”. The wallpaper in Illustrator is now ready.

 Home
Home