Notepad design is something that is very easy to do in Adobe Photoshop with the help of different shapes. You can design notepads as per your wish and can make them more appealing by adding various effects.
To learn how to design a notepad in Photoshop, follow the tutorial below.
Step 1 – Open the canvas
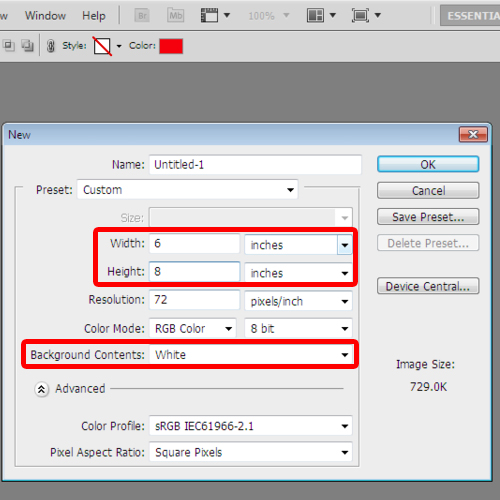
First of all, let’s open the canvas and set the dimensions. For a notepad, the width should be of 6 inches and the height should be of 8 inches.
For now, let’s keep the background white.
Step 2 – Work on a new layer
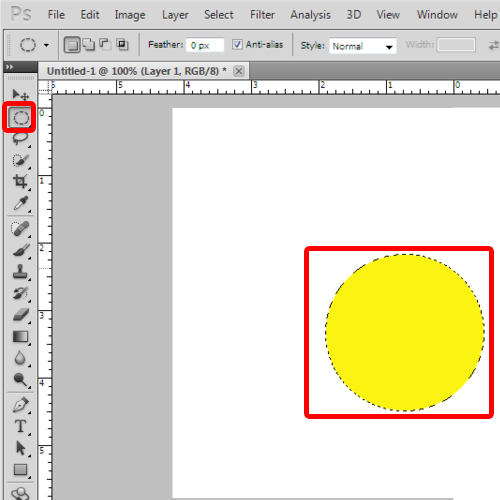
Now let’s select a new layer, pick up the Elliptical Marquee Tool, make a circular selection and fill the color. For now, let’s fill the selection with a shade of yellow.
Step 3 – Make more circles
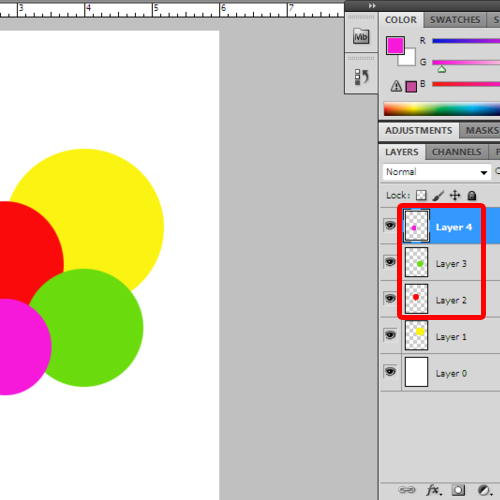
Now let’s make 3 more circles on a separate layer with the same Elliptical Marquee Tool and fill them with different colors.
Step 4 – Adjust the layer style options
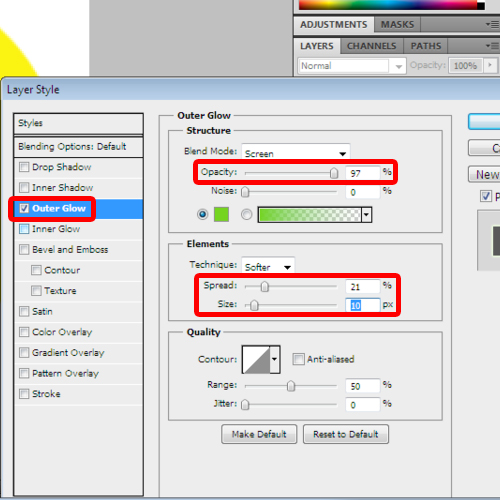
With that done, let’s open up the layer style options. First of all, we will set the outer glow option. First of all, let’s set the color to “74d41f”. With that done, let’s change the opacity to 97%, spread to 211% and size to 10 pixels.
Step 5 – Move to the “inner glow” tab
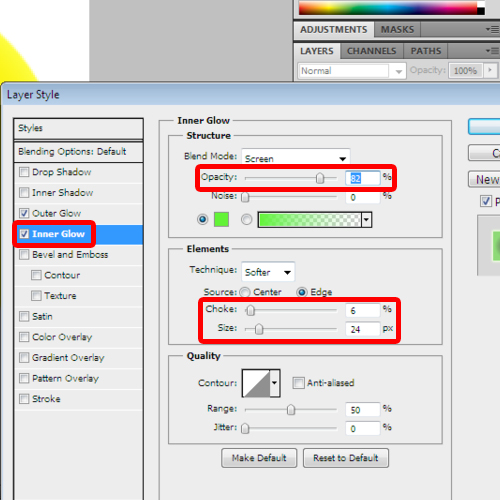
Now let’s move over to the Inner glow tab. Over here, let’s use “63f336” for the fill. With that done, let’s set the choke to 6 percent, size to 24 pixels and opacity to 82 percent.
Step 6 – Go to the “drop shadow” tab
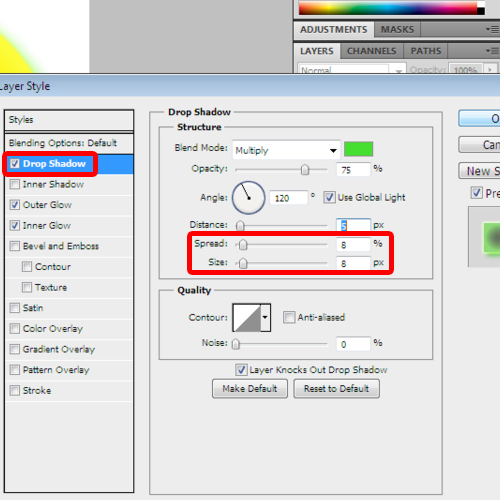
With that done, let’s move over to the Drop shadow tab. Over here, we will set the spread to 4 pixels and size to 8 pixels. Now let’s choose a color for the drop shadow fill. Over here, we will be using the value: “45df30” for the fill.
When you design notepads you can’t just insert the shapes without adding any effect to them in Photoshop. That is why; insert all of the above mentioned effects and others that you might wish to add. You can go ahead and use the same settings for the other circles. Make sure to use different colors and values for different circles since the all the circles are of different sizes.
For example, in the red circle, we chose the color #fb75dd for Outer Glow, Inner Glow and Drop Shadow. Similarly, in the green circle, we chose # ee8f15 and in the purple circle, we chose # 6fccf3.
Step 7 – Add parallel lines
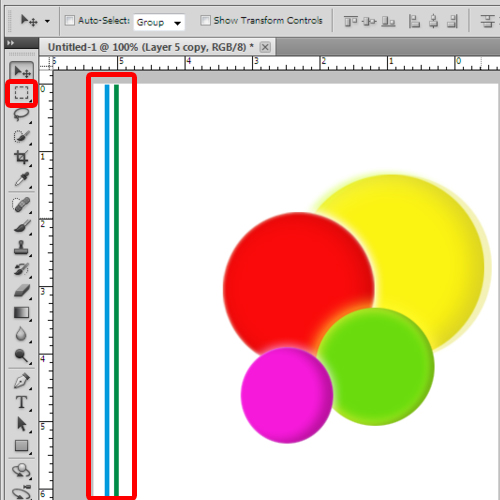
Now we will add parallel lines to our design. For that, select the Rectangle Marquee Tool and drag it vertically. Fill the color with blue. Copy the same layer and let’s change the color of the duplicated layer. For example, over here, it’s give it a green color.
Step 8 – Add the company name
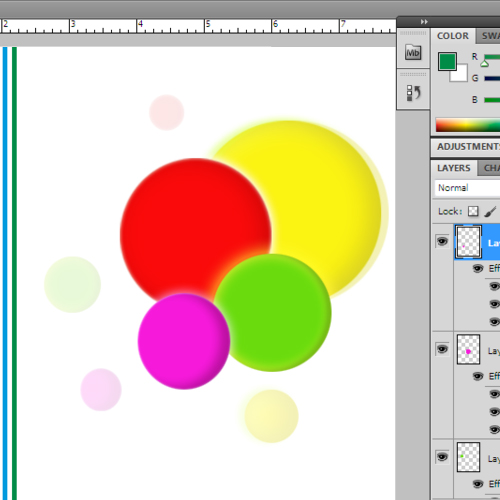
And that’s basically it for a simple notepad design. Remember, you should pay attention to the dimensions to are to be used. Over here, we will simply add the company name, duplicate the circles and position on the canvas accordingly. The overall output should be something similar to this.
And that’s it.
 Home
Home