In this tutorial you are going to learn how to use displace in Photoshop.
Step # 1 – Setting up the Images
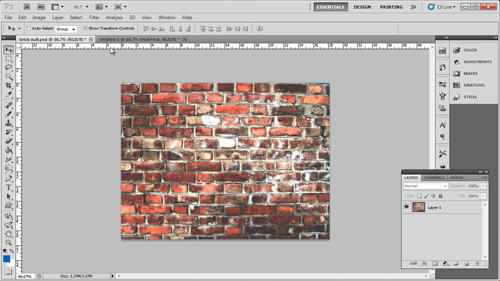
Before you begin you are going to need to have two images of the same size. One is going to be the area you want to displace onto and the other is going to be the item that you want to place onto the other image. Here you can see that we have an image of a wall as well as some text that we are going to place onto the wall. Both of these images should be of the same size.

Step # 2 – Creating a Duplicate Image
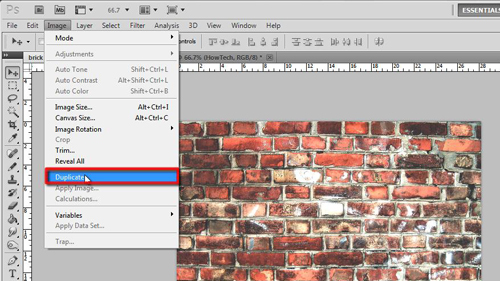
First of all you are going to need to create a copy of the base image to use in the displacement. Click “Image” then “Duplicate” and click “OK” in the dialog box that appears. A copy of the image will be created, you need to click “Image” then “Adjustments” then “Desaturate”. Now, click “Image” again, go to “Adjustments” and click “Levels”. The levels window will open and you need to drag the two outer pivots inwards until you get a sharply contrasted photo like this. Click “OK” when done. Save the image somewhere you will remember and click “OK” in the dialog box that appears.

Step # 3 – Overlaying the Image
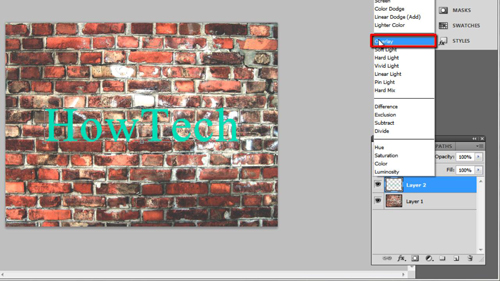
Now, click on the tab that contains the image you want to place onto the wall. Here it is text and we are going to select this and copy it to our clipboard by pressing “Control” and “C” on the keyboard. Go back to our original brick wall image and paste the text onto it. In the layers panel click in the drop down box that current reads normal and choose “Overlay”. As you can see it starts to blend into the wall background and is already looking pretty effective.

Step # 4 – Applying the Displacement
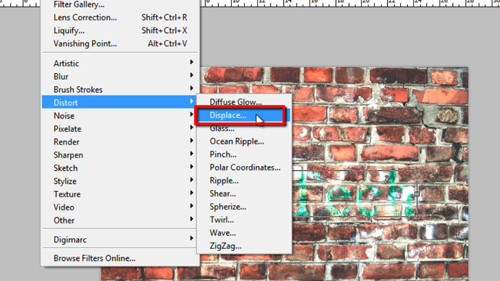
The main problem is that the text doesn’t have any of the texture of the wall on it and this is what displacement will allow us to change. Click “Fitler” navigate to “Distort” and click “Displace”. A dialog box will appear and you will need to enter two values here, these largely depend on the size of your photograph and you will need to experiment with them to see which works best for you. Here we are setting both figures at “2”. Click “OK”. You now need to select the duplicate image we created earlier and click “Open”. The displacement effect will be applied and you can now see that the text seems to ‘fit’ onto the wall better and that is how to use displace in Photoshop.

 Home
Home