Learning how to distress an image in photoshop can make your images look older than they actually are, which can be a fun effect to add to images.
Step # 1 – Making the Image Sepia
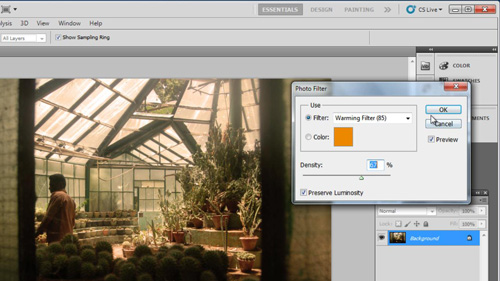
Old photographs are often in sepia tone so we are going to give the image that effect first. Click on “Image” in the main tool bar, navigate to “Adjustments” then click on “Photo filter”. In the “Filter” drop down box select “Warming Filter (85)” then move the density slider until it looks just right – here that it at about 67. Click “OK”.

Step # 2 – Adding Grain to the Photo
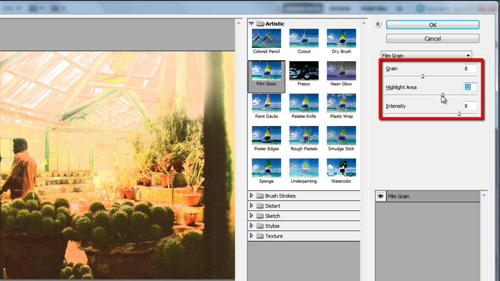
Photoshop comes with a wide range of special filters you can apply to photographs. We are going to distress this photo by adding grain to it. Click “Filter” and navigate to “Artistic” then click on “Film Grain”. In the window that appears you can see a preview of what the image will look like on the left, zoom out to get a good view of the image. Now, use the three sliders on the right to add an appropriate amount of grain. Here it looks right with the settings at “8” for “Grain”, “2” for “Highlight Area” and “8” for “Intensity”. Click “OK” to apply the transformation. This is one way of how to distress an image in photoshop.

 Home
Home