Adobe Photoshop is a digital artist when it comes to professionally retouching images. Beauty retouching is probably one of the most popular application areas in which Photoshop is used. You can easily learn portrait retouching techniques like enhancing skin tone or face features using different Photoshop tools. There are many tips, tricks, and techniques for improving a portrait image for which this software offers a variety of advanced tools. Using these tools you can easily smooth out skin and hair, optimize body proportions and emphasize some beautiful details.
Follow the steps to learn how to do retouching of a portrait in Adobe Photoshop.
Step # 1 – Open an Image
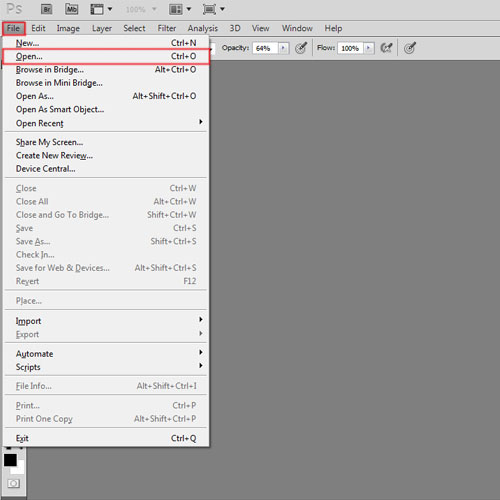
First of all launch Adobe Photoshop and open up the image which needs retouching. It can only be a portrait image or a complete profile picture. The selection of the image depends on you but the technique may slightly vary for different images.
Step # 2 – Using the Clone Stamp Tool
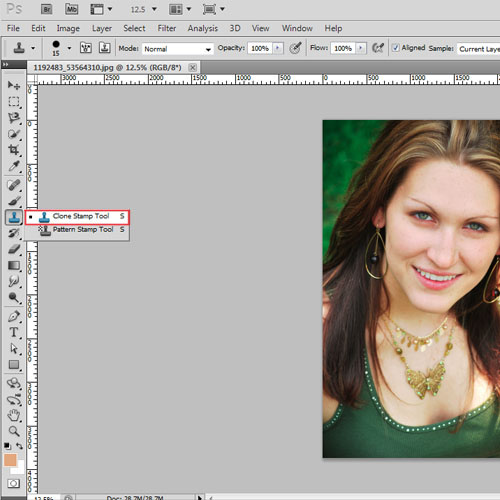
There are many tools used to remove larger spots. In this tutorial, we will select the “clone tool” from the toolbar and remove the bigger and darker spots from the face. Press “Alt’ and click on the just below or above the spot and then release “Alt” button and then click on the spot to remove it. Remember not to use a large clone stamp size for the spots as it may result in an uneven texture. Keep the size of the tool according to the size of the spot.
Step # 3 – Create a duplicate layer
Once the more visible spots are cleared, we will now create a duplicate layer to apply a filter. Right click on the layer in the “layer panel” and select the “duplicate layer” option.

Step # 4 – Using Gaussian blur filter
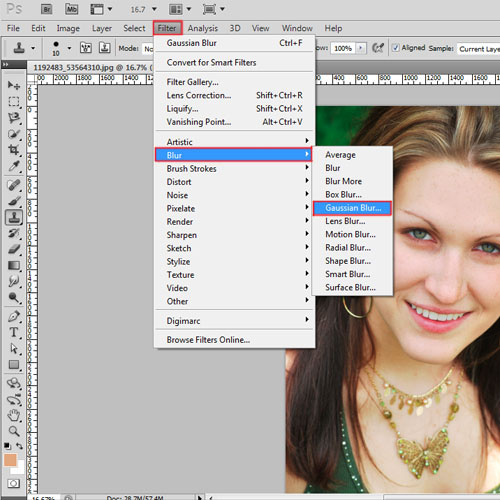
The next step will be to smooth out the skin. We will apply the blur filter on the duplicate layer. Go to “filter” and click on the “blur” option from the menu. When the menu appears, select “Gaussian blur” from the list.
Step # 5 – Adjust the level of blur
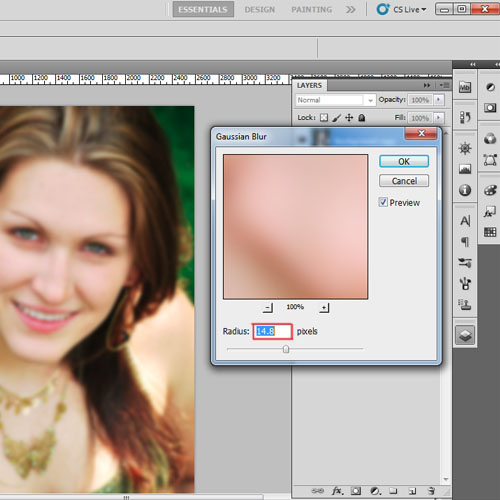
When the dialog box appears, set the radius to 14.8 pixels and apply. This setting will vary for different images. The image should be enough blur that all the marks and spots on the skin become invisible.
Step # 6 – Create a vector mask to the layer
Once the whole image is blurred, we will add a vector mask to the layer by clicking on its button on the “layer panel” so as to erase the parts of the blur image. We can directly remove the parts using the “eraser tool” as well.
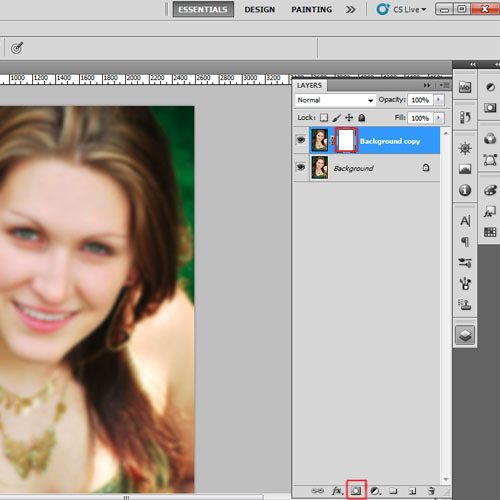
Step # 7 – Remove the blur layer with brush tool
From amongst the different Photoshop tools click on the “brush tool” and select the “soft round brush”. Set the default colors of the brush tool otherwise the vector mask option will not work. Now carefully apply the “brush tool” to erase the blur layer on the parts of the image except for face.
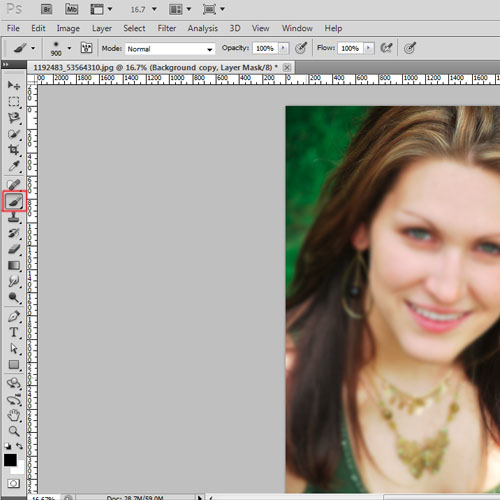
Step # 8 – Carefully apply brush tool around eyes and lips
Now we will carefully apply the brush on the eyes, eyes brows, and lips to make the feature visible.
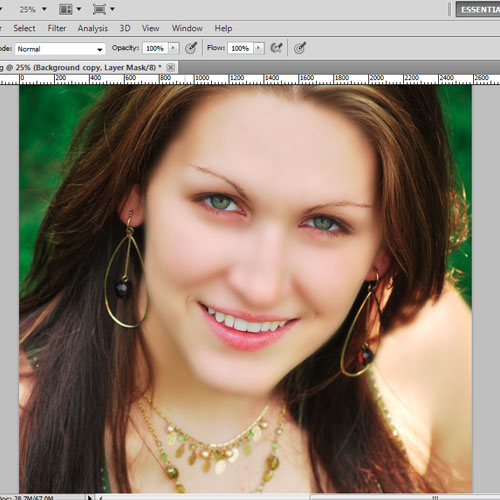
Step # 9 – Decrease the opacity of the brush tool
Once the features are clear, we will need to make wrinkles and lines more visible so that the portrait does not look artificial. For that, first reduce the opacity of the brush to around 30-40% and carefully apply the brush around nose and on the wrinkle lines.
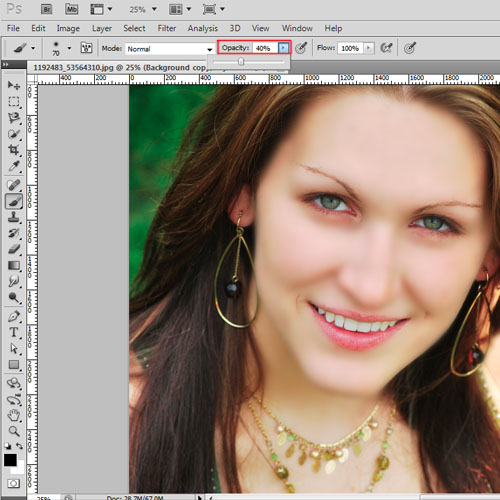
Step # 10 – Decrease the opacity of the layer
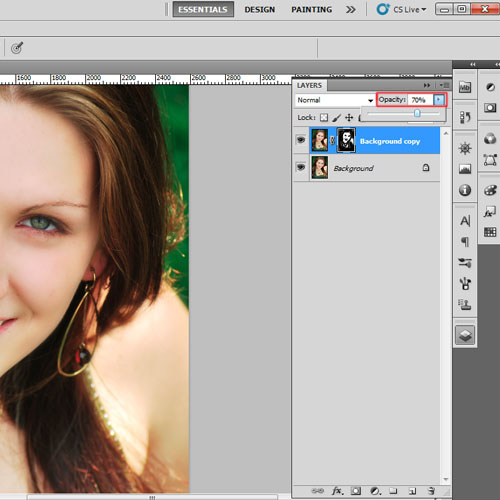
In the end, reduce the opacity of the layer to 70% so that the layer blends with the original image. The level of opacity will vary for different images. Now the portrait retouching is complete.
 Home
Home