Surprisingly spray paint in Photoshop is not a default option in the brush tools. This tutorial will show you how to create a good spray paint brush.
Step # 1 – Using a Preset Brush
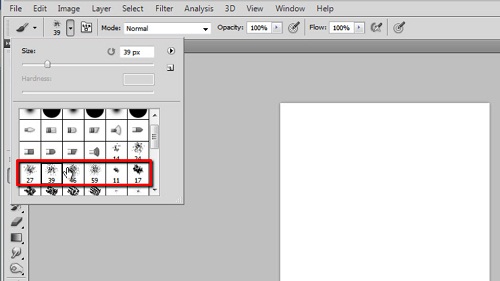
Start a blank document in Photoshop. Select the brush tool on the left and in the menu at the top select one of the “Splatter” brushes. We are working with an “A4” size page here and so a brush size of around 170 looks good. As you can see when we paint onto the canvas it doesn’t look particularly like spraypaint.

Step # 2 – Adjust the Shape Dynamics
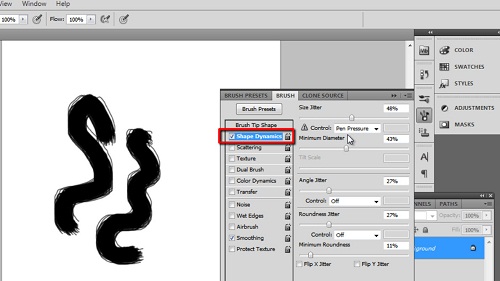
To make it look more like spray paint we need to customize the brush. On the right click on the “Brush” icon and a panel will appear with numerous brush options. Click the checkbox next to “Shape Dynamics” and in the options on the right selecting a “Size Jitter” of “80%” works well, as does “10%” for the “Minimum Diameter”. Set the bottom three sliders all to “50%.”

Step # 3 – Adjusting Scattering and Using the Brush
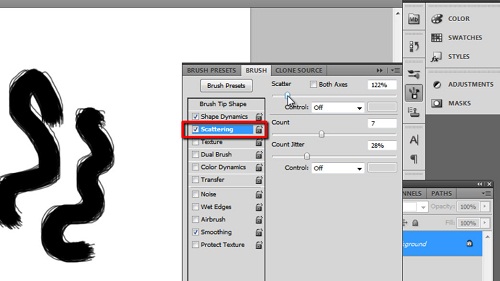
Now check the “Scattering” box and access its setting. Here change the “Scatter” to “0”, the “Count” to “3” and “Count Jitter” to around “10%”. Click the double arrow in the top right to hide the brush options. Now use the brush to paint onto the canvas, it will look much more like spray paint. You can experiment with different colors to get maximum effect from the brush and that is how to use spray paint in Photoshop.

 Home
Home