In this video tutorial we will show you how to highlight hair in GIMP.
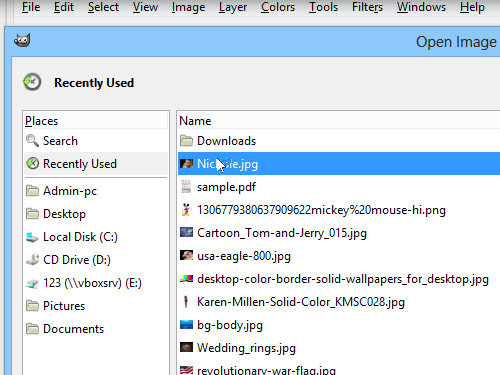
In order to highlight hair in GIMP you need to start the program. Go to the “File” menu and click “Open”. In the appeared window select the image on your computer and press “OK”.
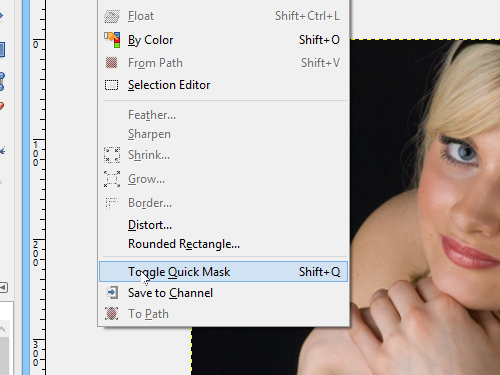
Now you have to switch into the quick mask mode. Go to the “Select” menu and choose the “Toggle Quick Mask” option or use keyboard shortcut “Shift+Q”.
Then go to the toolbar of the program and choose “Paintbrush Tool”. Now you need to select a color for the brush. If you choose white color, it means that editable area will be highlighted. If you choose black color it means that area will be excluded from the selection.
Choose the area you want to highlight with the brush, then press keyboard shortcut “Shift+Q”.

The hair has been successfully highlighted.