Today in this tutorial, we will show you a nice and simple technique to put different images into frames by using Photoshop. We are going to use the layer mask option which is one of the most useful tools available in Photoshop. You will also learn how to use a brush tool to remove, hide or reveal images over layer mask. There are other useful Photoshop tutorials available in this series from which you can learn many designing techniques and sharpen your skills.
Follow this step by step guide to learn how to insert pictures into frames in Photoshop.
Step # 1 – Opening up an Image
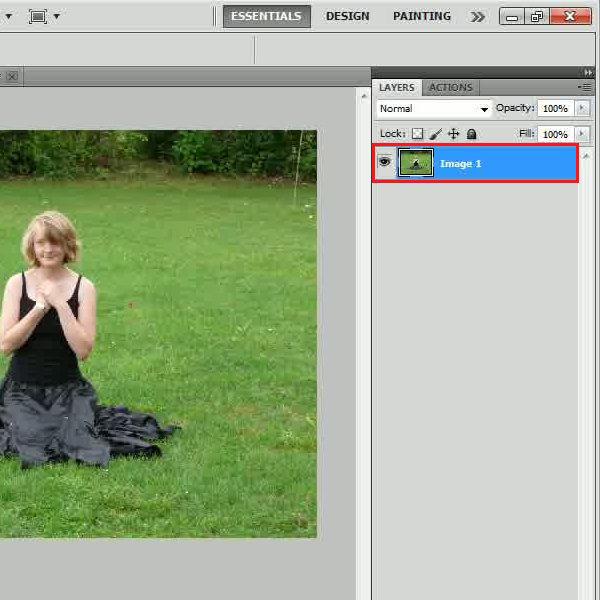
In the first step, launch Adobe Photoshop and open up an image. Here we are using three different images of a girl sitting on grass with different posses and dresses. The reason why we choose these photos is due to their identical background. You can choose any photos of your choice; however their background must be alike in order to apply the effect.
Step # 2 – Inserting a Second Image
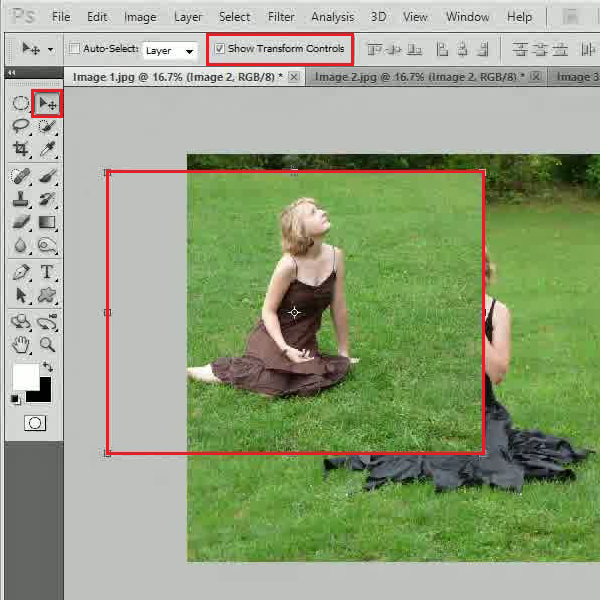
After loading the photo, move over to the second image and drag it on the first image. Now adjust its size and placing according to the background. Here we reduce its size and place it on the left corner. Now click on the “Add Layer Mask” icon located at the bottom of the layers panel. This will add a layer mask on this layer.
Step # 3 – Creating a Layer Mask
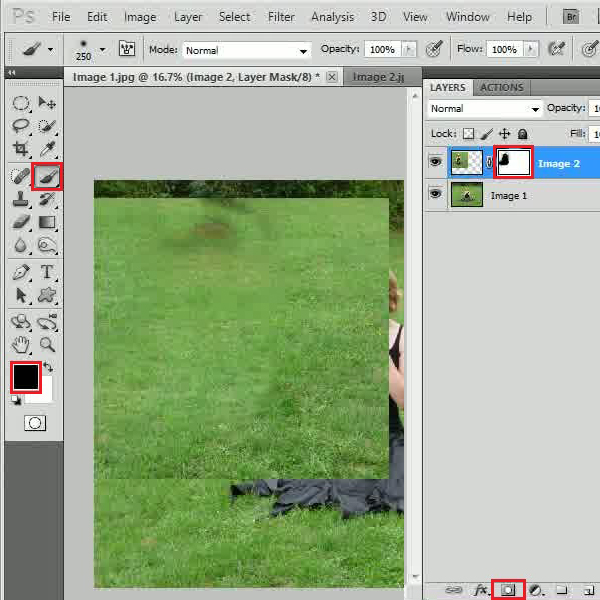
Once done, click on the layer mask which you just have created, select a soft brush and choose black color. Now start painting over the girl image to remove it.
Step # 4 – Inverting the Mask
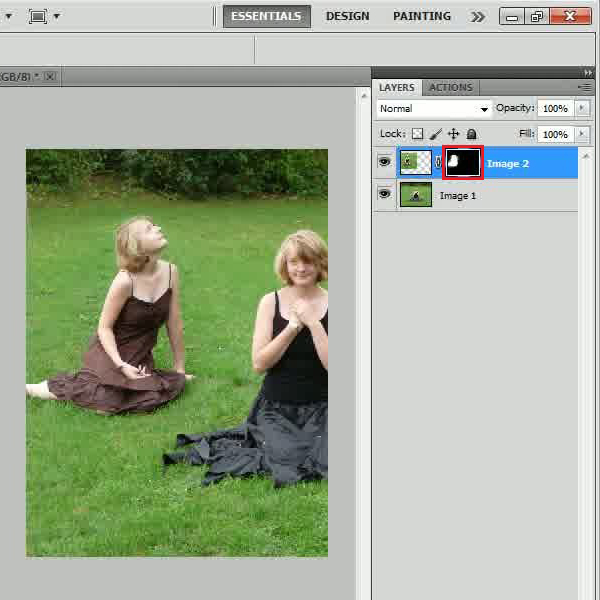
In the next step, press the “Ctrl+I” key on the keyboard to inverse the mask. This will reveal the girl image and remove rest of the background in the photo.
Step # 5 – Repeating the Same Technique
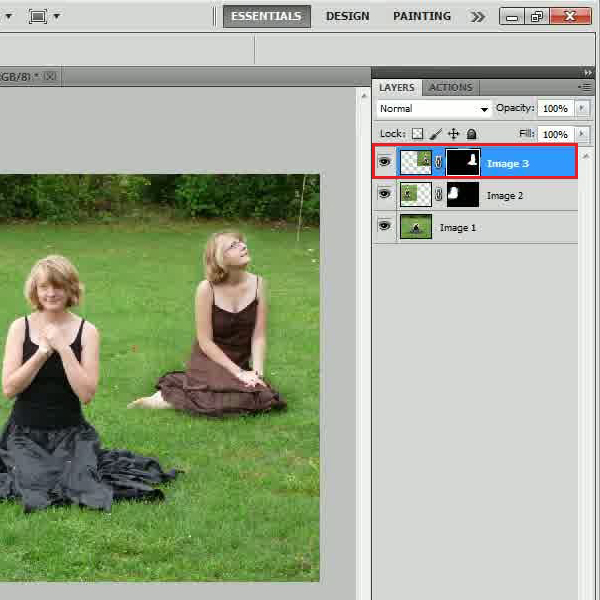
In a similar way, drag another image on this canvas and add a layer mask to it. Select the soft brush and repeat the same procedure on this image as well. This way you can simply add various images into frames.
 Home
Home