In this tutorial you’ll learn how to make an Obama poster style in Adobe Photoshop. Doing this is fairly easy in this software and can be done following the seven steps given below.
To understand how to make an Obama poster style follow the tutorial below.
Step 1 – Select the object
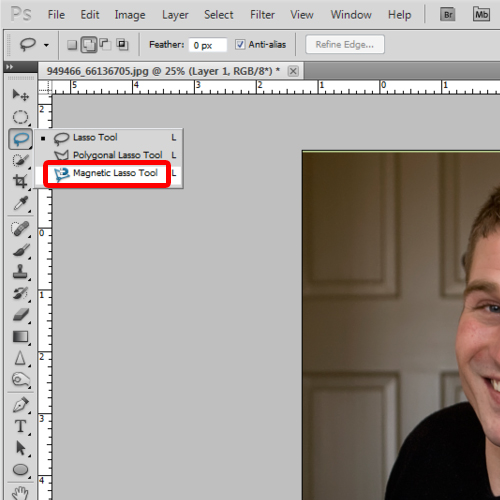
Over here, we will be working on this image right here. Let’s duplicate the layer and make a selection of the main object that we will be working on using the magnetic lasso tool.
Step 2 – Create new layer
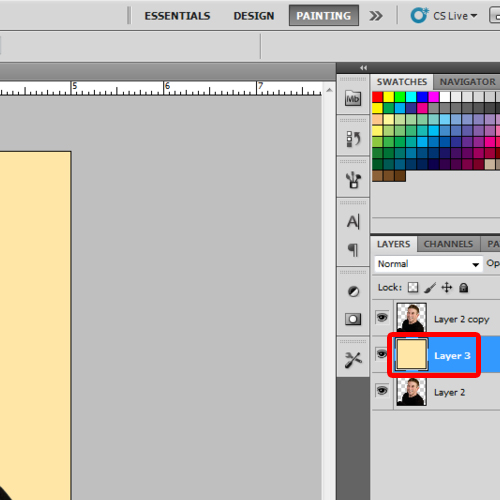
With that done, we will create a new layer for the background and set the color to “#fde5a9”.
Step 3 – Set the threshold level
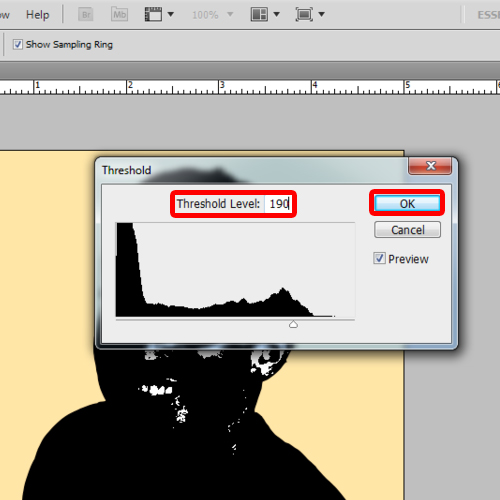
Now let’s hide the original image, select the first copied layer, go to the image menu, move over to adjustment and click on the threshold option. Over here, we will set it to 190.
Now we will make another copy of the original layer and add the threshold filter to this layer as well, using 150 for the value. Similarly, let’s make another copy and set 130 for the threshold filter value. Lastly, we will make another duplicate layer and set 90 for the threshold filter value.
Step 4 – Use the palette knife filter and magic wand tool
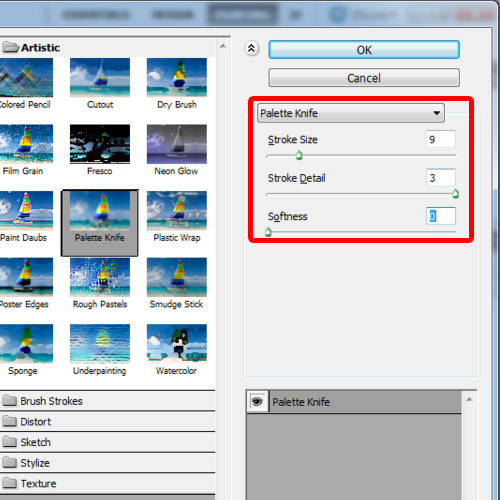
Choose the first layer and apply the palette knife filter over here. Now let’s set the stroke size to 9, detail to 3 and softness to zero. Now let’s hide this layer. Select the second layer now and apply the palette knife filter on it as well, setting the stroke size to 21 and hiding the layer. Now select the third layer, set the stroke size to 21. With that done, hide this layer and apply the same filter on the fourth layer, using 21 for the stroke. Now make all the layers visible and you should have something like this.
Choose the first layer, select the magic wand tool and make the selection by pressing the Ctrl key and right clicking on the box present in the layers tab. With that done, hit the delete button. Now apply this procedure on the remaining 3 layers.
Step-5 – Make a background pattern
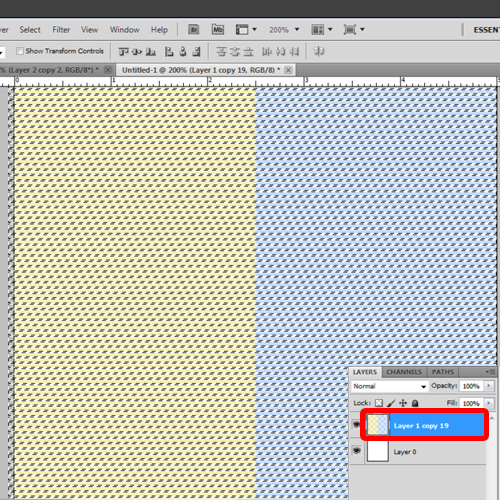
Now we’ll create a pattern for the background. Open a new window; set the page presets as custom and keep the document size to 5 by 5 cm.
Create a new layer, select the ‘rectangular marquee tool’ and make a thin vertical line. Fill it with light blue color, using #bdd9fd for the color code. Now make a duplicate layer, make the selection by pressing the Ctrl key and right clicking on it. Fill it with light yellow color, using #f7eeac for the color fill.
Now arrange the lines with each other in perfect symmetry and turn them on the horizontal axis by using the free transform tool. Once you’ve set this whole line on top, start making duplicates to create a linear pattern.
Now that your pattern is made, copy this pattern and fit it to the canvas we were working on.
Step 6 – Enter fills
For now let’s hide the fourth layer. Now let’s select the third layer and fill it with “#71969f”. With that done, select the second layer fill it with “#d71a21”. Now let’s select the first layer and fill it with “#00324d” to make an Obama poster style. Over here, we have used the bucket tool to fill the layers with color.
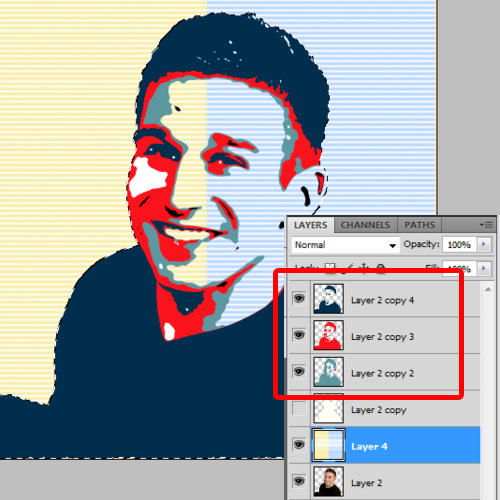
Step 7 – Work on a new layer
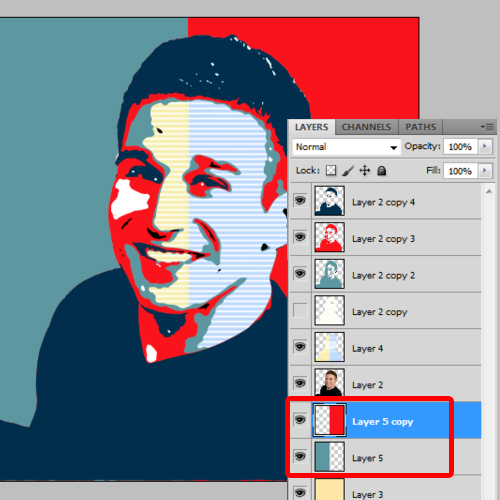
Now we will create a new layer, select the rectangular marquee tool from the tool box; make a selection of one half of the canvas and fill the color “#71969f”. Duplicate the layer and drag it into the remaining part of your background. Fill it with “#d71a21” and you’re done. Hence by following the steps above you can learn how to make an Obama poster style in Photoshop.
 Home
Home