In this tutorial, we will teach you how to make caricatures in Adobe Photoshop. These are very easy to create and can be made through a quick eight steps process.
To understand more of how to make caricatures follow the procedure given below.
Step 1 – Select the object
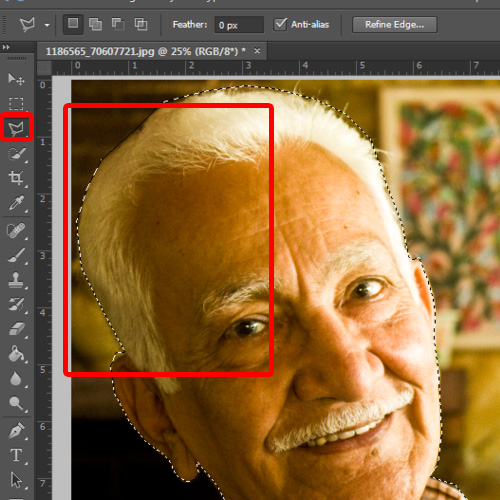
Over here, we will be working on this image right here. First of all, we will pick up the lasso tool and create a selection of the main object that we will be working on. With that done, let’s copy the selection on to a new layer and open up the liquify filer.
Step 2 – Work on the face
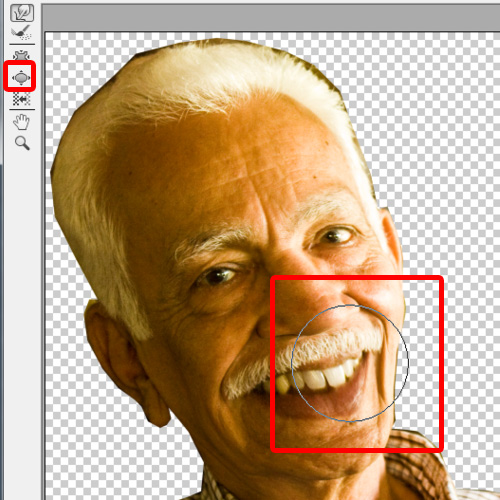
Over here, we will first pick up the bloat tool and use it over the mouth area. This is to make that area a bit more prominent. Over here, we will be basically focusing on the mouth, nose and the hair. We will be touching up the other parts of the face as well, but our main focus would be on these areas.
Always remember that how you make a caricature depends on the image you are working on.
Step 3 – Use the wrap tool
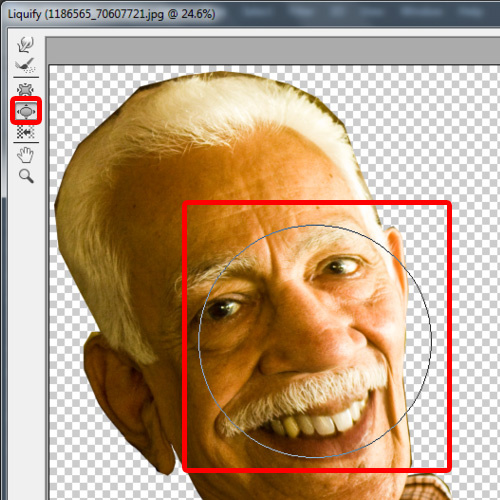
So let’s make the mouth and nose a bit more prominent with the bloat tool first. With that done, we will pick up the forward wrap tool and apply it to change the overall face structure. The idea is to make a V shaped face so towards the mouth, the face would be a bit inwards. Let’s stretch the chin area a bit over here as well.
Step 4 – Work on the hair
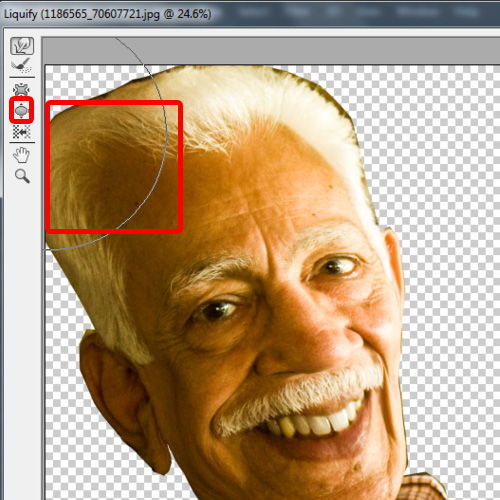
Now let’s work on the hair. Over here, we will stretch the hair till the end of the canvas like so. You can add a few touch ups according to your image as well.
Step 5 – Work with the clone stamp tool
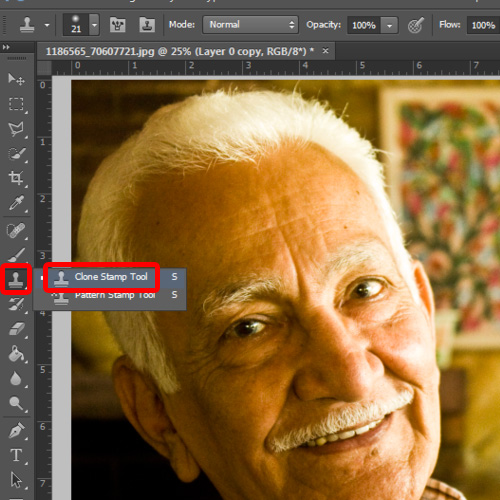
Now we will work on the background. Over here, we will use the clone stamp tool to remove the part of the face which is overlapping with the new layer over here.
Step 6 – Apply the blur effect
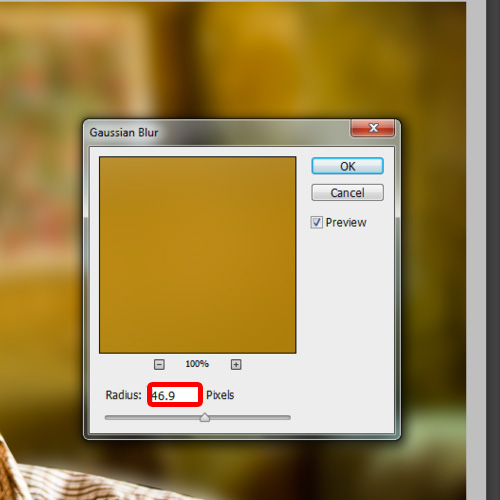
Now to further carry on with the process to make caricatures apply the guassian blur effect on the background, using 46.9 for the blur.
Step 7 – Apply filter
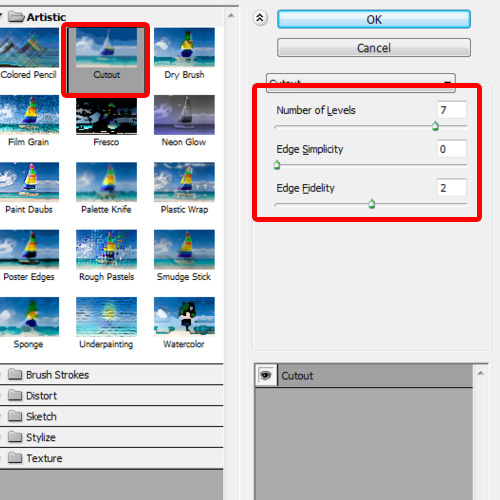
With that done, we will apply the cutout filter on the main object layer, with number of levels set to 7, edge simplicity set to 0 and edge fidelity set to 2.
Step 8 – Work on the duplicate layer
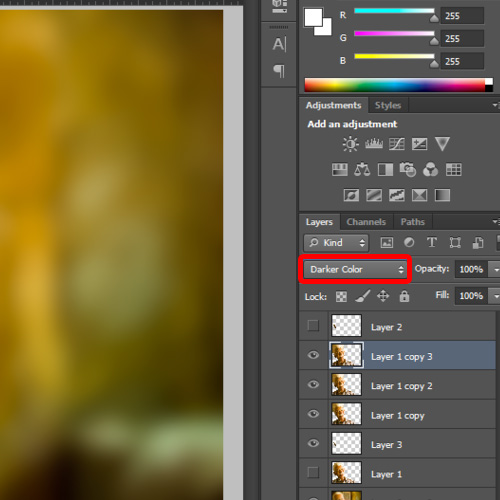
With that done, we will duplicate the layer and change the blend mode of the layer to darker color.
And that’s it, over here you have learned how to make caricatures in Photoshop.
 Home
Home