With the advancement of GUI (Graphic User Interface), colorful images and pictures have become an essential part of all softwares and applications developed now a days. The internet has become a popular source of media just because of its interactive nature and vibrant websites with images that attract people towards the content of the website. With this improvement there are many image editing softwares that have been developed over the years. One of them is Photoshop which is the most interactive and easy to use photo editing application. You can render and edit out images with a number of effects using this application.
Here in this tutorial we will show you how to use tilt-shift effect in Photoshop in a few simple steps.
Step # 1 – Open An Image
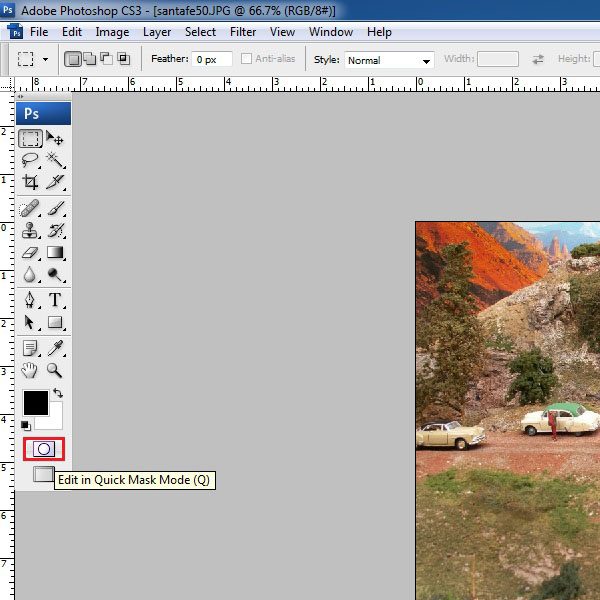
Open Adobe Photoshop and load a picture in which you want to create a miniature effect. After loading the image, select the “Quick Mask Mode” option from the tool bar, highlighted in the image below. You can also select this option by using the “Q” key from the keyboard as a shortcut.
Step 2 – The Gradient Tool
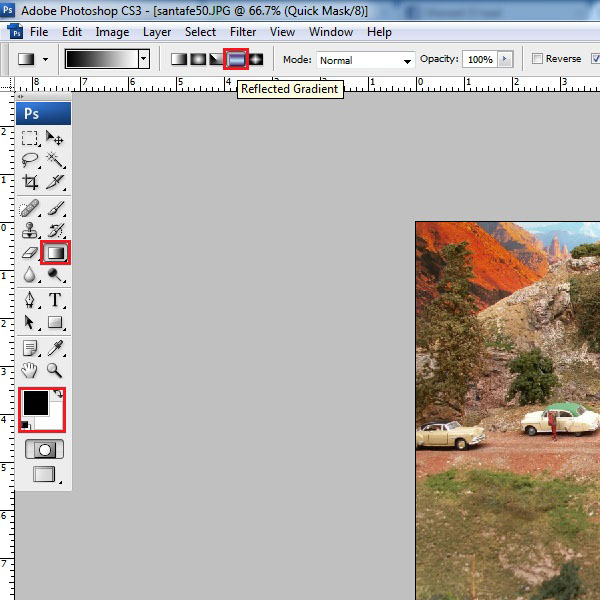
Click on the “Gradient Tool” option from the tool bar and select the “Reflected Gradient” option from its sub menu on the top of the window, highlighted in the image below. Adjust its default color to “Black” for its foreground and “White” for its background.
Step 3 – Apply Gradient On Image
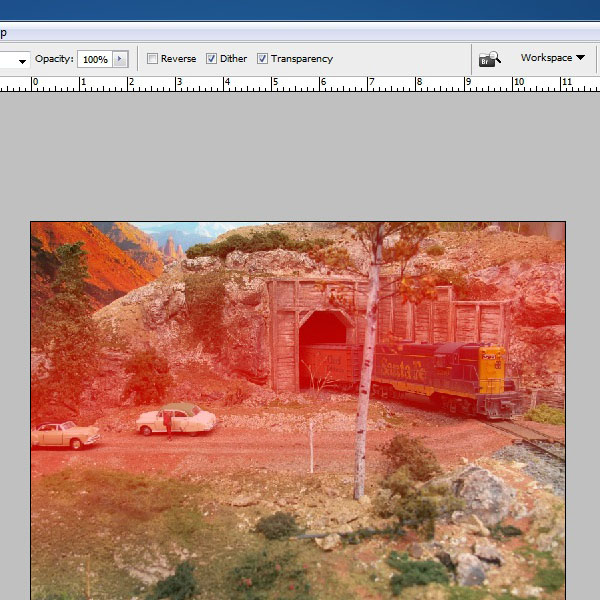
Click on the top of the object in the image which you want to focus on while creating a miniature effect. After clicking on it, drag a line towards the far end of the image by dragging the cursor. If done perfectly, you can see a red shade appearing right in front of you.
Step 4 – Exit From Quick Mask Option
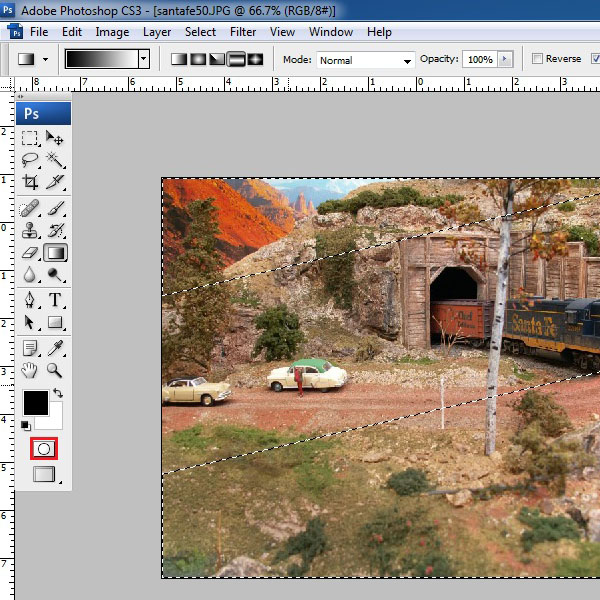
Once done, click on the “Quick Mask Tool” option once more from the tool box and select it to exit from the quick masking mode. Now you can see a selection appearing on the image.
Step 5 – Use Filter Option
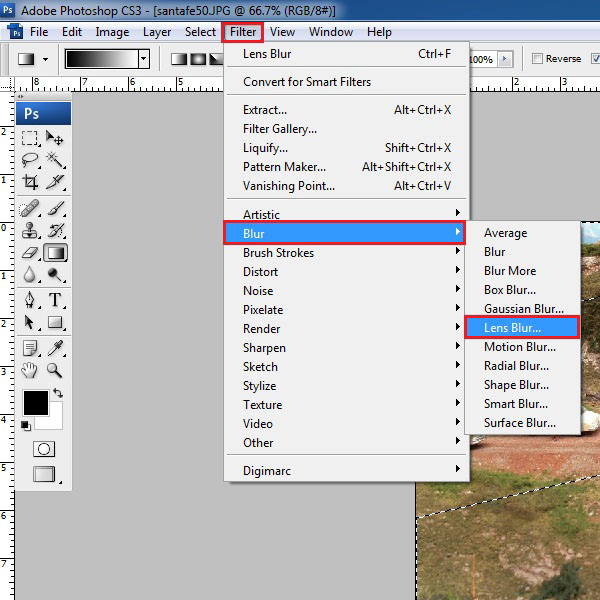
Open the Filter menu and from the menu select the “Blur” option. Now select the “Lens Blur” option from the menu.
Step 6 – Apply Filter Effects
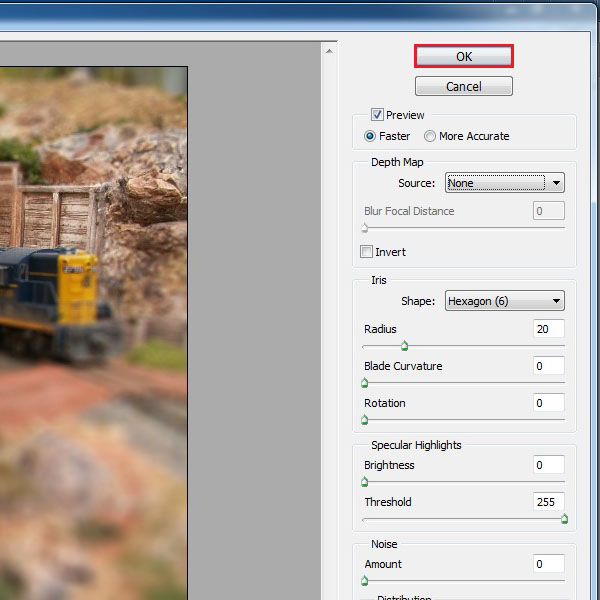
A new window will appear in front of your screen. Here you can play around with more advanced features according to your requirement. Choose the Faster mode and keep the Depth Map Source to None. Choose the Hexagon (6) option for your Shape and set the Radius to 20, Blade Curvature to 0, Rotation to 0, Brightness to 0, Threshold to 255, Noise to 0 and choose the Uniform option for your Distribution. After completing this step, click on the “OK” button to apply the filter effects on the image.
Step 7 – Adjust Hue and Saturation
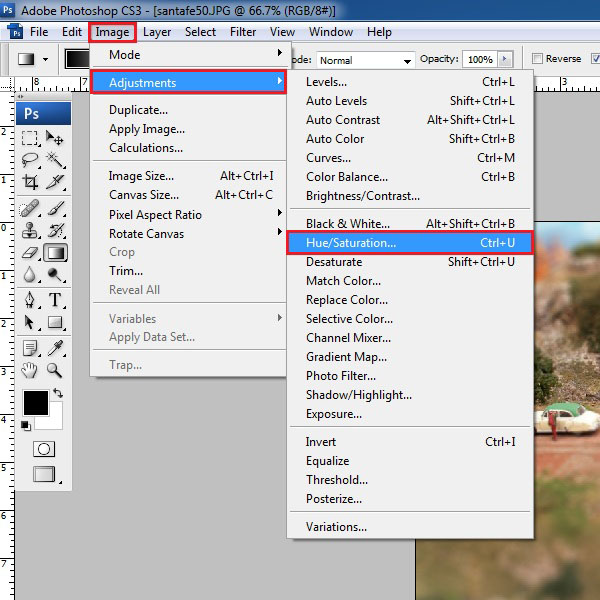
Once the filter effects has been applied successfully, open the “Adjustment” option by moving on to the “Image” menu at the top of the window. Now select the “Hue/Saturation” option from the menu to open the adjustment panel.
Step 8 – Adjusting the Saturation of the Image
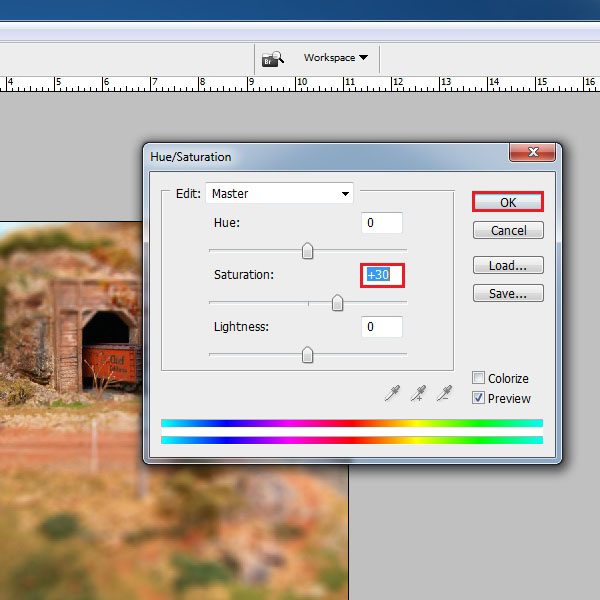
Now set the saturation level to “+30” and then click on the “OK” button to continue.
Step 9 – Save Your Image
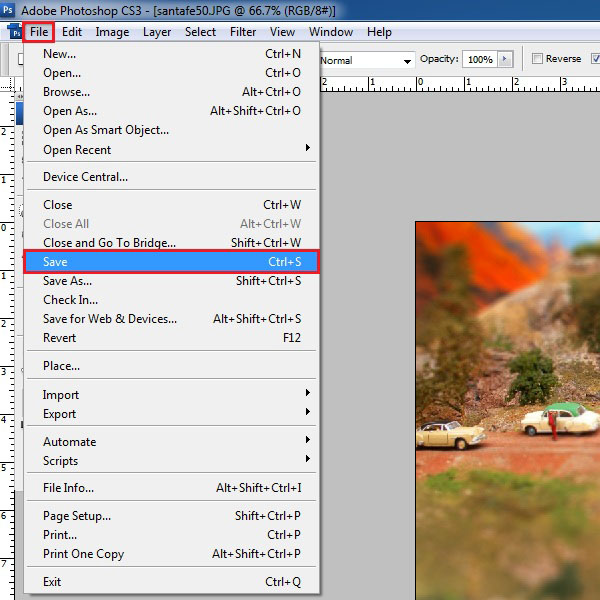
Open the file menu and choose the “Save” option to save your image.
 Home
Home