In this tutorial you are going to learn how to adjust biceps size in Photoshop, which can be a valuable piece of knowledge for photographers.
Step # 1 – Creating a Layer from the Background
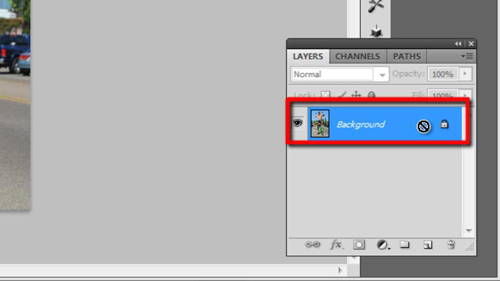
Here we have an image of a man and we are going to use Photoshop to increase the size of his arms. First you are going to need to create a layer from the background, so make sure that background is selected in the layers panel and press “Control” and “J” on the keyboard.

Step # 2 – Selecting the Right Brush
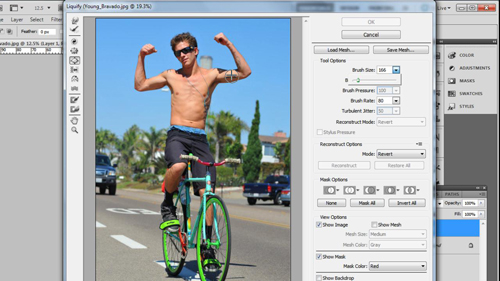
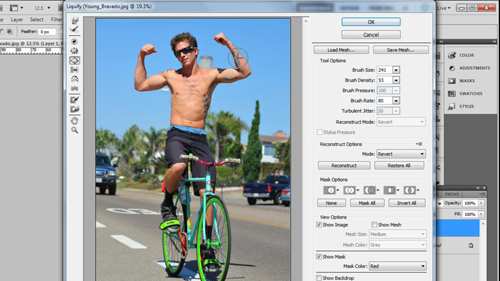
Click “Filter” in the main menu and from the options that appear click “Liquify”. A window will open with a preview of the image in it – this is where you are able to make adjustments to the proportions of the image. We are going to need to use the “Bloat tool” to increase the muscle size, so choose this from the menu on the left. You are going to need to set a brush size that is just a little larger than the biceps, you can do this in the options on the left, a size of “241” works well here. A “Brush density” of around 50 works well.

Step # 3 – Enlarging the Muscles
Now bring the brush onto the image and click in the center of the biceps, clicking multiple times will continue to increase the muscle size – clicking and dragging will increase it dramatically. Don’t go overboard here, if the muscles are too large they won’t look real. You should also adjust the size of forearms as well as the biceps so that it looks balanced.

Step # 4 – Completing the Changes
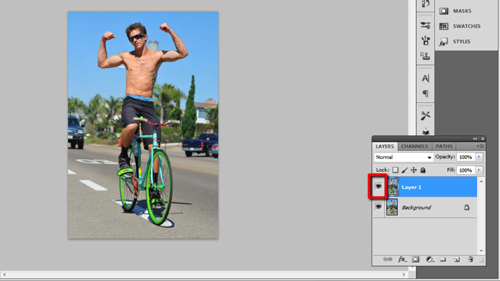
When you have a good result click “OK” and the changes will be applied to the main image. To compare the before and after click the “eye” icon in the layers panel to make the adjustments invisible, click it again to bring them back. As you can see the result we have here is effective and that is how to increase biceps size in Photoshop.

 Home
Home