Unfortunately there is no ‘Glare removal’ tool in Photoshop just yet. Fortunately there are some other powerful tools you can use to learn how to remove glare in Photoshop.
Step # 1 – Selecting the Appropriate Tool
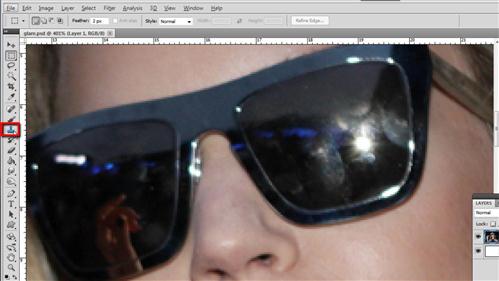
Open the image that you want to remove glare from in Photoshop, here you can see that we have an image with a significant glare on the sunglasses. Zoom in on the area with the glare and from the menu on the left select the “Clone Stamp Tool”.

Step # 2 – Selecting a Brush Size
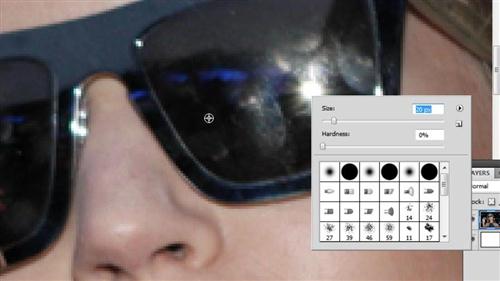
When you move the cursor onto the image you will see the size of the brush. You need to change the size of this until it is right for dealing with the image. Right click on the image and use the slider to adjust the size of the brush until it looks about right – here a size of 20 pixels works just fine.

Step # 3 – Painting Over the Glare
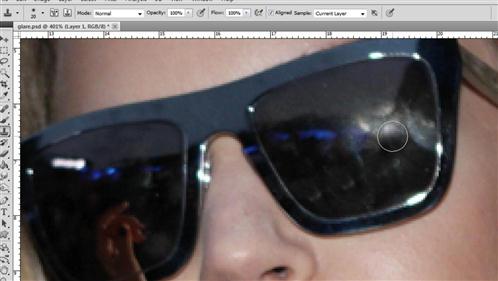
Now, hold down “Alt” on the keyboard and click on the part of the image that you want to ‘clone’ from. This should be an area similar to what the glasses would look like if there were no glare. Once you have defined this, release the “Alt” key and use the brush to paint over the glare. Readjust where you source for cloning comes from if necessary.

Step # 4 – Tidying up the Image
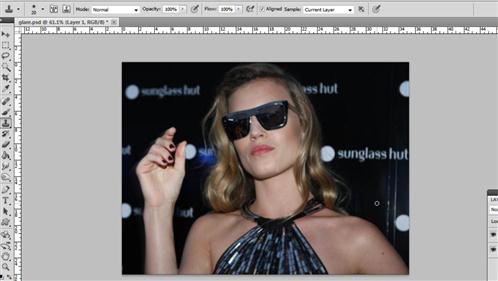
You will probably notice some duplicated parts have appeared during the clone procedure. Again redefine your clone source and cover these up. Now, zoom out of the image to see the overall result – as you can see here we have effectively removed the glare and that is how to remove glare in Photoshop.

 Home
Home