It’s a known fact that snaps will never come out perfectly according to our requirements. Most of the time, we have to take snapshots again and again to avoid unwanted objects. However this problem can be fixed by using Photoshop. It provides various tools which are specifically designed to fix images. Today we will show you five different tools and methods to remove unwanted object from a picture and manipulate it according to your desire.
Follow this step by step guide to learn how to remove unwanted things from images in Photoshop.
Step # 1 – Using the Clone Stamp Tool
In the first step, launch Adobe Photoshop and load an image from which you want to remove unwanted objects. Now select the “Clone Stamp” tool from the menu click on the area which you want to make a reference while holding the “Alt” key on the keyboard. This will copy the referred area. Now start moving the cursor while holding the left mouse button over the object which you want to remove.
Step # 2 – Using the Spot Healing Tool
In the next step, we’re going to use the “Spot Healing Brush” tool. For this purpose, select it from the toolbar. Now click on the small objects over the image to remove them. The spot healing brush can simply remove small spots according to their surrounding image.
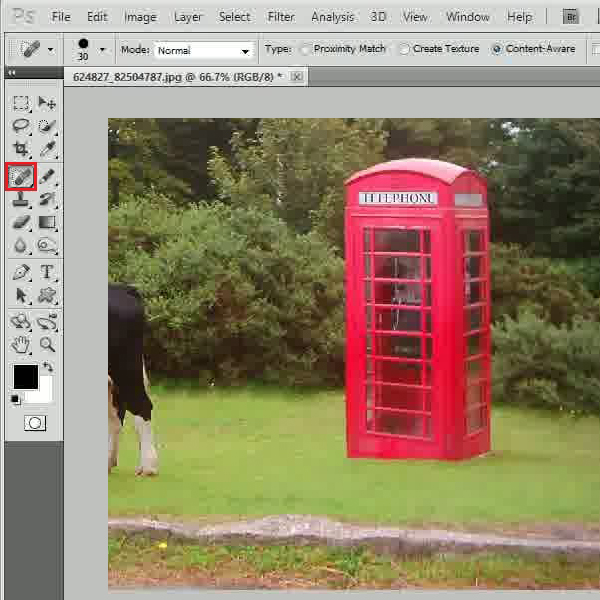
Step # 3 – Using the Healing Tool
Now select the “Healing Brush” tool from the menu and click on the area while holding down the “Alt” key to make a reference. The healing brush works similarly as the clone stamp tool, however it clones the referred area in a smarter way rather than just copying it.

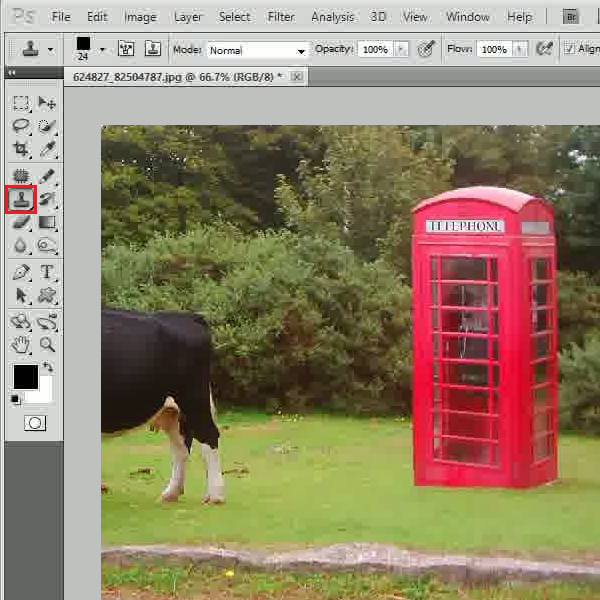
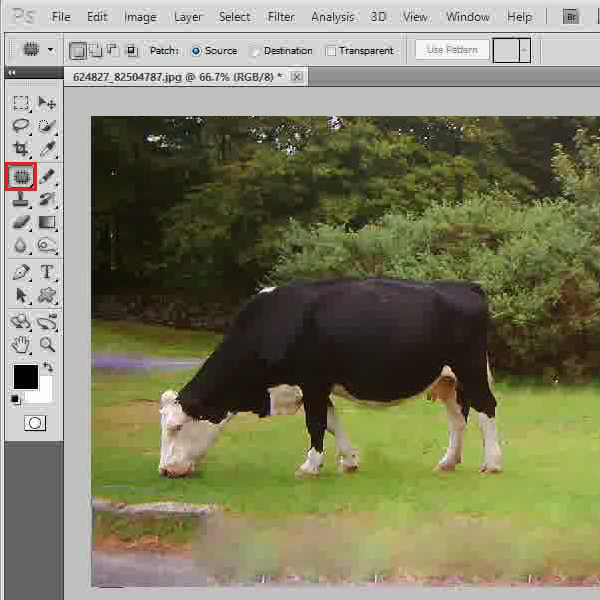
Step # 4 – Using the Patch Tool
In the next step, select the “Patch” tool from the menu. This tool can simple adjust the grain and reduce pixels of the selected part according to its reference. In order to use this, click on the area which you want to remove and drag it to a similar area which you want to use as a reference. Here we use a spot healing brush again to fix the area.
Step # 5 – Using the Content Aware Function
In the last step, select the area which you want to remove, go to the “Edit” menu and click on the “Fill” option from the list. In the settings panel, choose the “Content Aware” option from the drop down list. After selecting it, choose its mode to “Normal” and its opacity to “100 percent”. After changing these settings, click on the “OK” button. This will simply remove a large selected area of the image according to its surrounding pattern.